Manage Chromebooks
Last updated April 8th, 2024
Knox Manage provides you the ability to manage your fleet of Chromebooks and their installed ChromeOS apps. Unlike with Android devices, Knox Manage doesn’t directly interact with Chromebooks through an agent on the Chromebook itself. Knox Manage instead interfaces with the Google Admin console, which does the intermediary work of enrolling a Chromebook and setting its policies. Communication between Chromebooks and the Google Admin console is enabled by native technologies on ChromeOS.
ChromeOS management overview
ChromeOS and Chromebook management on Knox Manage relies on a link between the managed services on the Google Admin console and the Knox Manage console. Due to this fact, there are some important differences you should keep in mind when managing ChromeOS and Chromebooks compared to the other supported OSs on Knox Manage:
-
Automatic syncing. Organizations, users, and devices are synced from the Google Admin console. You can’t create new organizations or users from the Knox Manage console.
-
Organization-based deployment. Devices can only be assigned to organizations. Groups aren’t supported.
-
Organization-based profiles. Each organization has an automatically-generated profile associated with it. To set policies for deployments, you must edit the associated profile. You can’t create additional profiles.
-
User-based enrollment. Each user account is associated with a Chromebook.
Currently, the User & Browser and App & Extension policies are available. Support for Device policies is planned for a future release.
Set up Chromebook management
Before you can begin managing Chromebooks, you must set up your Google Admin Console and Knox Manage:
-
First, you need to upgrade your Chrome license. Depending on which license you have, purchase the Chrome Enterprise Upgrade or Chrome Education Upgrade from the Google Admin Console.
-
Once upgraded, you need to set up an organization and users. On the Google Admin console, create an organization and add your users.
-
Lastly, register the Google admin account with Knox Manage:
-
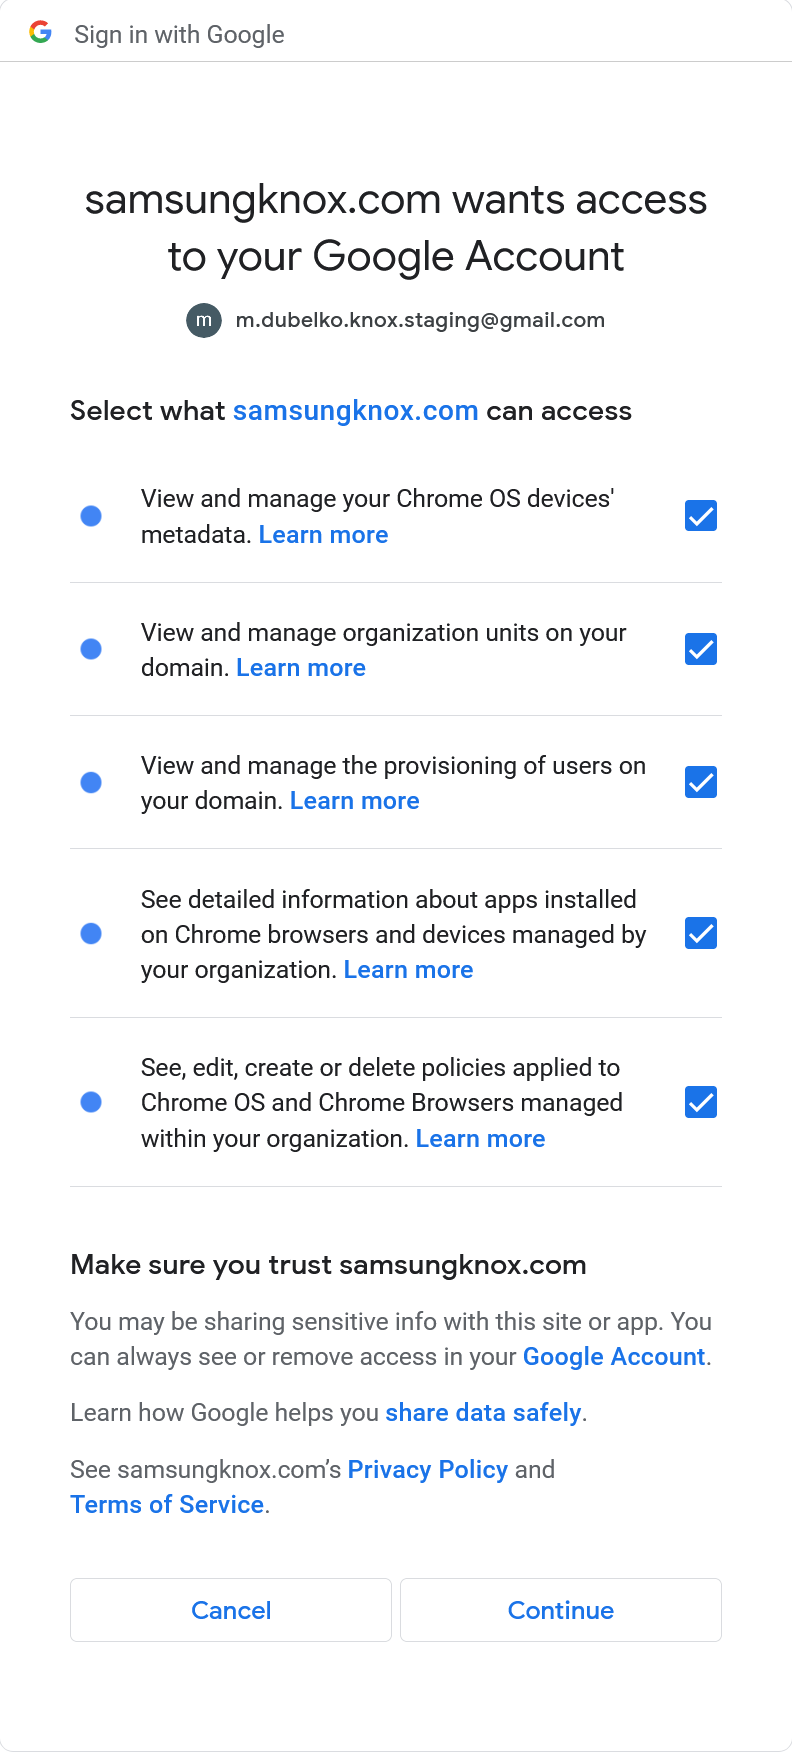
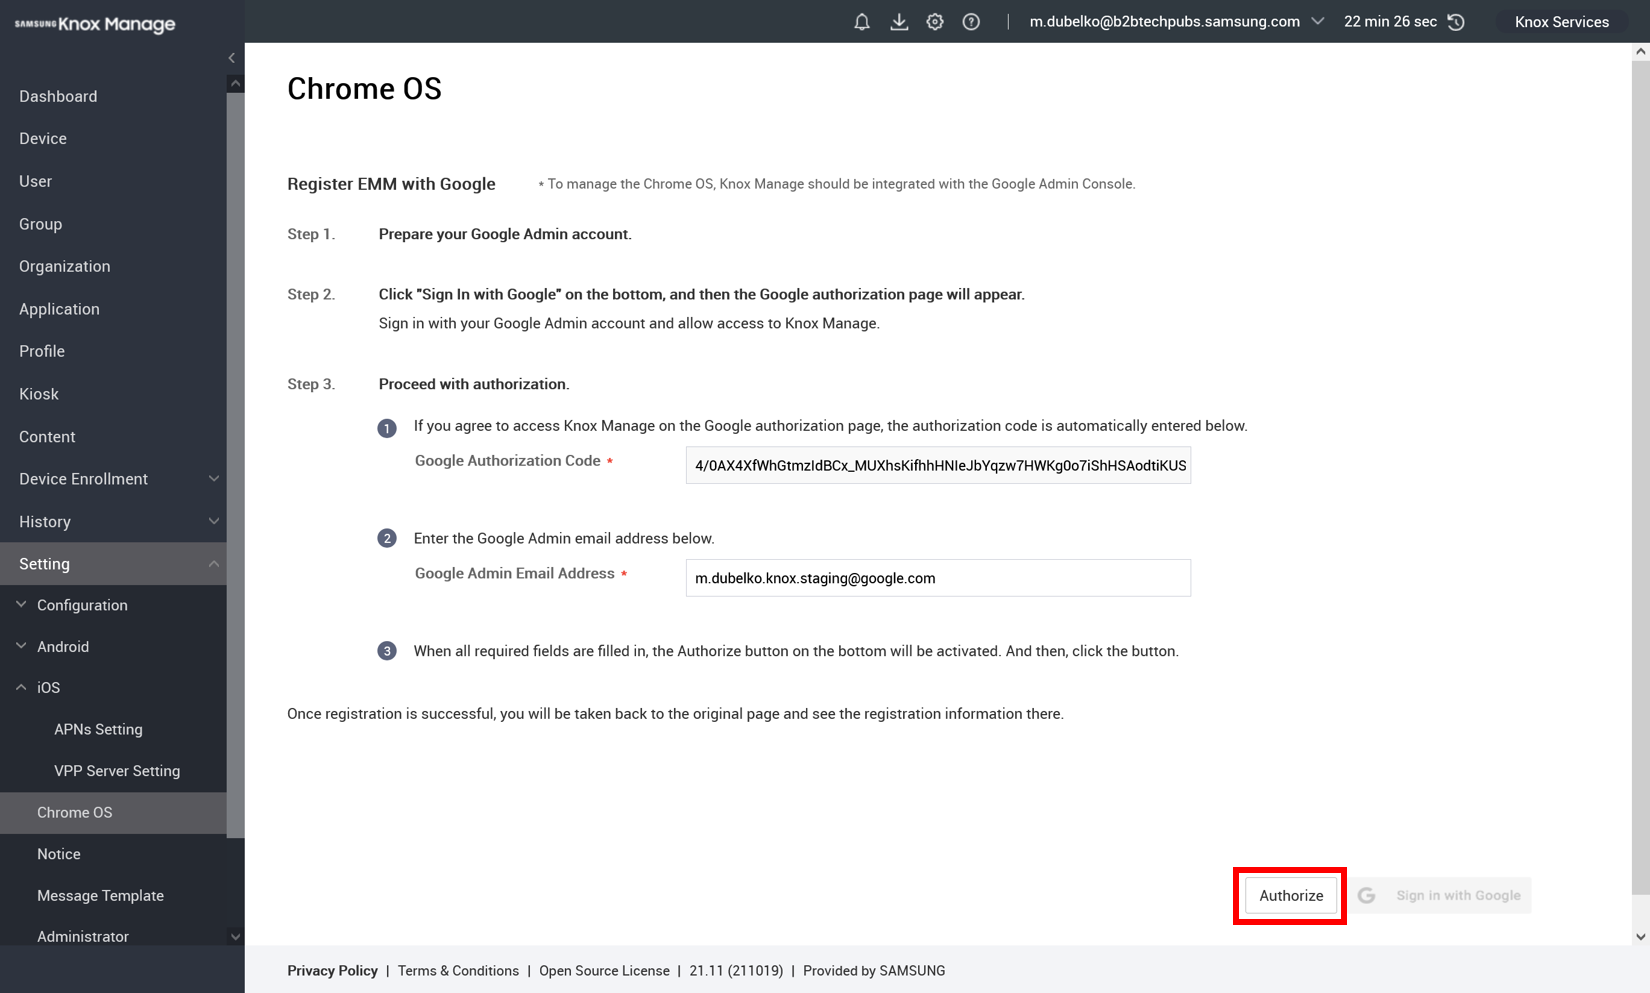
On the Knox Manage console, go to Setting > ChromeOS > Sign in with Google. The Google accounts page opens.
-
Sign in to the Google account.
-
Select all permissions, then click Continue. The browser returns you to the Knox Manage console. The Google Authorization Code field is now filled in.

-
Enter the same account for the Google Admin Email Address, then click Authorize.

-
See also
On this page
Is this page helpful?