Set up an iOS or iPadOS kiosk
Last updated March 18th, 2024
With Knox Manage, you can deploy Apple hardware and its app ecosystem as a kiosk solution. You can manage and monitor iPhones or iPads as single-app kiosks for uses such as self-service terminals, whiteboards, or interactive directories.
Knox Manage configures and deploys an Apple device as a kiosk through a dedicated kiosk profile that targets a single, managed app for use. The App Lock configuration in the profile determines this app. You can select iOS apps from the App Store and the Volume Purchase Program. No custom kiosk app or package is needed.
Requirements
The following Apple devices support kiosk mode:
| System | Requirement |
|---|---|
| iOS | iOS 6 and higher |
| iPadOS | iPadOS 6 and higher |
Kiosks are set up remotely through pushing and applying the kiosk profile, so you don’t need the device on hand until you verify its profile or use it.
Make sure you assess and choose a kiosk app before you proceed.
Set up a kiosk profile
Step 1 — Add the target app to the Knox Manage console
First, add the app to your tenant:
Step 2 — Assign the target app from the Knox Manage console to your device
You can only install the target app once it’s assigned to your device through a group or organization:
If you selected Manual for your Installation Type, make sure you install the target app on your device before proceeding.
Step 3 — Configure and apply the kiosk profile
After installing the target app on your device, create, configure, and assign the kiosk profile:
Make sure the target app isn’t blocked by the App Block/Allowlist Settings policy.
-
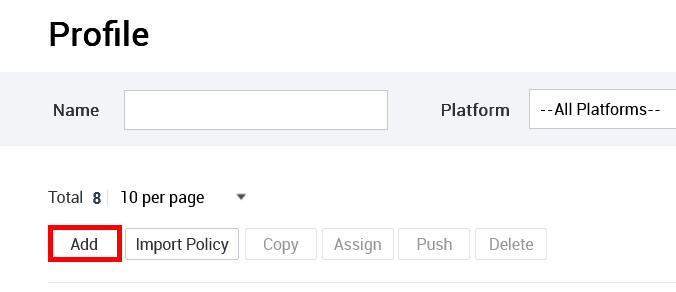
Go to Profile, then click Add.

-
Enter a Name for your profile.
-
Select iOS for your Platform.
-
(Optional) Configure an Event Profile.
-
(Optional) Enter a Description describing your new profile.
-
Click Save & Set Policy to open the Set Policy page.
-
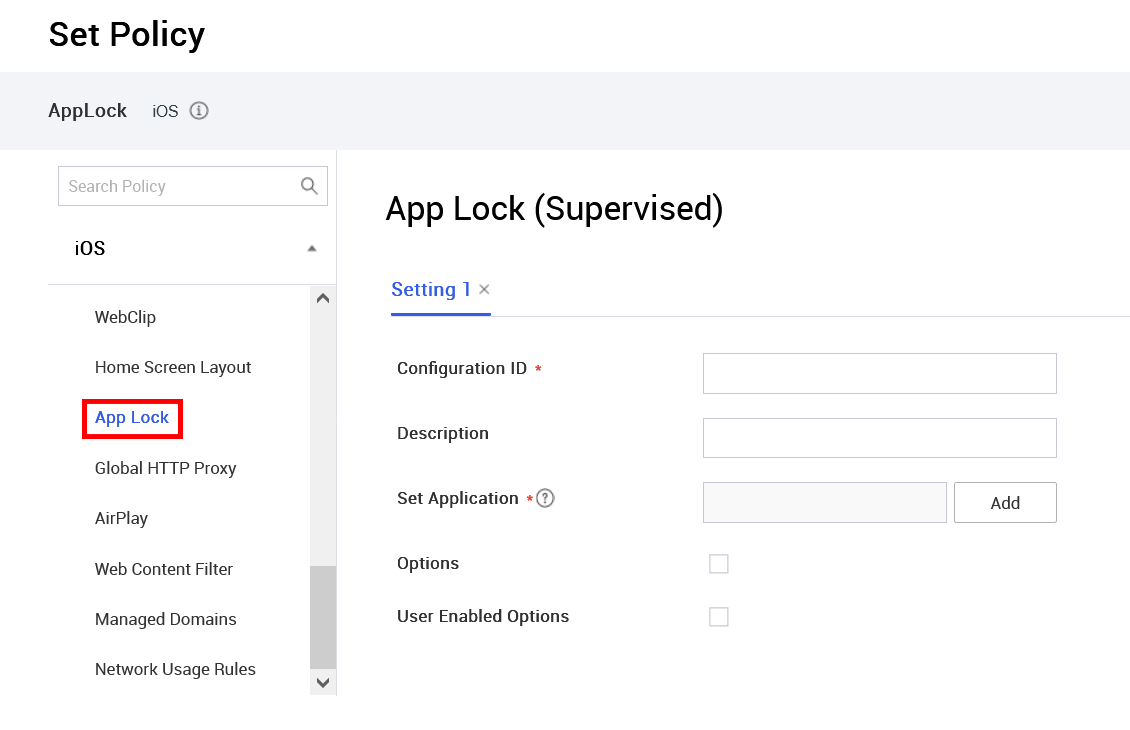
Go to the App Lock drawer.

-
Configure the App Lock configuration:
-
Enter a Configuration ID for your policy. This is a unique name you set to identify the policy, rather than a machine-generated identifier.
-
(Optional) Enter a Description describing your policy.
-
For Set Application, click Add to select the target app.
-
(Optional) Select Options or User Enabled Options to control more specific features of the kiosk. If you don’t configure a policy setting, the default device settings are kept.
For a detailed breakdown of all the available settings in an App Lock configuration, see App Lock in the iOS policy reference.
-
-
Click Save & Assign to immediately push and apply the profile to the target device.
Verify the profile
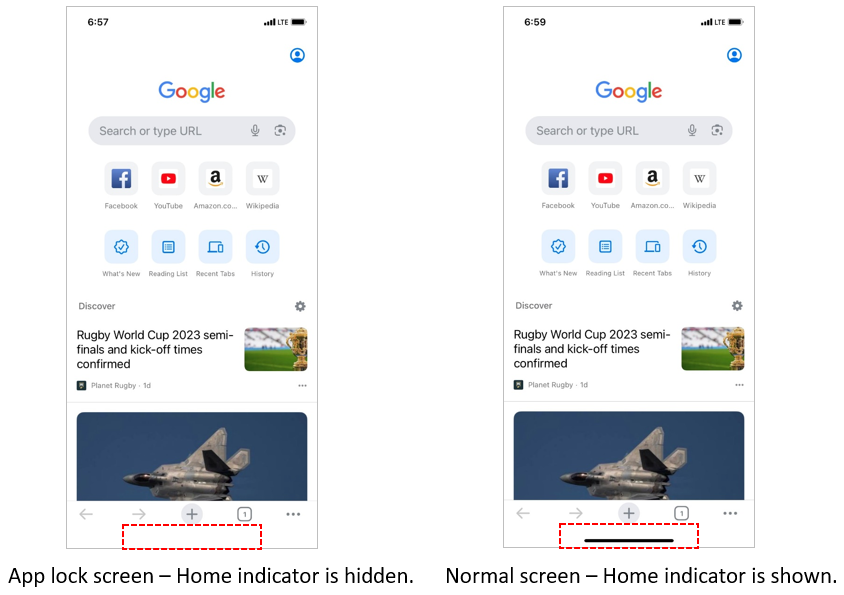
After applying the App Lock policy, the home indicator is hidden on your device, which restricts the device user’s access to the home screen.

Turn off kiosk mode
If you want to go back to the home screen, you must unassign the profile to turn off kiosk mode:
You can only disengage kiosk mode by removing the profile from the device. Make sure that it’s safe to do so before you continue.
- Go to Profile.
- Click the name of the profile with App Lock to open the Profile Details page.
- Click Assigned Group / Organization.
- Select the group or organization corresponding to your device.
- Click Unassign.
Once you’re ready to resume kiosk operation for the device, reassign the profile to it. To do so, see Assign profiles to groups and organizations.
On this page
Is this page helpful?