How to configure Android OpenVPN client with certificate authentication using Knox Manage
Last updated July 26th, 2023
Categories:
Environment
- Knox Manage (KM)
- Android Enterprise
Prerequisites
An OpenVPN server set up according to your security requirements for VPN remote access.
Overview
Using OpenVPN Connect, you can set up a VPN connection for your mobile devices to securely access your corporate network. This article walks you through the steps on how to set up the OpenVPN Connect client with certificate authentication (CA), using Knox Manage (KM) for client installation and certification provisioning.
To configure Android OpenVPN with CA for KM:
- In KM, add the OpenVPN Connect application.
- Create a PKCS12 certificate using an OpenVPN configuration file.
- Upload the PKCS12 certificate to KM.
- In the OpenVPN app, import the OpenVPN configuration file and select the certificate from the Android Keystore system.
- Connect your device to the VPN.
How do I add the OpenVPN Connect application in Knox Manage?
- In your KM console, go to Application > Add > Public.
- In the search bar, enter “OpenVPN” and click Search.
- Select “OpenVPN Connect” by OpenVPN.
- On the OpenVPN Connect application page, click Approve.
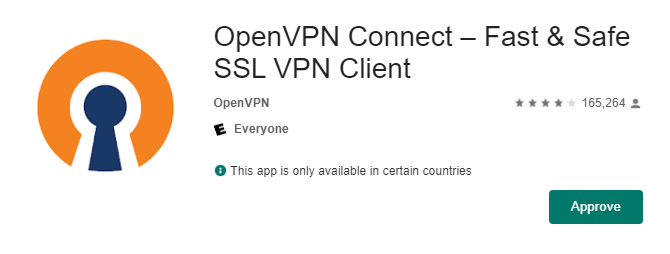
- In the pop-up window that appears, click Approve.
- Click Done, then click Save.
- Go to Application.
- Under the OpenVPN application, click Assign.
- Under Target device, select Android Enterprise with the Automatic install type.
- Under Target section, select your group or organization, then click Assign.
How do I create a PKCS12 Certificate using an OpenVPN configuration file?
If you use OpenVPN configuration files with embedded certificates, extract the certificates in PKCS12 format. This prevents sensitive information, like private keys, from being transferred and stored in the configuration file. Instead, they will be provisioned through Knox Manage and stored safely in the device’s Android Keystore system.
You can use OpenSSL to combine sections of the OpenVPN configuration file into a PKCS12 certificate. To do so:
-
In a text editor, open your OpenVPN configuration file in a text editor.
-
Find the following sections in the file:
<ca>...</ca> <cert>...</cert> <key>...</key> -
Copy the text in the
<ca>section to a new text file. Ensure the content matches the following format:-----BEGIN CERTIFICATE----- ... (certificate contents) -----END CERTIFICATE----- -
Save the new text file as “ca.crt”.
-
Repeat Step 3 for the
<cert>section, saving it as “client.crt”. -
Repeat Step 3 for the
<key>section, saving it as “client.key”.
After copying the certificate information out of the OpenVPN configuration, you should have three files named “ca.crt”, “client.crt”, and “client.key”. You can now use OpenSSL to combine them:
-
On your computer, install OpenSSL.
-
In your file manager, navigate to the folder containing your “ca.crt”, “client.crt”, and “client.key” files.
-
Open Command Prompt and enter the following SSL command:
openssl pkcs12 -export -in client.crt -inkey client.key -certfile ca.crt -name MyClient -out client.p12
When prompted, enter a strong password to secure your certificate with.
You now have an OpenVPN-compatible “client.p12” certificate that you can upload to KM and push to your device’s Android Keystore.
How do I upload a PKCS12 Certificate to Knox Manage and push it to my device’s Android Keystore?
-
In your KM console, go to Advanced > Certificate > External Certificate > Add.
-
Upload your “client.p12” certificate and enter the information as shown below:
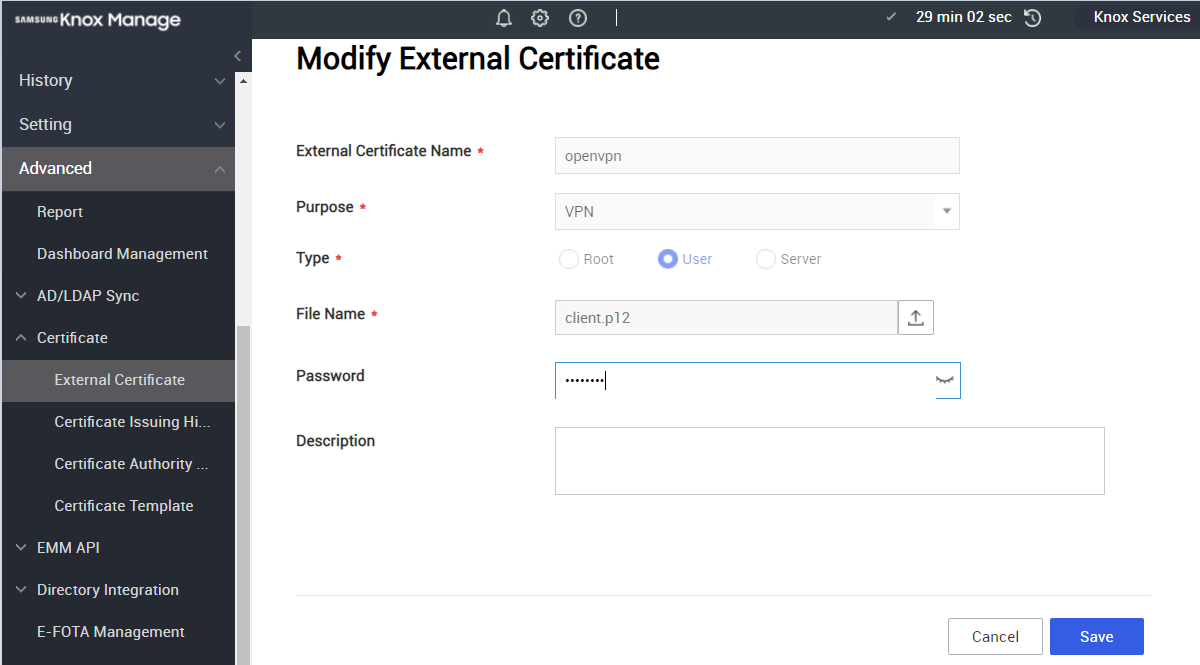
- Click Save.
To store the client certificate in your device’s Android Keystore:
-
In your KM console, go to Profile.
-
Click on your device’s profile > Modify Policy.
-
Select Certificate, then enter the information as shown below:
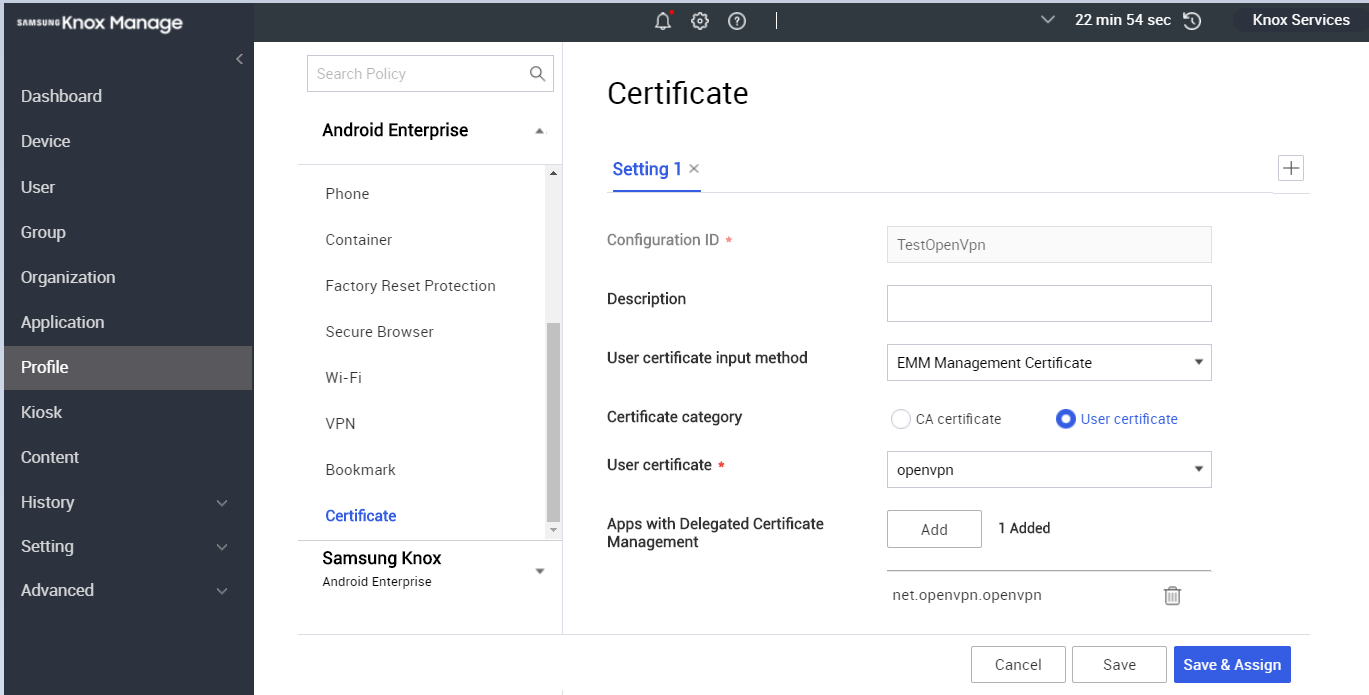
- Click Save and Apply.
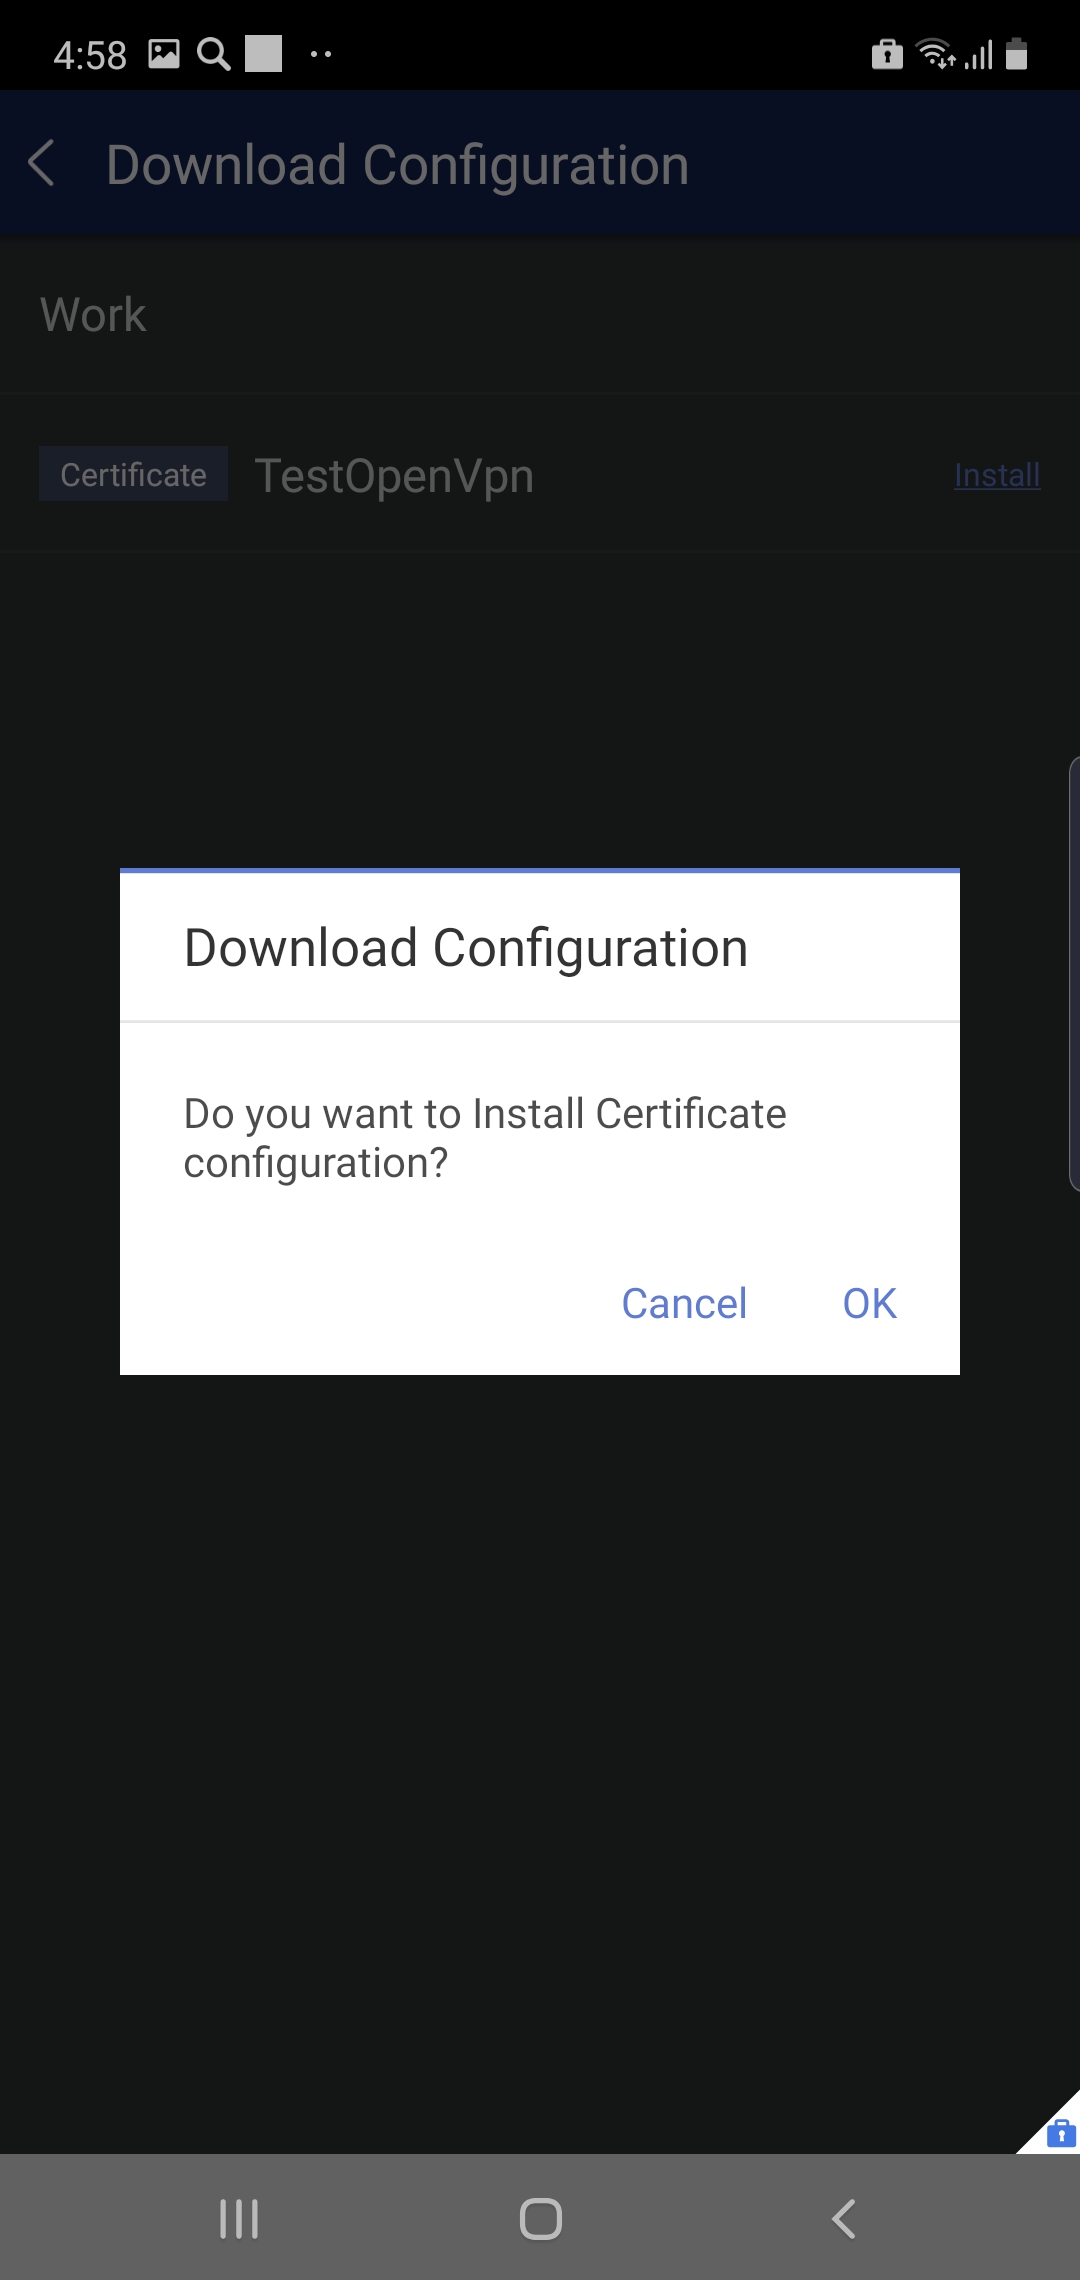
To install the client certificate on your device:
- In the KM client on your device, navigate to Download Configuration > Install.
- Tap OK.
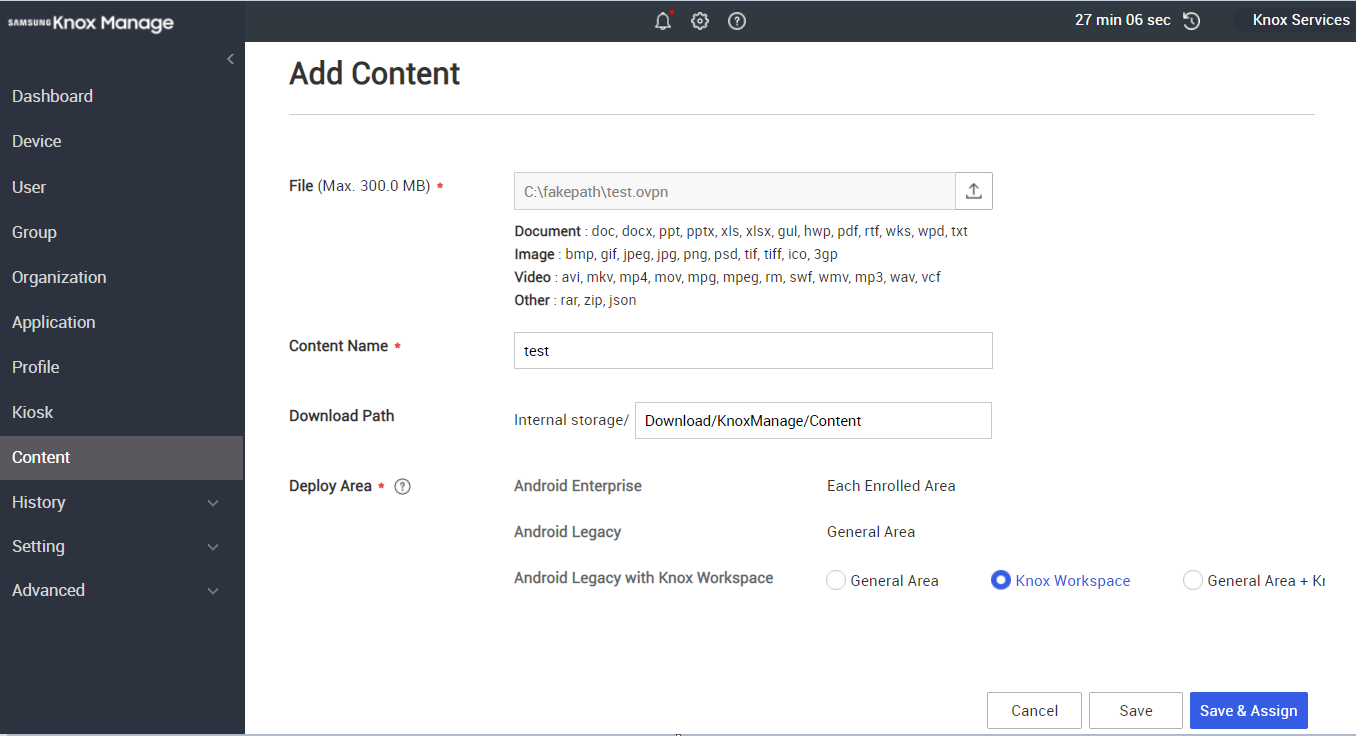
To sync the OpenVPN configuration file (*.ovpn) with your device:
-
In your KM console, under Content, upload the configuration file to to KM.
-
Enter the information as shown below:
Ensure your OpenVPN configuration file follows this format:
client
dev tun
proto udp
remote <your server name/IP>
port 1194
resolv-retry infinite
nobind
user nobody
group nogroup
persist-key
persist-tun
remote-cert-tls server
cipher AES-256-CBC
auth SHA256
verb 3
How do I import an OpenVPN configuration file into the OpenVPN app?
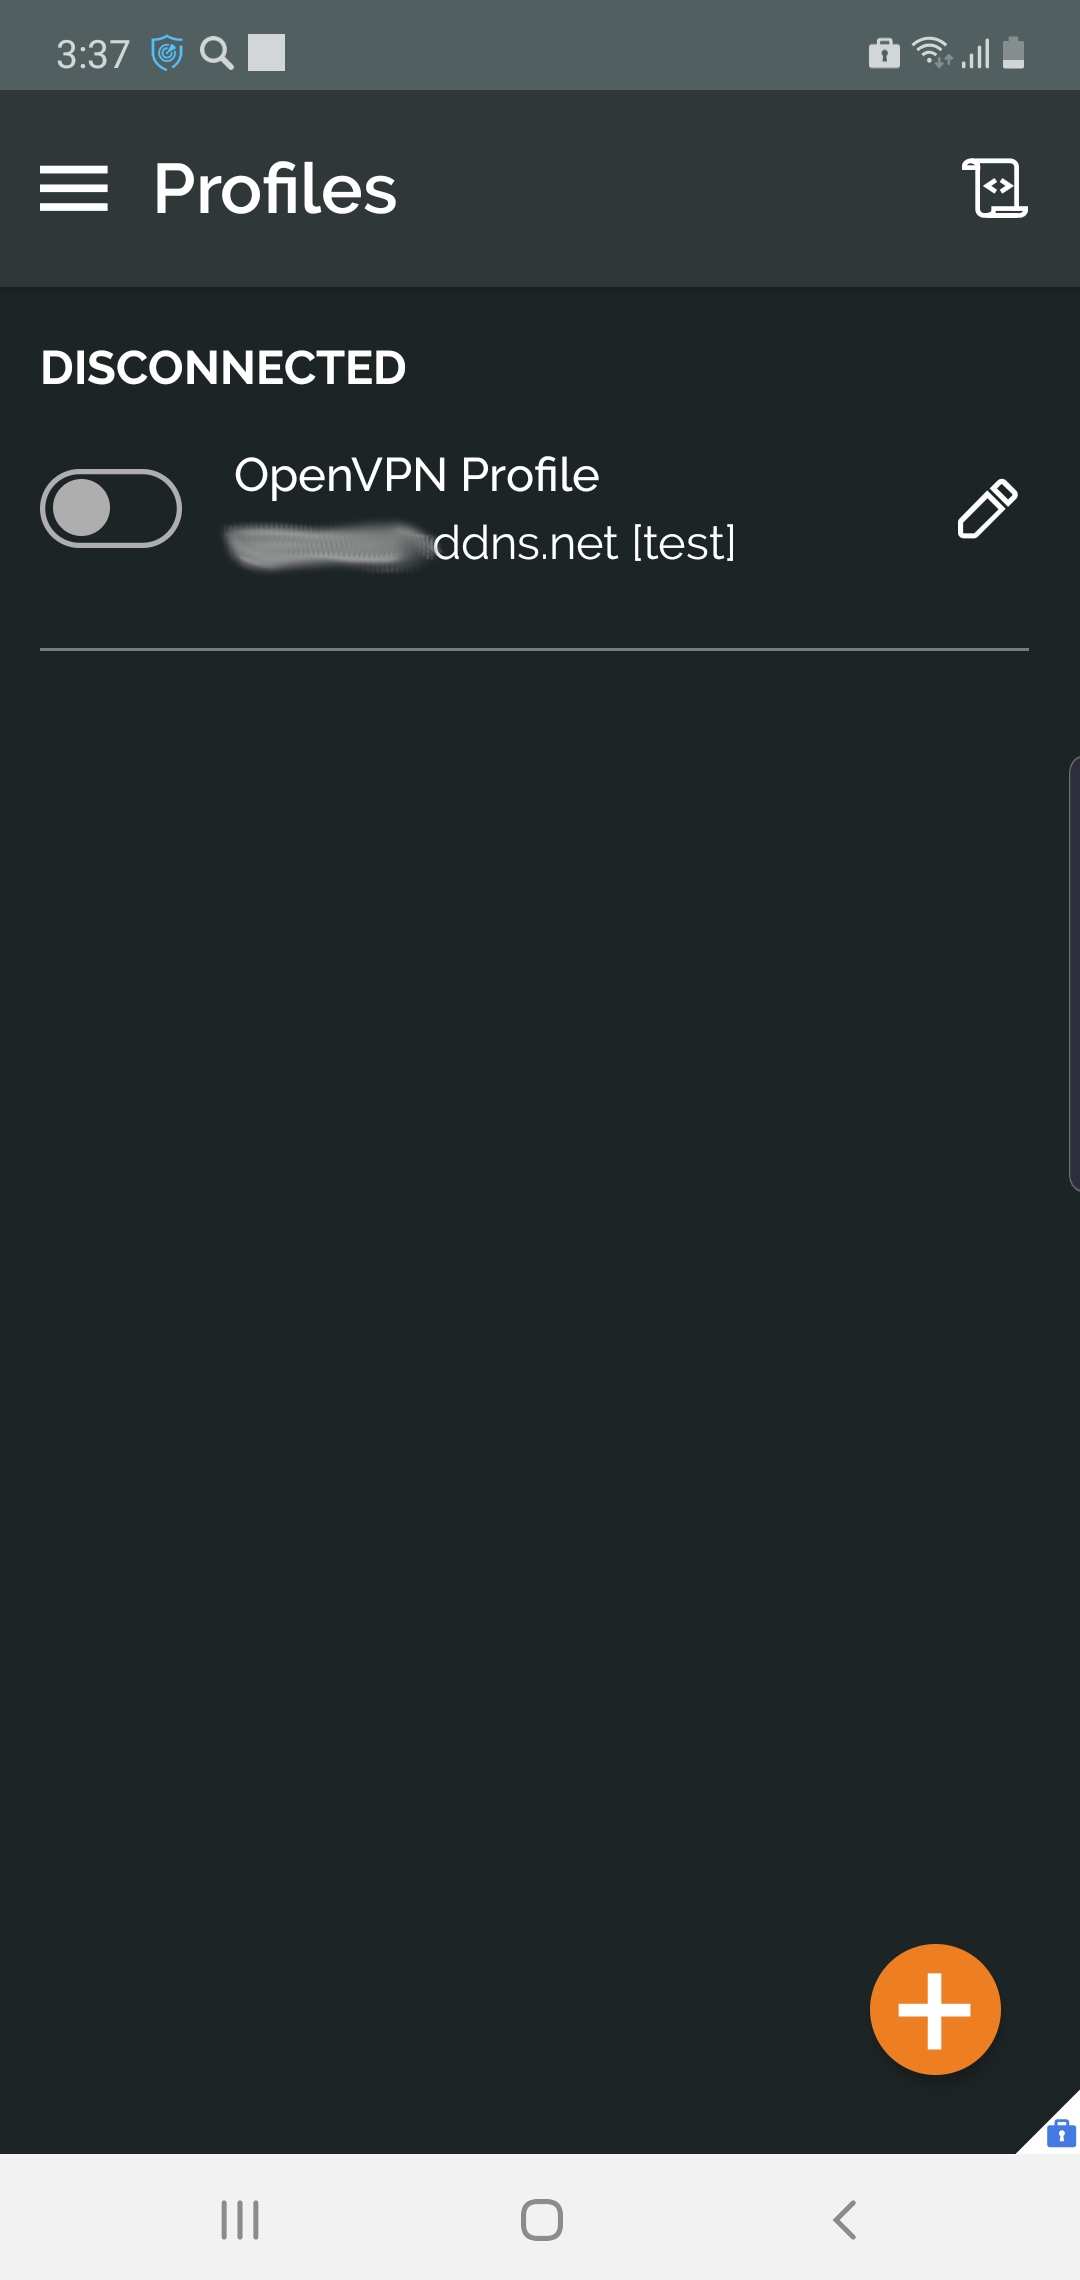
- In the OpenVPN app on your device, go to Import Profile > File.
- Select your configuration file and tap IMPORT > ADD.
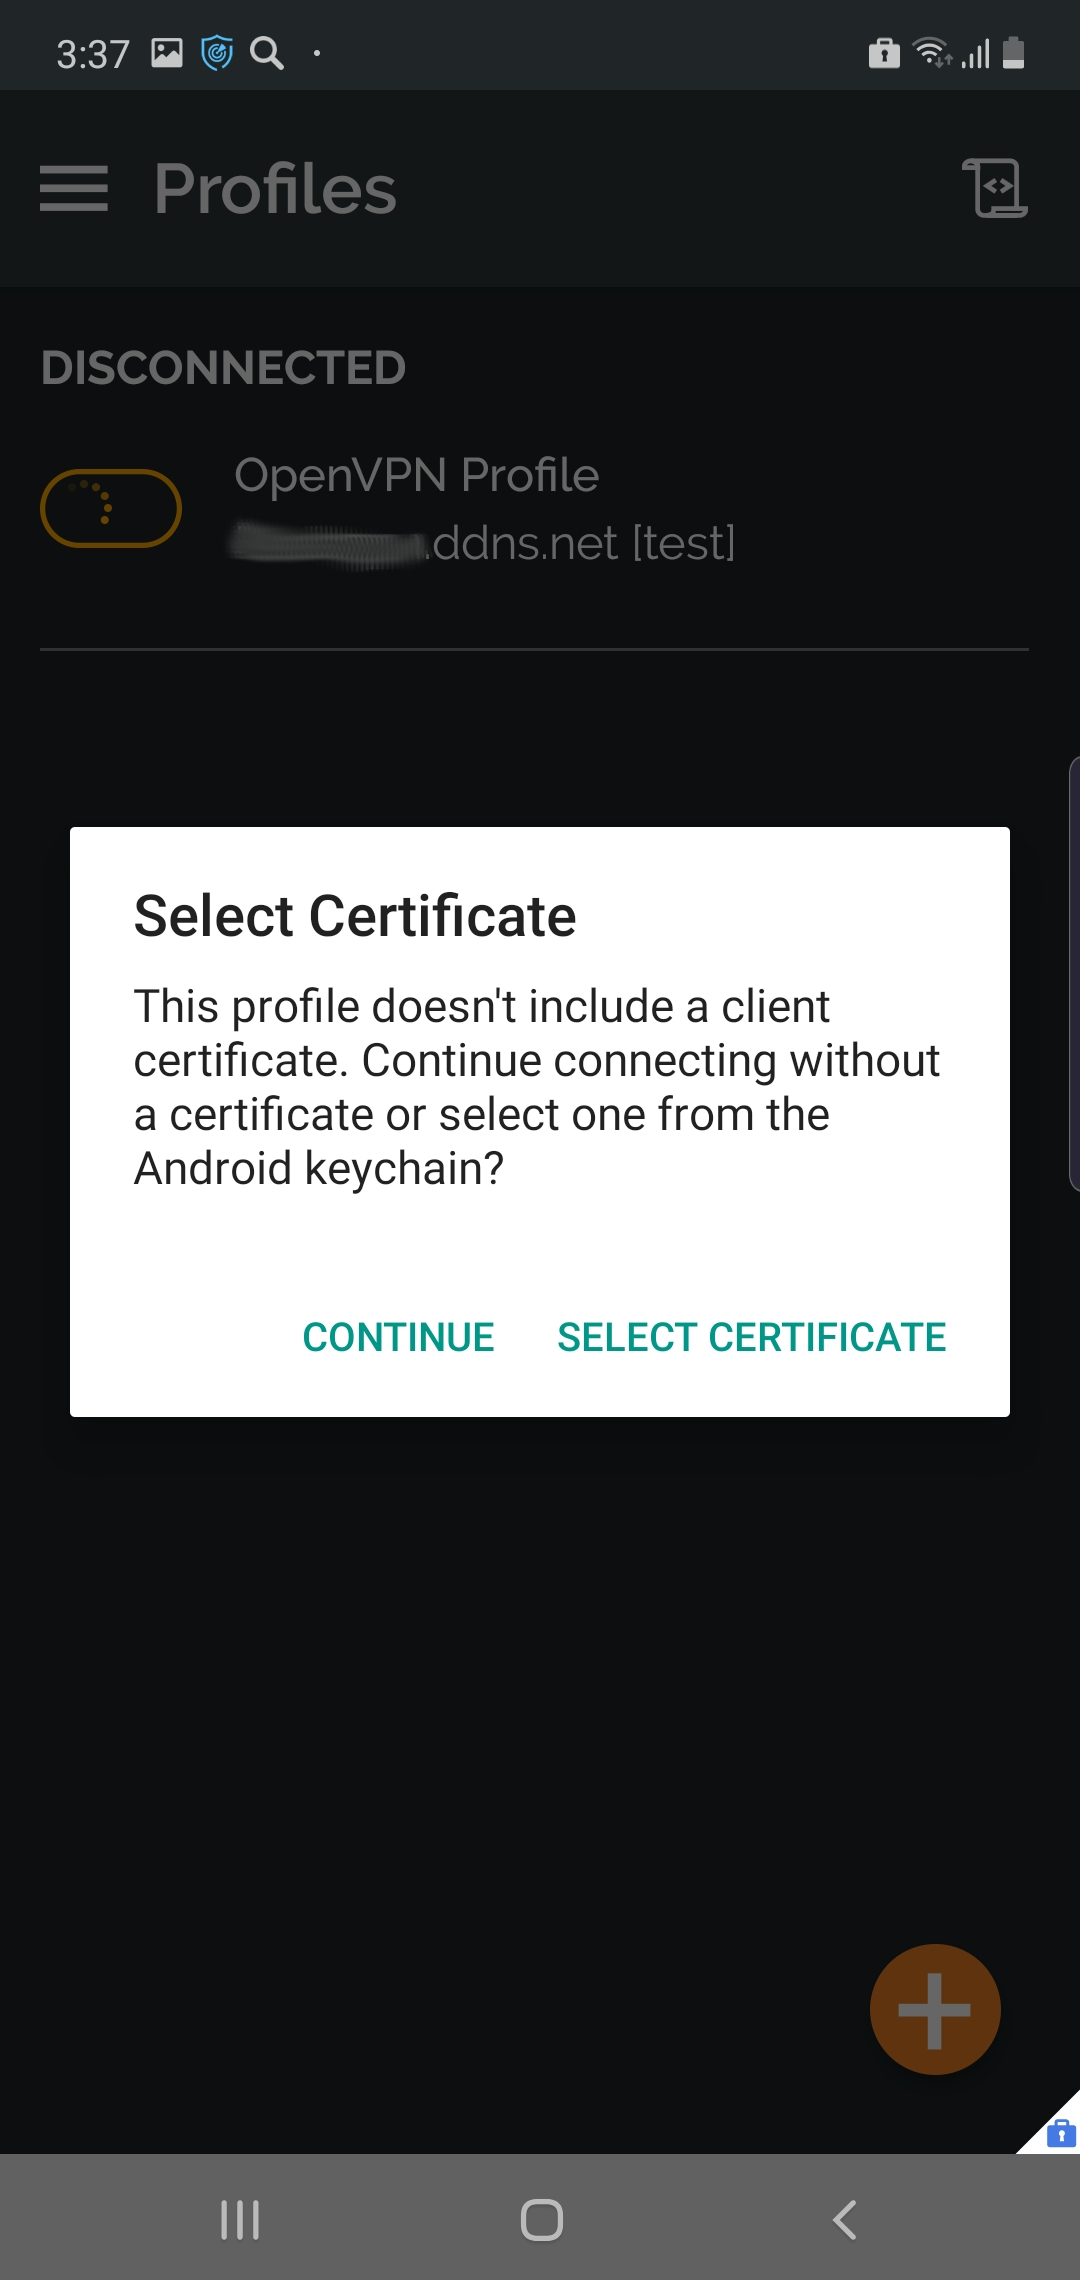
- Select your profile and tap Select Certificate.
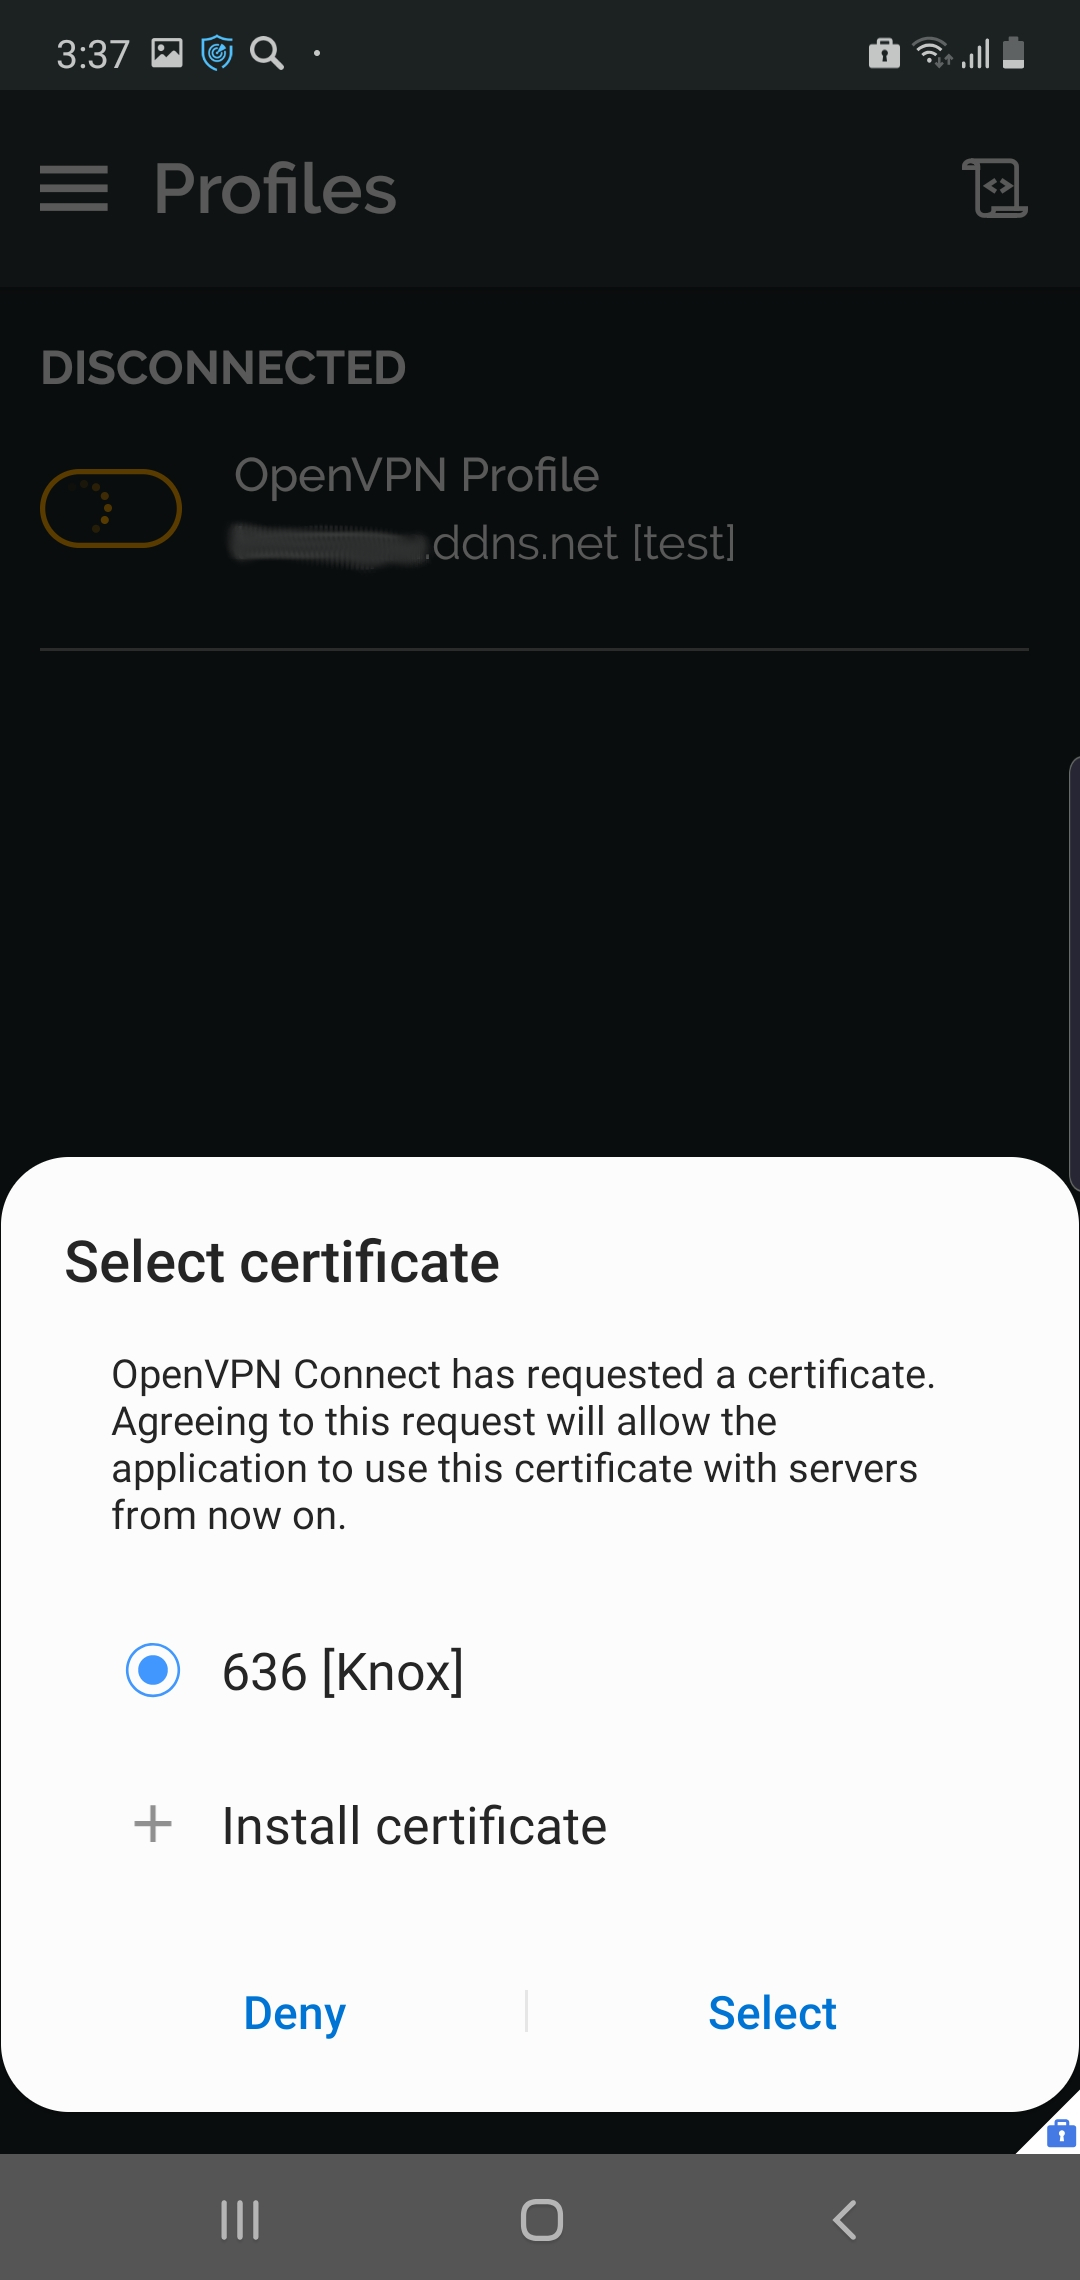
- Choose your certificate, then tap Select.
After you import your OpenVPN profile and certificate, complete the configuration by enabling the profile in the app and connecting to the VPN.
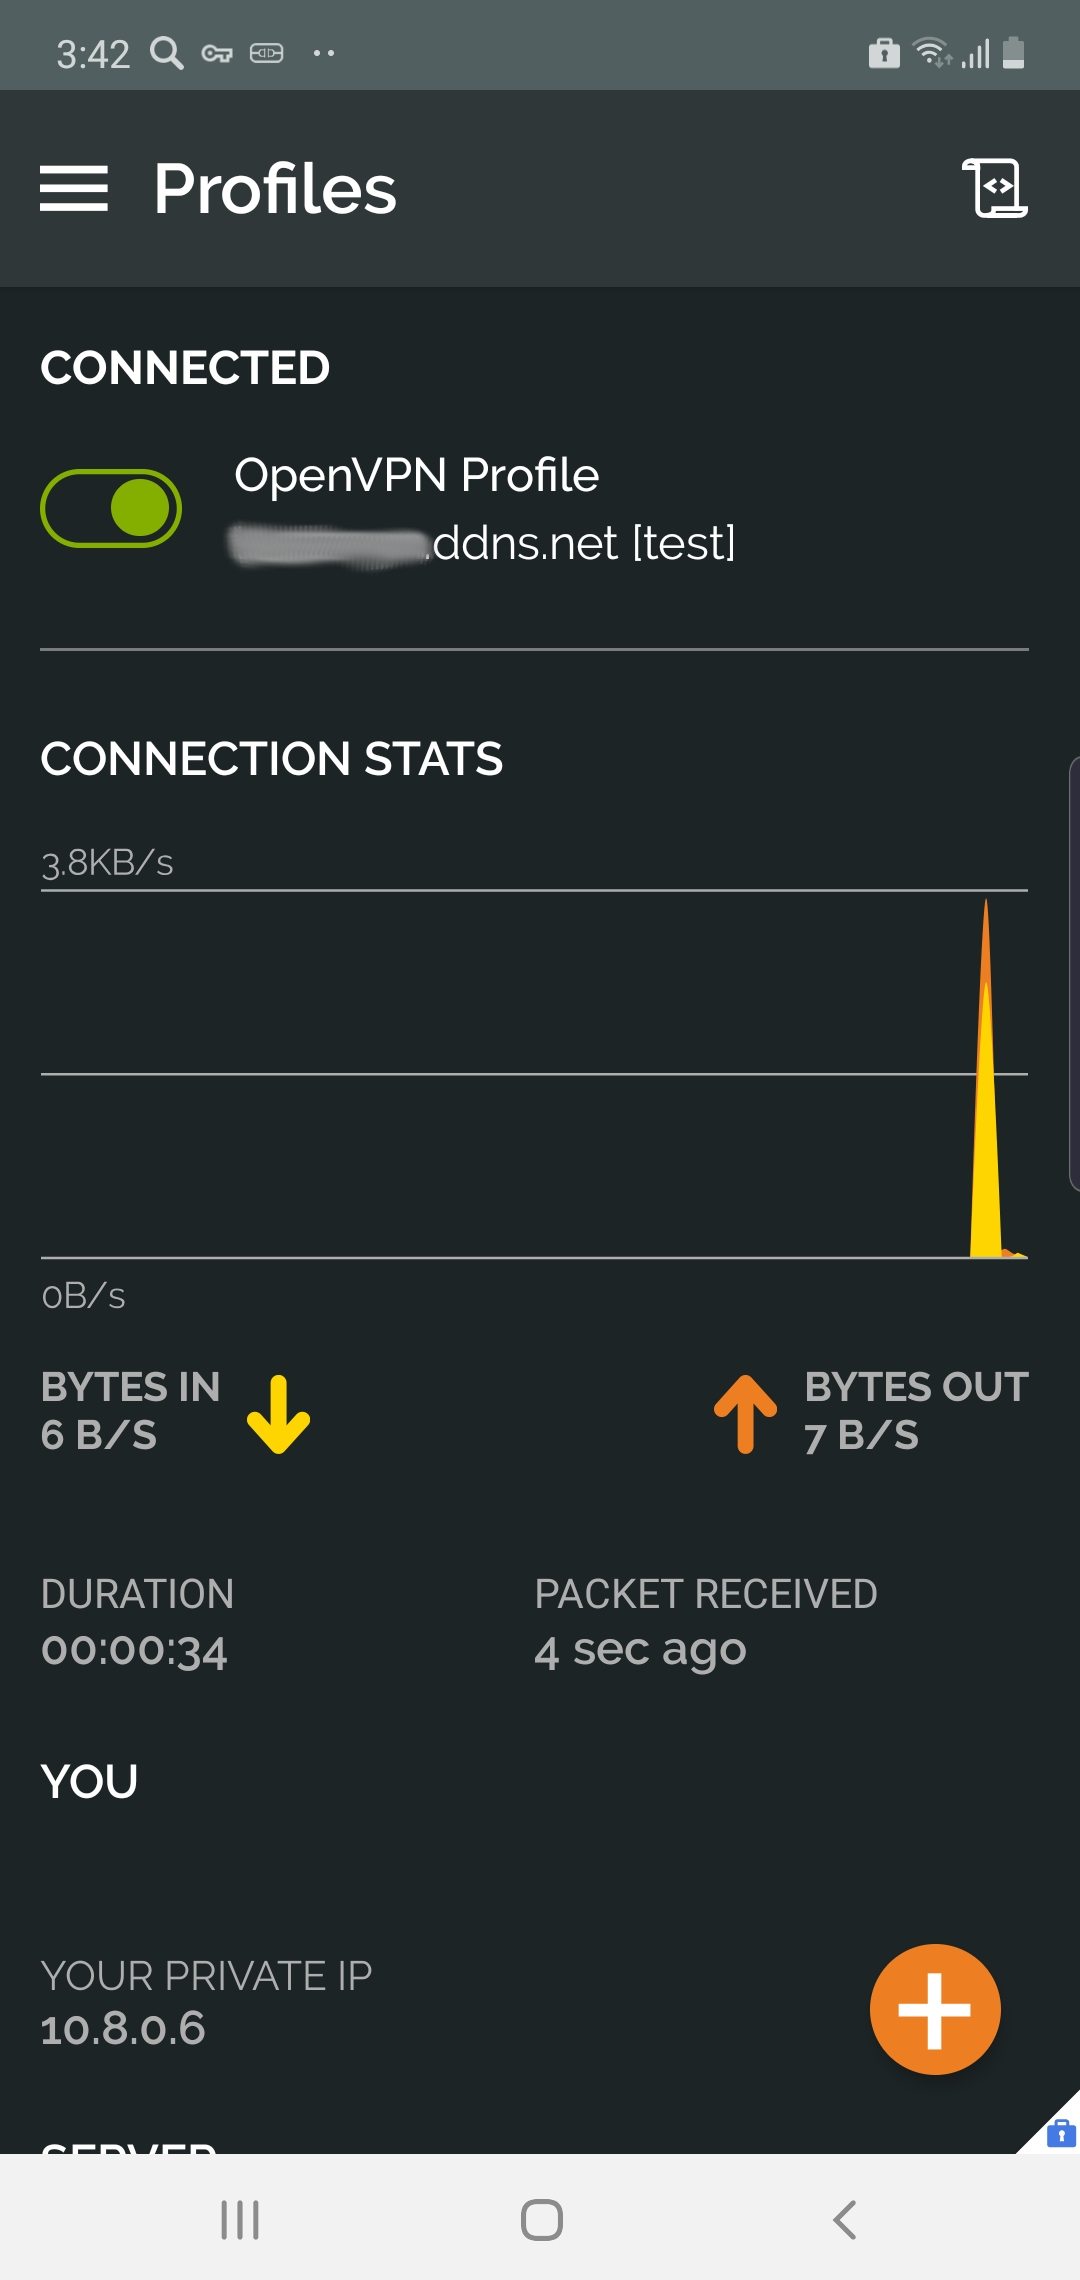
The OpenVPN connection is now established on your device.
On this page
Is this page helpful?