Configure the Android Enterprise environment
Last updated October 8th, 2026
To use Android Enterprise devices, you must register Knox Manage as the EMM provider on the Google Play console and configure the basic environment of Managed Google Play (MGP), which is the app platform for enterprises that manage Android devices.
You can use the following account types when registering Knox Manage as an EMM provider:
- A personal Google account allows you to manage Android devices.
- A Google account from an enterprise domain allows you to manage Android and ChromeOS devices.
If you want to configure your Knox Manage tenant with your Google Workspace environment, you must use a Google account from an enterprise domain.
To modify the existing link between Knox Manage and your Google account, see Update EMM provider information.
Register Knox Manage on the Google Admin console
To register Knox Manage as your EMM provider:
-
On the Knox Manage console, go to Setting > Android > Android Enterprise.
-
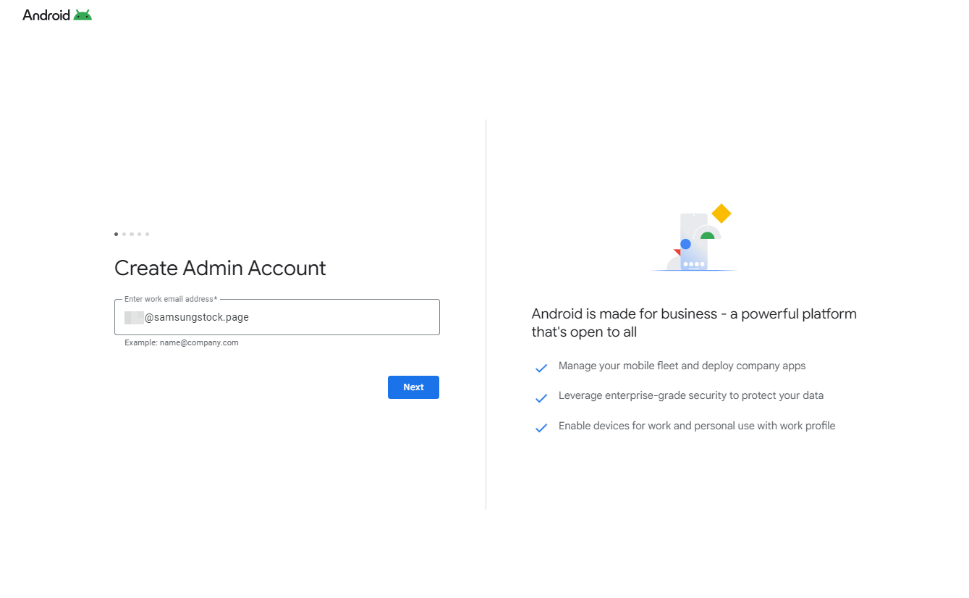
Click Link Account and confirm that you want to register. The Knox Manage console redirects you to Google’s Create Admin Account page.
If there is an existing admin account, the email address will prepopulate the Enter work email address field. Attempting to enter a different email address shows an information message that suggests using the admin email.
-
If your Google account’s domain is managed by Google, click Allow to bind your Knox Manage tenant to the account.
-
If your Google account’s domain isn’t managed by Google:
-
You are asked to verify your email and a verification message is sent to your email address. Sign-in to your email account and verify your email address.
-
Google’s Welcome to Android Enterprise page displays. Click Continue.
-
Provide the required registration details, select Android Enterprise as your subscription, create a password for Google’s admin console, and click Agree and continue.
-
Click Allow and create account to register Samsung Knox Manage as your EMM provider and create an account on Google Admin console.
-
-
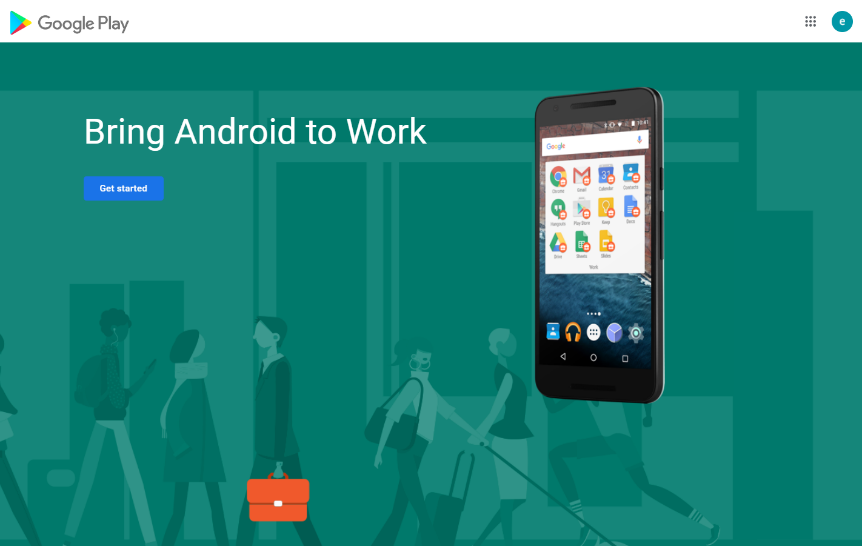
If you sign in with a new personal Google Account and want to deploy only Android devices, select Sign up for Android only. The Google Play console opens:
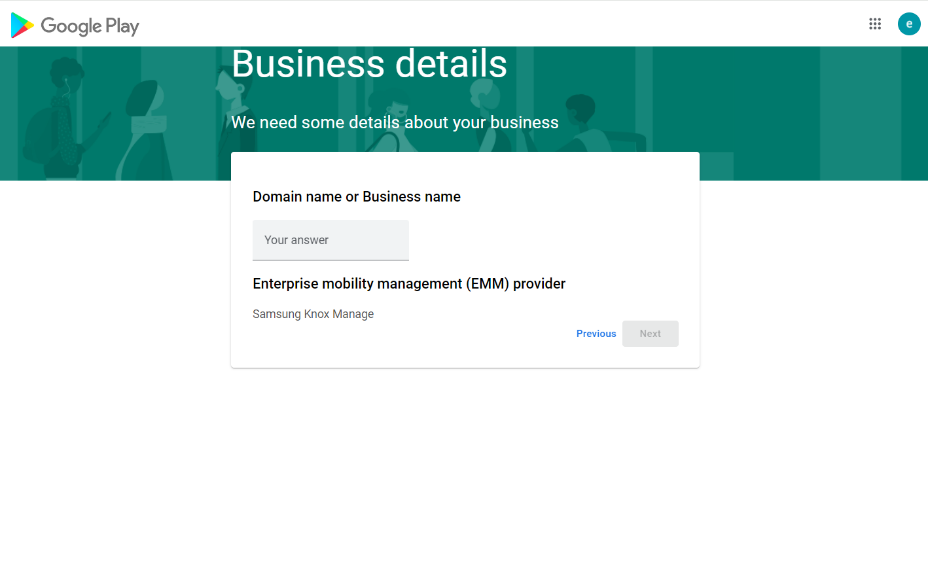
- Enter your Domain name or Business name and click Next.
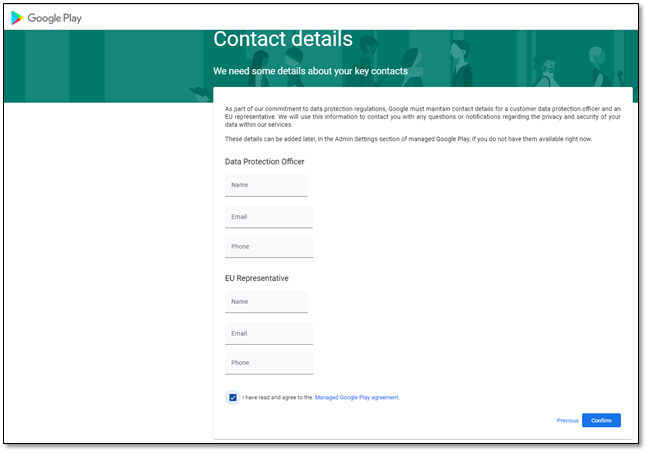
- Enter the details of your data protection officer and EU representative, select I have read and agree to the Managed Google Play agreement, and click Confirm.
- Click Complete Registration. You can use this procedure to bind multiple Knox Manage tenants to Google’s Admin console.
Knox Manage is enabled as an Android EMM on the Google Admin console, and the Google Account information is shown on the Android Enterprise page on the Knox Manage console.
If you get a “Can’t enable Android Enterprise with this account” error, it implies that the email address you provided is associated with an existing managed Google domain, and therefore can’t be used.
To resolve the issue, you can request the admin of the existing managed Google domain to add your email address to the domain.
Alternatively, you can use the Sign up for Android only option from the error dialog. Proceed to sign in to Managed Google Play then go to Settings > click Add and enter the email address > click Invite. Confirm that you have received an invitation email, and close the on-screen dialog.
Configure the environment
You can further configure the environment as follows:
-
Test for sync issues between Knox Manage and Google servers at any time to help identify any issues. On the Android Enterprise page on the Knox Manage console:
- Click Test & Sync. A pop-up displays if your connection test is successful.
-
Select whether to Reset Basic store layout. By default, apps are organized in the managed Google Play Store app based on app collections that you create and maintain on the Google Play console. If you want to display the apps in managed Google Play Store without any categorization, click Reset.
-
For Default Auto Update Apps, select an option to specify when Managed Google Play apps can update automatically:
- Only auto-update over Wi-Fi (Default)
- Auto-update over any network
- Let the user choose
- Never auto-update
-
Select whether to use Maintenance Window to force update apps at a specific time:
- Use. Apps are forced to update during a specific timeframe. Specify a Start Time and Duration to define the timeframe.
- Do not use. Apps automatically update irrespective of whether the device is charging or idle, or the app isn’t in use. Automatic updates can be paused during freeze periods.
-
Click Save to finish configuring the environment.
Ensure that the Google Account used to register Knox Manage on the Google Play console isn’t deactivated and deleted due to inactivity. For information about Google’s inactive account policy, see the Google topics Inactive Google Account Policy and Updating our inactive account policies.
This document was updated for the Knox cloud services 26.10 UAT.
On this tab
To use Android Enterprise devices, you must register Knox Manage as the EMM provider on the Google Play console and configure the basic environment of Managed Google Play (MGP), which is the app platform for enterprises that manage Android devices.
You can use the following account types when registering Knox Manage as an EMM provider:
- A personal Google account allows you to manage Android devices.
- A Google account from an enterprise domain allows you to manage Android and ChromeOS devices.
If you want to configure your Knox Manage tenant with your Google Workspace environment, you must use a Google account from an enterprise domain.
To modify the existing link between Knox Manage and your Google account, see Update EMM provider information.
Register Knox Manage on the Google Admin console
To register Knox Manage as your EMM provider:
-
On the Knox Manage console, go to Setting > Android > Android Enterprise.
-
Click Link Account and confirm that you want to register. The Knox Manage console redirects you to Google’s Create Admin Account page.
If there is an existing admin account, the email address will prepopulate the Enter work email address field. Attempting to enter a different email address shows an information message that suggests using the admin email.
-
If your Google account’s domain is managed by Google, click Allow to bind your Knox Manage tenant to the account.
-
If your Google account’s domain isn’t managed by Google:
-
You are asked to verify your email and a verification message is sent to your email address. Sign in to your email account and verify your email address.
-
Google’s Welcome to Android Enterprise page displays. Click Continue.
-
Provide the required registration details, select Android Enterprise as your subscription, create a password for Google’s admin console, and click Agree and continue.
-
Click Allow and create account to register Samsung Knox Manage as your EMM provider and create an account on Google Admin console.
-
-
If you sign in with a new personal Google Account and want to deploy only Android devices, select Sign up for Android only. The Google Play console opens:
- Enter your Domain name or Business name and click Next.
- Enter the details of your data protection officer and EU representative, select I have read and agree to the Managed Google Play agreement, and click Confirm.
- Click Complete Registration. You can use this procedure to bind multiple Knox Manage tenants to Google’s Admin console.
Knox Manage is enabled as an Android EMM on the Google Admin console, and the Google Account information is shown on the Android Enterprise page on the Knox Manage console.
If you get a “Can’t enable Android Enterprise with this account” error, it implies that the email address you provided is associated with an existing managed Google domain, and therefore can’t be used.
To resolve the issue, you can request the admin of the existing managed Google domain to add your email address to the domain.
Alternatively, you can use the Sign up for Android only option from the error dialog. Proceed to sign in to Managed Google Play then go to Settings > click Add and enter the email address > click Invite. Confirm that you have received an invitation email, and close the on-screen dialog.
Configure the environment
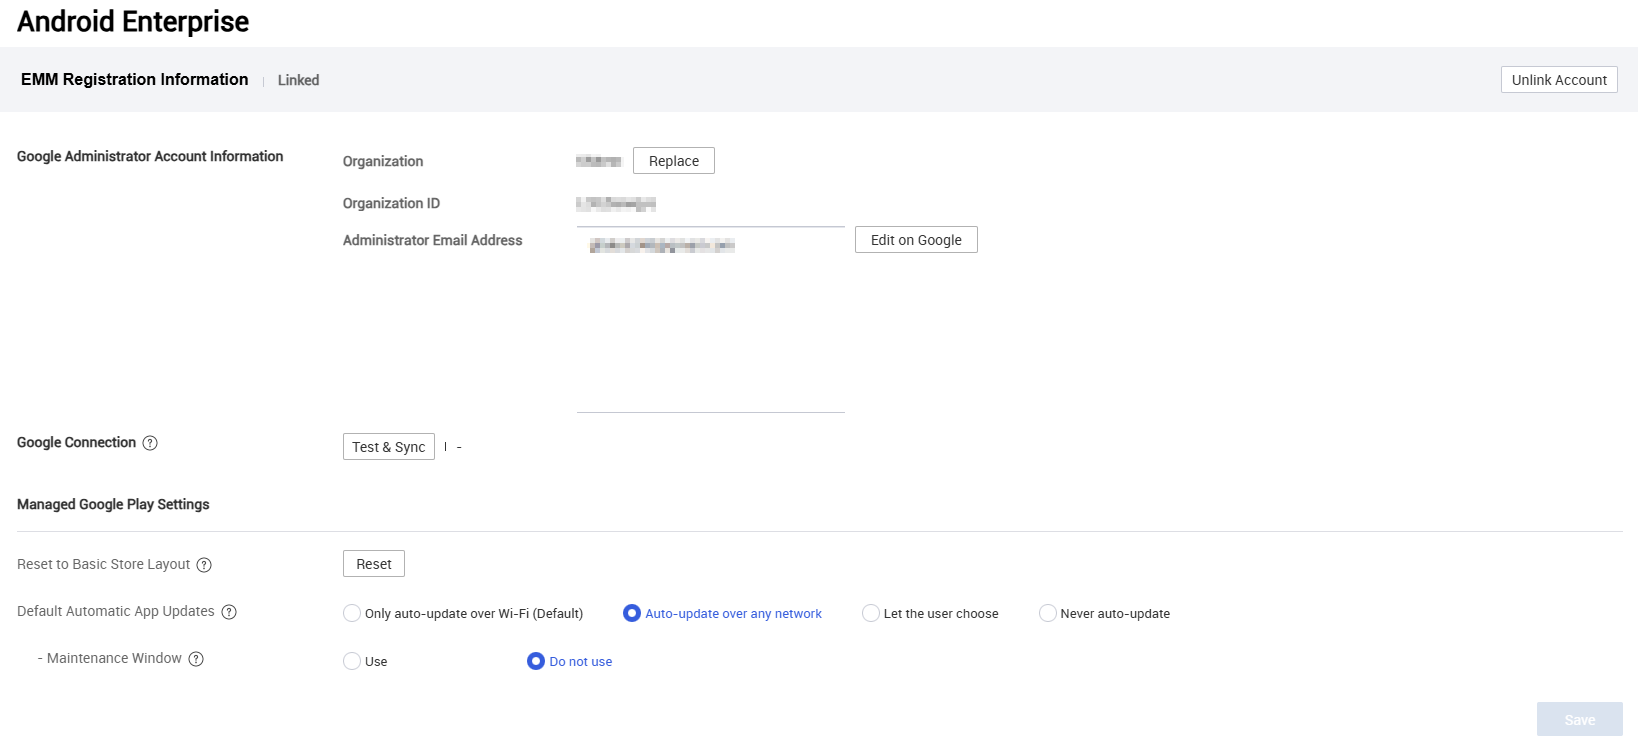
Once your Android Enterprise account is linked, you can configure the following settings related to your environment on the Android Enterprise page.
EMM Registration Information
This section displays the connection status between Knox Manage and your Android Enterprise account. Once connected, it displays as Linked. Click Unlink Account to remove the link between Knox Manage and your Google account.
Google Administrator Account Information
This section displays the details of the Google admin account used to register Knox Manage as the EMM provider.
- Organization — The name of the organization registered with Google. Click Replace to replace your Managed Google Play account with a different one. Click Upgrade to upgrade from a Managed Google Play account to a Managed Google domain account, which you can use to integrate your tenant with Google Workspace. See Configure Google Workspace authentication to learn more.
- Organization ID — The unique identifier for the organization registered with Google.
- Administrator Email Address — The email address of the Google administrator account. Click Edit on Google to change the administrator email address on Google’s admin console.
Google Connection & Account Settings
This section displays the connection status and account type for your Google integration.
- Google Connection — Click Test & Sync to test for sync issues between Knox Manage and Google servers. The available results are Succeeded or Failed.
- Enterprise Type — The type of Google account used to register your Android Enterprise environment. Displays Managed Google Play when registered with a personal Google account, or Managed Google Domain when registered with a Google account from an enterprise domain.
Managed Google Play App Settings
This section lets you configure how Managed Google Play apps are organized and updated on devices.
- Reset to Basic Store Layout — By default, apps are organized in the managed Google Play Store app based on app collections that you create and maintain on the Google Play console. If you want to display the apps in managed Google Play Store without any categorization, click Reset.
- Default Automatic App Updates — Specifies when Managed Google Play apps can update automatically on devices. Select one of the following options:
- Only auto-update over Wi-Fi (Default) — Apps update automatically only when the device is connected to Wi-Fi.
- Auto-update over any network — Apps update automatically over any network connection, including cellular.
- Let the user choose — Device users can decide whether apps update automatically.
- Never auto-update — Apps never update automatically.
- Maintenance Window — Specifies whether to force app updates during a specific timeframe. This setting is available when Default Automatic App Updates is set to an option other than Never auto-update. Select one of the following options:
- Use — Apps are forced to update during a specific timeframe. Specify a Start Time and Duration to define the maintenance window.
- Do not use — Apps automatically update irrespective of whether the device is charging or idle, or the app isn’t in use. Automatic updates can be paused during freeze periods.
Click Save to save any settings you configured.
Ensure that the Google Account used to register Knox Manage on the Google Play console isn’t deactivated and deleted due to inactivity. For information about Google’s inactive account policy, see the Google topics Inactive Google Account Policy and Updating our inactive account policies.
Is this page helpful?