View or modify user details
Last updated June 17th, 2026
After you’ve created a user, you can view or edit their details — such as their name and email — either individually or in bulk.
You can also manage user tags, which are custom identifier labels that allow you to categorize your users, individually or in bulk.
View and edit an individual user’s details
To view and edit a user’s details, follow these steps:
-
On the Users page, click a user’s name.
-
On the user details panel that opens, you can view futher details, such as their User ID, Email, and more.
- Click the number following User groups, Organization, or Device count to see the names of the user groups, organizations, or devices that the user is associated with.
-
Click EDIT USER. The Edit user page opens, where you can modify details such as the user’s Name, Email, or User group.
- To modify the user’s password, click CHANGE PASSWORD, then enter and confirm their new password.
- To temporarily disallow a user from signing in and enrolling new devices, change their User status to Inactive. To allow these permissions again, change their User status to Active.
- To add the user to a new group, click the User group drop-down and select a group. Optionally, you can create a new, manual user group by clicking CREATE GROUP.
-
Click SAVE. Your edits to the user are reflected on the user list.
Edit user details in bulk
To edit multiple users in one operation:
-
On the Users page, click the BULK ACTIONS tab.
-
Click MANAGE USERS. The Manage users page opens.
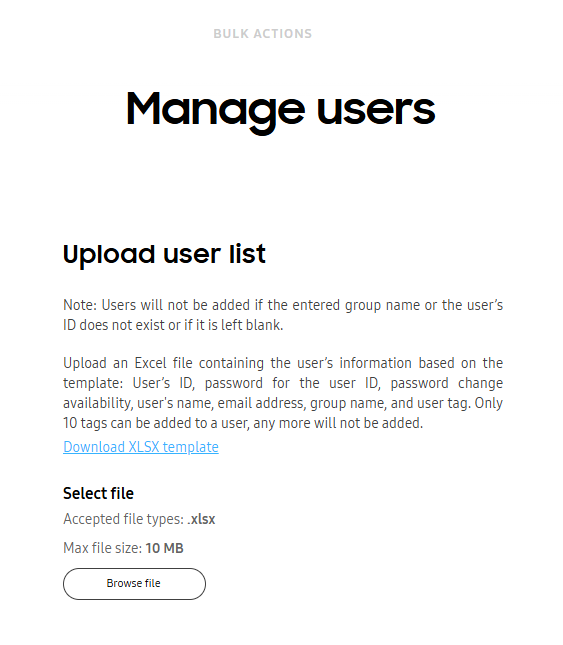
-
Click Browse file and upload your XLSX file with the edited users’ information.
You can also download a XLSX file that contains the required column headers and a detailed explanation of each column by clicking Download XLSX template.
To ensure your file is properly formatted, configure your spreadsheet with the following headers:
- Column A — User ID
- Column B — Password
- Column C — Reset after Sign-in
- Column D — User name
- Column E — Email
- Column F — User group
- Column G — Organization code
- Column H — Tags
You must input either 0 or 1 in the Reset after Sign-in column.
- 0: The device user must reset the password after signing in.
- 1: The device user can’t reset their password after signing in. They must use the password you specified in the Password column.
Your spreadsheet should look something like this:
Column A Column B Column C Column D Column E Column F Column G Column H Field User ID Password Reset after Sign-in User name Email User group Tags Tags Example (Can't be changed) 123456789bB! 1 Johnathan Doe johnathan_doe@example.com Group2 (Optional) (Optional) -
Click SUBMIT. The users you specified on the XLSX are shown with the edited information on the Users page.
Manage an individual user’s tags
Tags are custom identifier labels that allow you to categorize your users. To add or delete tags for an individual user:
-
On the Users page, click a user’s name. The user details panel opens.
-
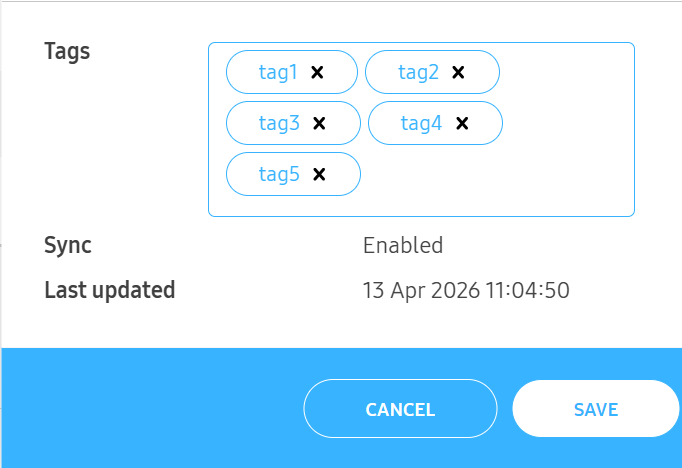
Click the Tags box, type a tag, then click outside of the Tags box or press the Enter key.
A tag must contain a minimum of 3 characters and a maximum of 100 characters, can’t contain semicolons (;), and can’t repeat an already existing tag for that user.
To delete a tag, click the x to the right of the tag.
-
Click SAVE.
Your changes are now applied.
Manage user tags in bulk
To add or delete tags for multiple users in one operation:
-
On the Users page, click the BULK ACTIONS tab.
-
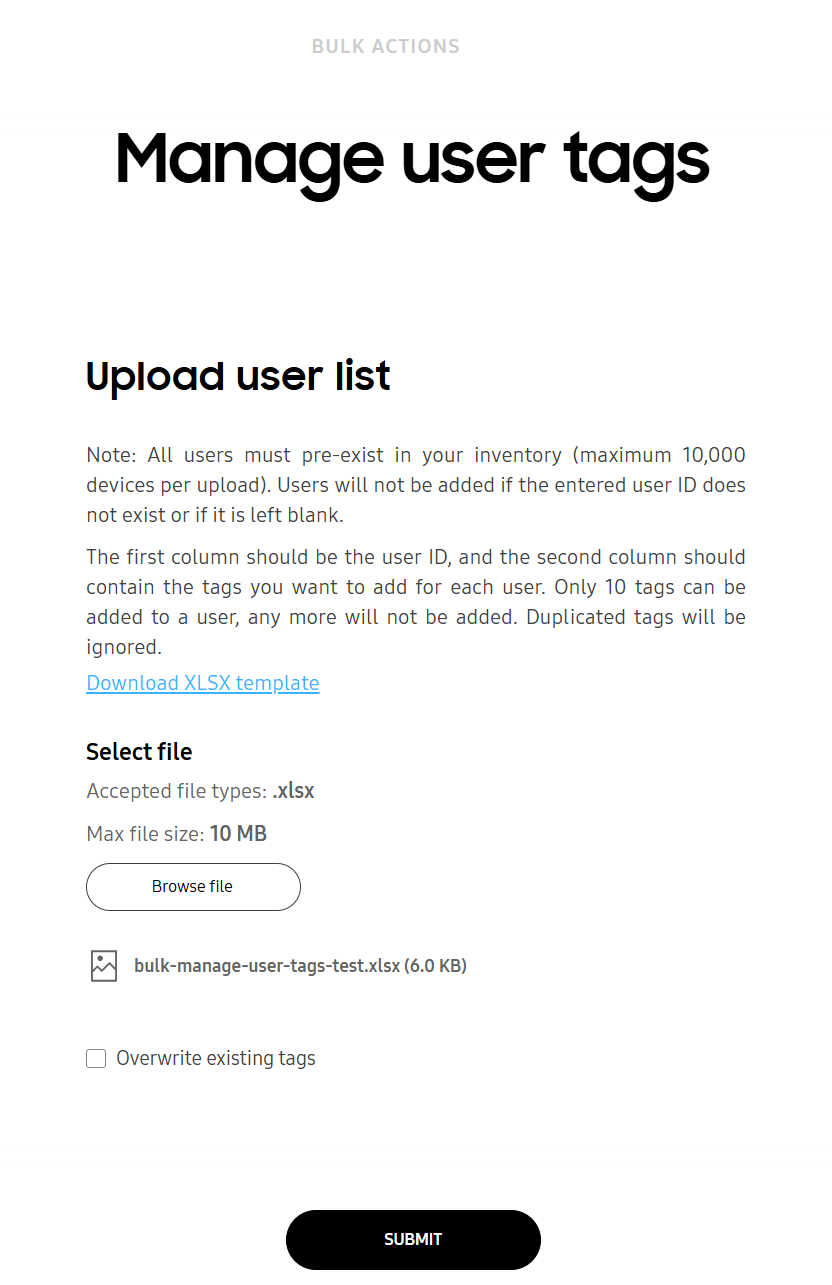
Click MANAGE USER TAGS. The Manage user tags page opens.
-
Click Browse file and upload your XLSX file with up to 10 tags per user.
You can also download a XLSX file that contains the required column headers by clicking Download XLSX template.
- On each row, the order of the columns is: User ID, Tags.
- Up to 10 tags can be added to one user, with each tag being separated by a semicolon (;).
To ensure your file is properly formatted, configure your spreadsheet with the following headers:
- Column A — User ID
- Column B — Tags
Your spreadsheet should look something like this:
Column A Column B Field User ID Tags Example john.doe Tag1;Tag2;Tag3 -
(Optional) To delete previously added tags for all users listed in the XLSX file, check Overwrite existing tags.
-
Click SUBMIT. Your specified tags for each user on the XLSX file are reflected on the Users page, USER TAGS column.
Manage sync settings for a directory type user
You can view and manage the sync status and settings of a directory type user as follows:
-
On the Users page, click the name of the directory type user you want to view or manage. The user details panel opens.
-
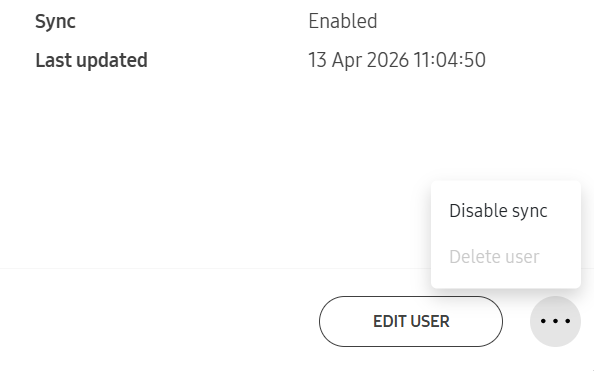
You can view the sync status to the right of the Sync heading. To manage the user’s sync status, click (More actions icon).
-
Click one of the following:
- Sync users — Immediately syncs between Knox Manage and your connected directory.
- Enable sync — Adds the selected user to the list of sync targets, including them in future sync processes.
- Disable sync — Removes the selected user from the list of sync targets, excluding them from future sync processes.
On this page
Is this page helpful?