Configure Google Workspace authentication
Last updated July 2nd, 2026
Once you configure the Android Enterprise environment, you can integrate your Knox Manage tenant with Google Workspace. This integration allows you sync directory resources, such as users and groups, from your Google Admin Console. Once it’s integrated, users can enroll Android Enterprise or Android Management API (AMAPI) devices with their Managed Google Domain Accounts.
Google authentication is supported when devices are enrolled in Knox Manage using a QR code sent with the enrollment guide.
Prerequisites
To sync your tenant with Google Workspace, you must meet the following prerequisites:
Managed Google Domain account
You must have registered your Android Enterprise environment with a Managed Google Domain account, not a personal one.
You can check what account you’re registered with by going to Setting > Android > Android Enterprise. Your account type displays beside Enterprise Type.
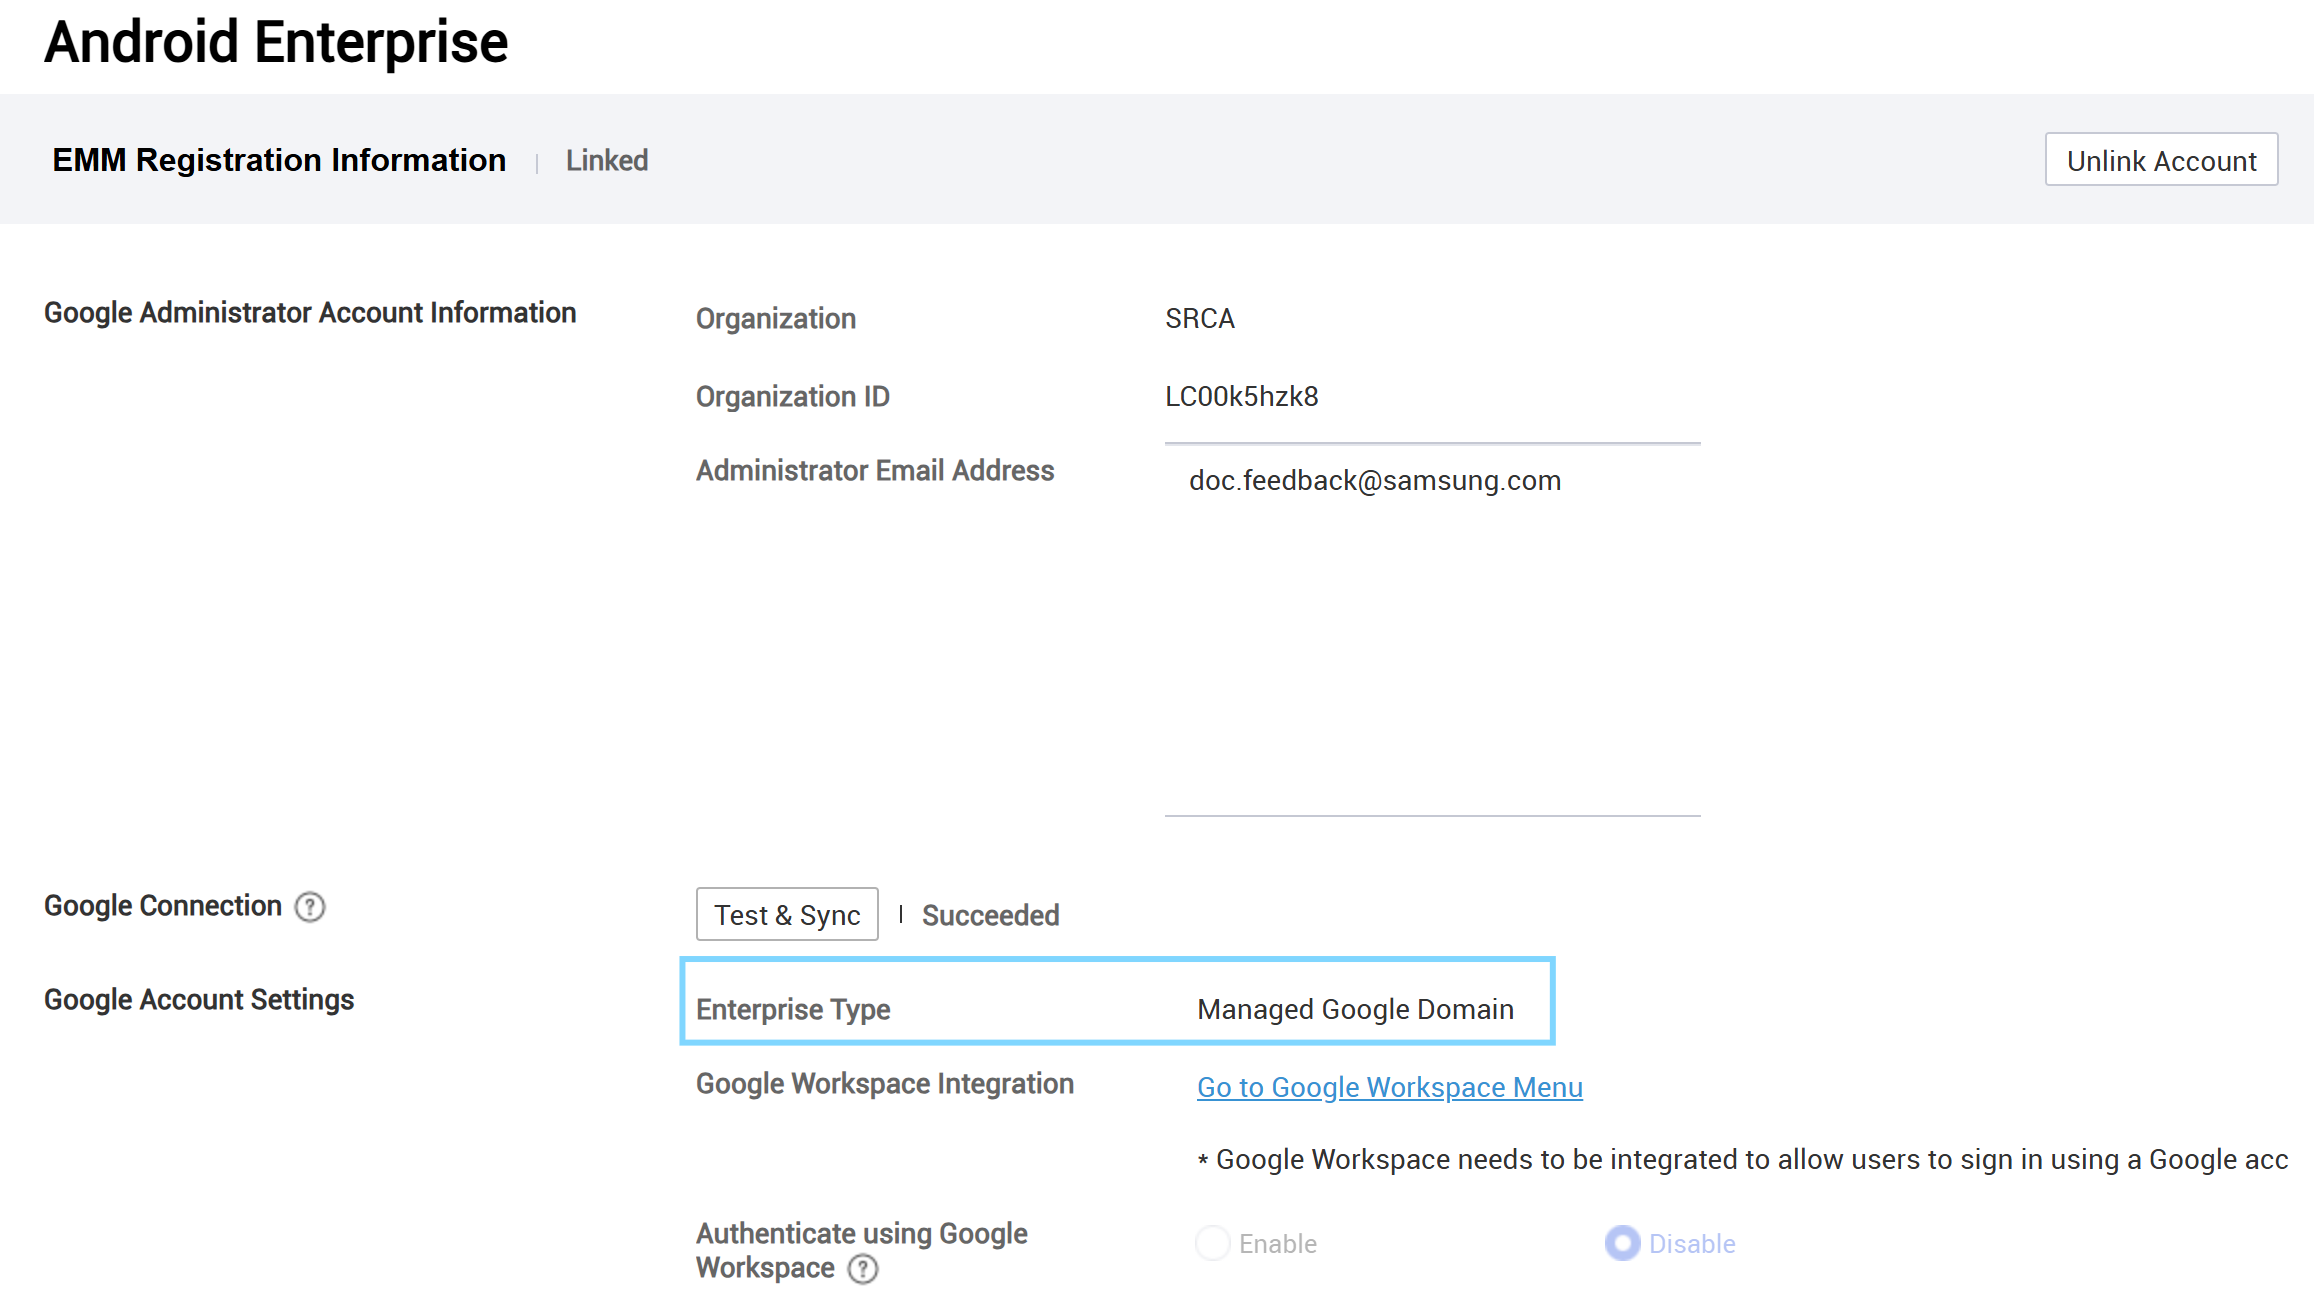
If the Enterprise Type isn’t Managed Google Domain, then you must unlink your account and re-register with a Managed Google Domain account. See Update EMM provider information to learn more.
Chrome OS settings
If you are set up for Chromebook management in your tenant, you must unlink your Chrome OS settings. See Manage Chromebooks for more information.
Connect to Google Workspace
To connect to Google Workspace:
-
Go to Setting > Android > Google Workspace. The Link Account with Google page opens.
-
Click Sign in with Google at the bottom of the page. You’re redirected to Google to sign into the Managed Google Domain account you registered your Android Enterprise environment with.
-
Once you sign into your Google account, you’re prompted to grant Knox Manage access to your Google account. Select what resources Knox Manage can view and manage from Google Workspace:
- Group subscriptions
- Organization units
- Groups
- Users
-
Click Continue.
-
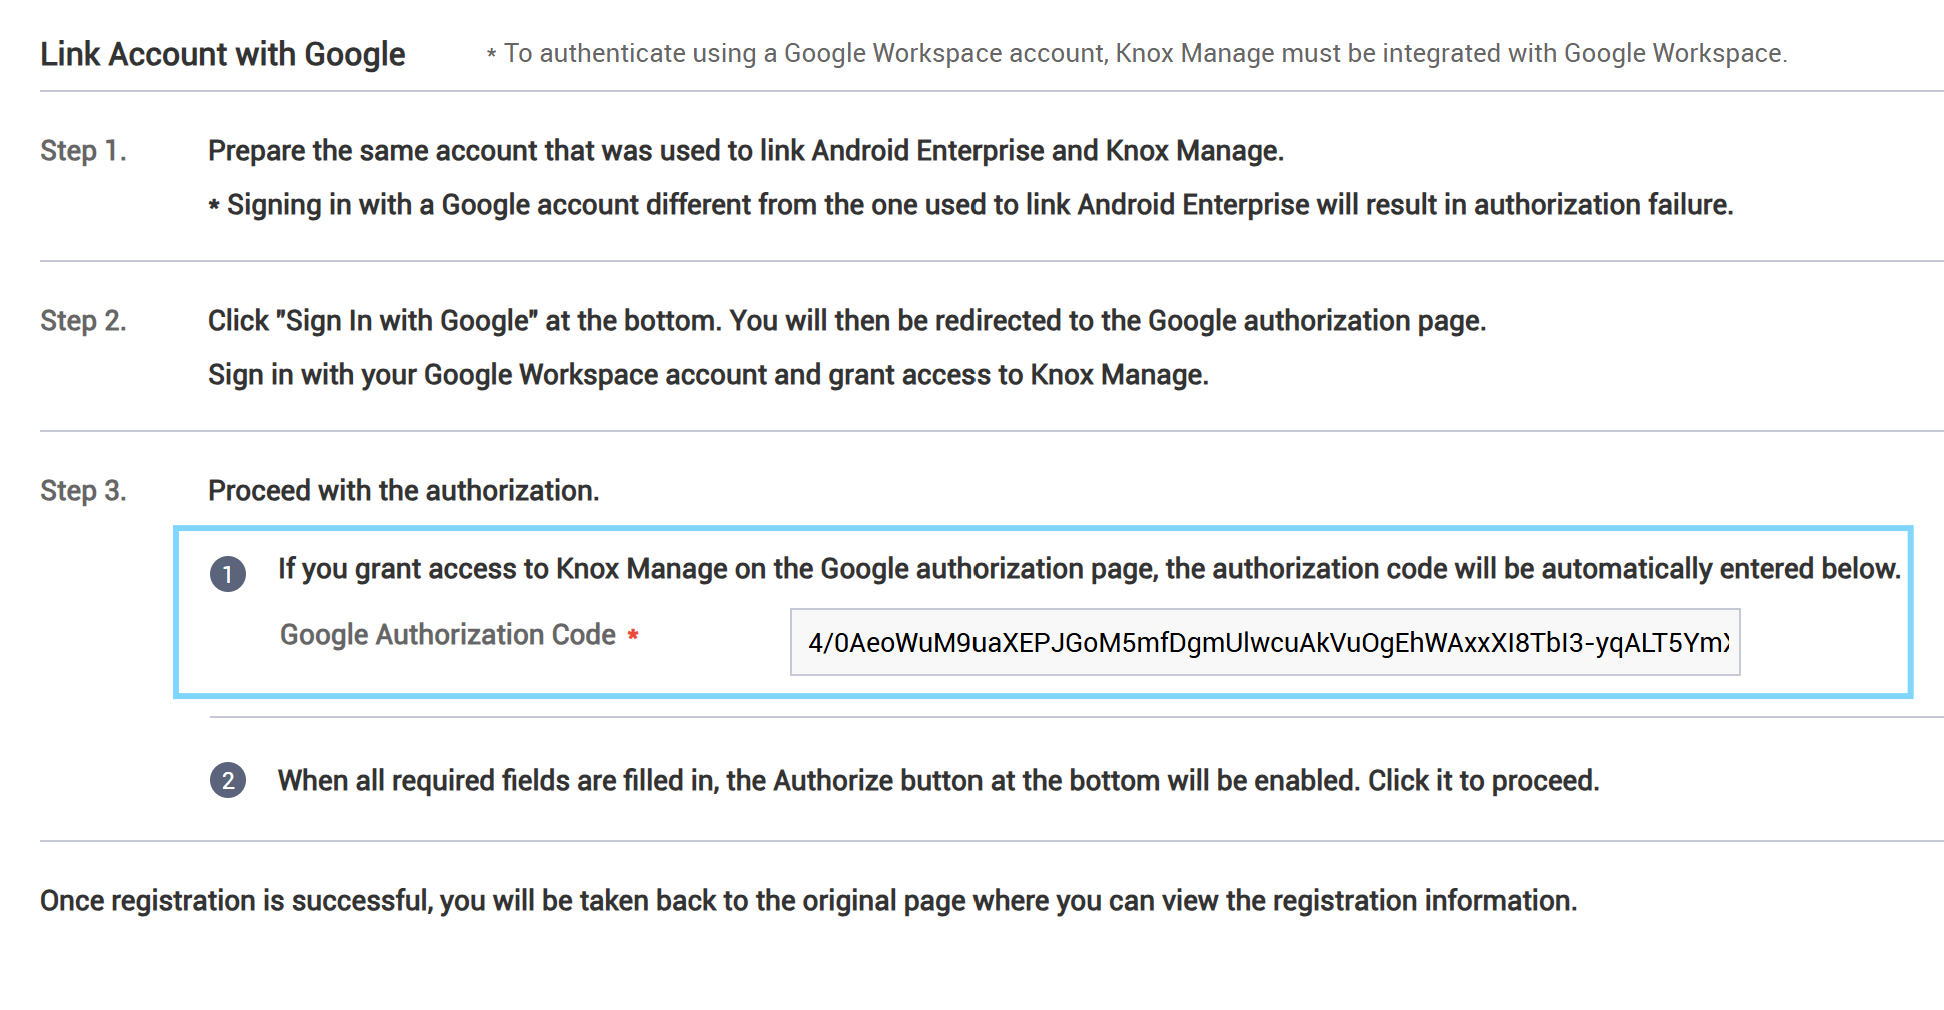
You’re directed back to the Link Account with Google page in Knox Manage. The Google Authorization Code is automatically filled. Click Authorize at the bottom of the screen.
-
Click Authorize. Your account is linked.
-
The Google Workspace page opens. To enable synchronization between Google Workspace and Knox Manage, you must validate the connection. Beside Connection between Knox Manage and Google, click Test Connection.
Directory resources from Google Workspace can now sync with Knox Manage.
Enroll devices with their Managed Google accounts
Device enrollment with a Managed Google account is available when devices are enrolled through a QR code sent with the enrollment guide. See Enroll a single device and Send the enrollment guide to learn more.
Before users can enroll devices with their Managed Google accounts, you must configure a few more settings depending on whether you manage Android Enterprise devices or AMAPI devices.
For Android Enterprise devices:
- Go to Setting > Android > Android Enterprise.
- Beside Authenticate using Google Workspace, click Enable.
If you don’t click Enable, device users can’t sign in with their Google accounts, but your resources will continue to sync from Google Workspace to Knox Manage.
-
Beside Allow User to Skip, select one of the following options:
- Allow user to skip — Allows users to sign into devices with their Knox Manage credentials instead of their Google accounts.
- Force user to sign-in — Forces users to sign into devices with their Google accounts.
Users can now enroll Android devices with their Google credentials.
For AMAPI devices:
-
In the Google Admin Console, navigate to Third-party integrations.
-
Click Manage EMM providers. Beside the entry for Knox Manage, enable Authenticate Using Google.
If you don’t enable Authenticate Using Google, device users can’t sign in with their Google accounts, but your resources will continue to sync from Google Workspace to Knox Manage.
Users can now enroll AMAPI devices with their Google credentials.
Manage Google Workspace connection
Once your tenant is integrated with Google Workspace, you can manage your connection from Knox Manage on the Google Workspace page. The following sections are available: Server Settings and Google Workspace Sync Settings.
At the top of the page, the following details are displayed:
- Domain — Your Knox Manage domain.
- Google Workspace Email — Your Managed Google Domain email.
- Google Workspace Sync Interval — The frequency, in days, that Google Workspace syncs with your tenant. You can set this under Sync Start Time.
Server Settings
The following information displays in the Server Settings section.
- Connection between Knox Manage and Google — Validates that the connection between your tenant and Google Workspace is successful, enavbling synchronization. Click Test Connection.
- Sync Google Workspace — Syncs resources from Google Workspace.
Google Workspace Sync Settings
The following information displays in the Google Workspace Sync Settings section.
- Sync Start Time — Set the frequency, in days, that Google Workspace automatically syncs with your tenant.
- Apply Auto Profile for User — Applies a profile to a user’s device only when their organization’s details change in Google Workspace.
- Apply or Unassign Auto Profile/App for Group — Specifies when to push a profile or app to a group and its members.
- When adding a user from group, profiles and apps will be applied to the user — Associated profiles and apps are assigned to users when they’re added to a group.
- When deleting a user from group, profiles and apps will be unassigned from the user — Associated profiles and apps are unassigned from users when they’re removed from a group.
- When deleting a group, profiles and apps will be unassigned from the group — Associated profiles and apps are unassigned from group members when the group is deleted.
Sync behavior
The following behaviors apply to all resources synced from Google Workspace:
- Resources can’t be synchronized individually, and must be synced all at once.
- If resources are deleted in Google Workspace, then they’re also deleted in Knox Manage.
Users
The following behaviors apply to all users synced from Google Workspace
- If a Google Workspace user has the same email as an existing Knox Manage user, they replace the Knox Manage user.
- If a Google Workspace user doesn’t have same email as an existing Knox Manage user, a new user is added to Knox Manage and their User ID will consist of the section of their email address before the
@domain. If this User ID overlaps with an existing User ID, three digits are added onto the end, such aslucymak001. - Google Workspace updates to users are always reflected in Knox Manage.
Groups
- Google Workspace updates to groups are always reflected in Knox Manage.
Organizations
- If a Google Workspace organization has the same Organization code as an existing Knox Manage organization, they replace the Knox Manage organization.
- Google Workspace updates to organizations are always reflected in Knox Manage.
Disconnect from Google Workspace
You can unlink your Google Workspace account from your Knox Manage tenant. When you unlink your account, any users, groups, and organizations that are synced from Google Workspace are removed from Knox Manage.
Before you unlink your account, you must first unenroll all Android Enterprise and AMAPI devices enrolled with a Managed Google Account. See Unenroll and delete devices to learn more.
If a user synced from Google Workspace has a device enrolled that isn’t Android Enterprise or AMAPI, then the user is not removed from your tenant when you unlink your account. Instead, their Source changes from Directory to Knox Manage, and their status changes to Inactive.
To unlink your Google Workspace account:
- Go to Setting > Android > Google Workspace.
- At the top of the page, click Unlink Account. The Unlink Account dialog appears.
- Confirm your intention by clicking OK.
On this page
Is this page helpful?