Create, duplicate, and delete groups
Last updated June 17th, 2026
Groups are organizational containers that allow you to efficiently categorize and manage collections of users or devices. On the Groups page you can create a group, duplicate an existing group to quickly create a new group with similar configurations, or delete a group that is no longer needed.
Create groups
You can create a group directly on the Groups page in the Knox Admin Portal. Alternatively, you can add a group by synchronizing information from an existing Identity Provider (IdP), like Active Directory (AD), to Knox Manage.
Instructions for creating a group from the Admin Portal differ depending on the membership type you select:
- Manual: A static group you must manually add members.
- Dynamic: A group where members are automatically added or removed based on pre-set criteria (up to 100 groups per tenant).
Create a new manual group
To create a group where you must manually add members:
-
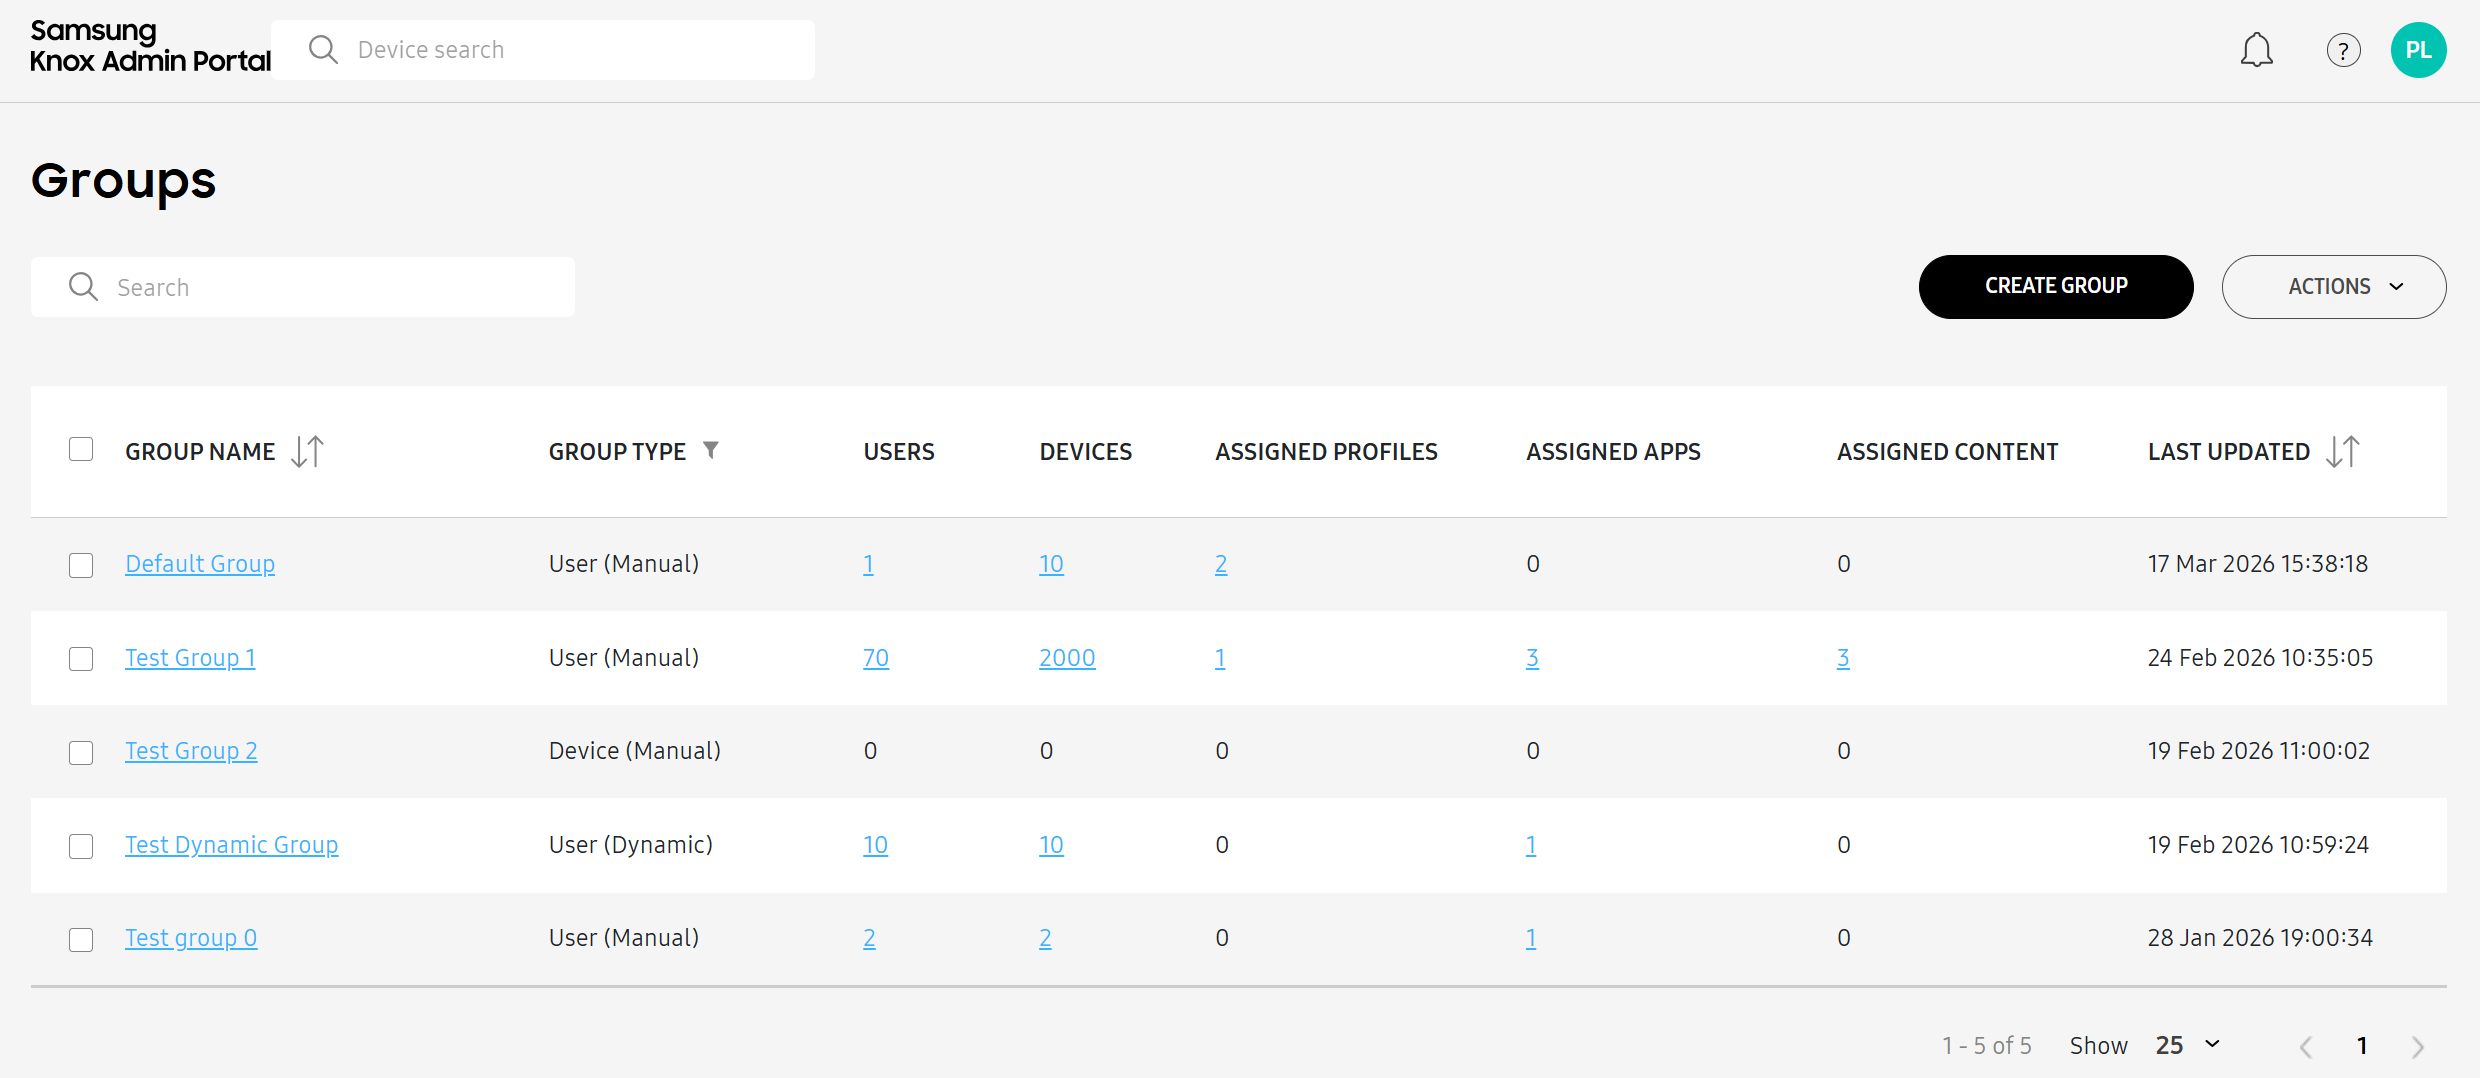
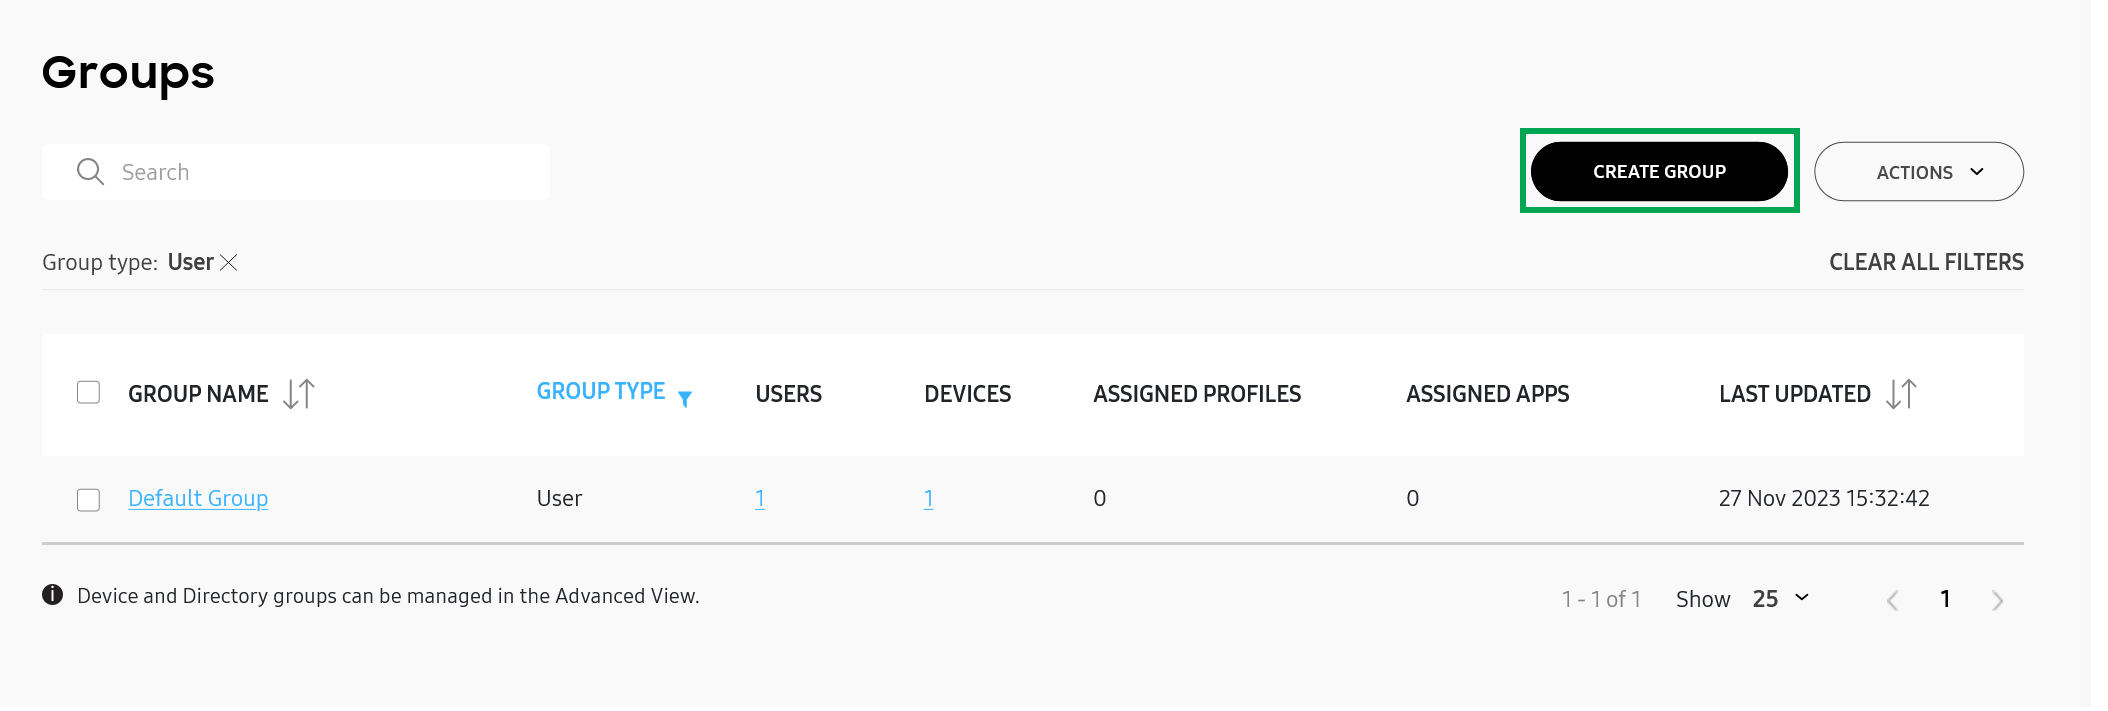
Go to Groups.
-
Click CREATE GROUP. The Create group page opens.
-
Enter a Group name.
-
Select if your group holds users or devices.
-
Under Membership type, select Manual. Then, click NEXT.
-
Select one or more users or devices to add to the new group.
-
Click CREATE.
Your new group displays in the group list, where the GROUP TYPE column indicates both the group type and the membership type.
Create a new dynamic group
To create a group where members are automatically added or removed based on pre-set criteria (up to 100 groups per tenant):
-
Go to Groups.
-
Click CREATE GROUP. The Create group page opens.
-
Enter a Group name.
-
Select if your group holds users or devices.
-
Under Membership type, select Dynamic. Then, click NEXT.
-
Click ADD CONDITION to define a new condition. You must define at least one condition, and up to five.
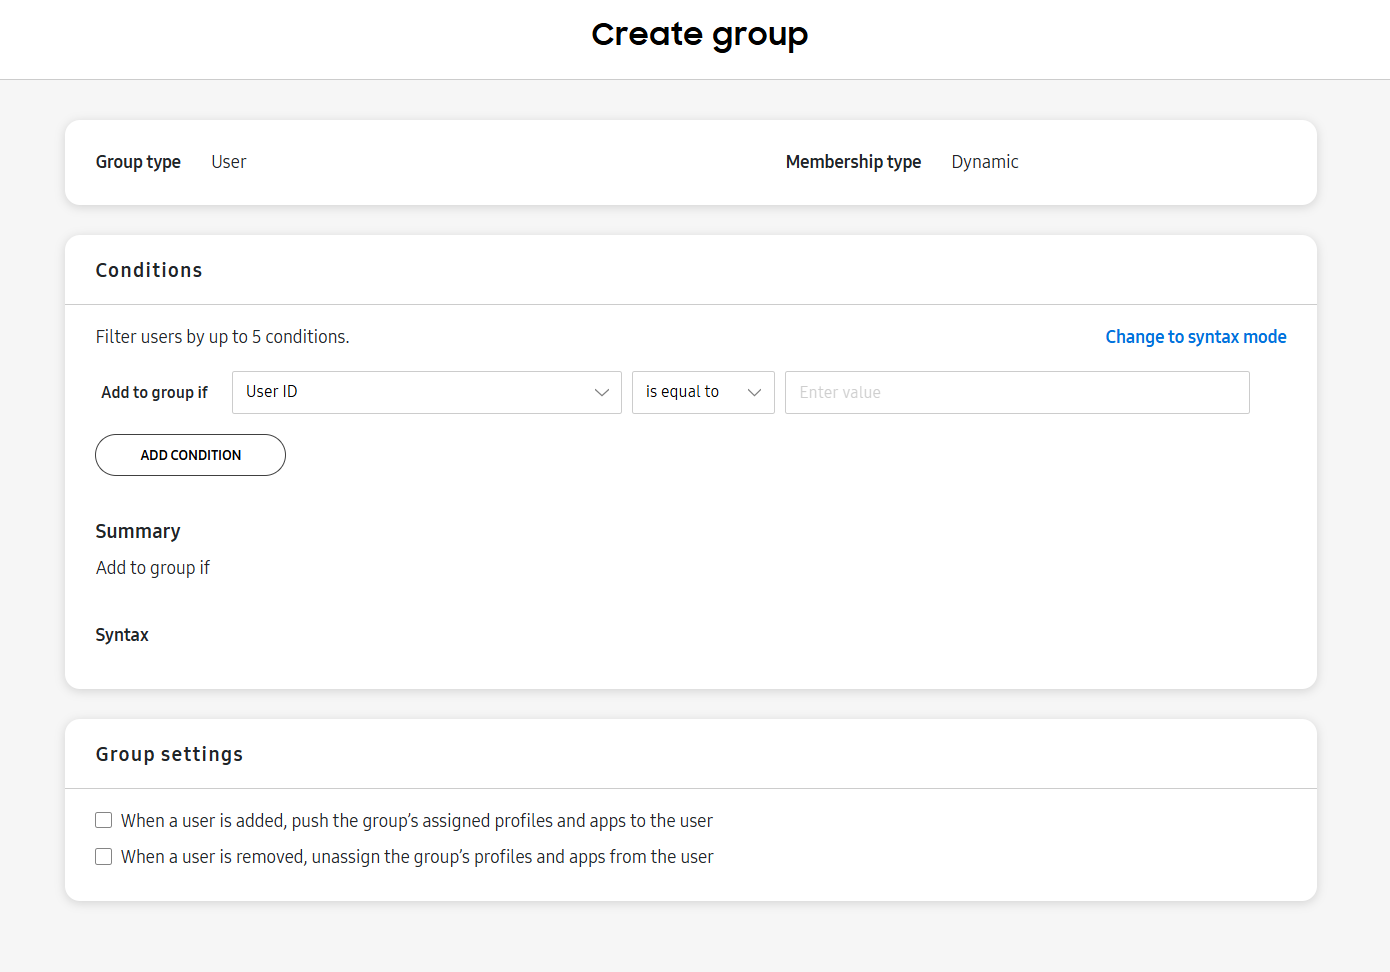
You can click Change to syntax mode to define as many conditions as you’d like using MVFLEX Expression Language (MVEL), up to a maximum of 1000 characters. Click Learn more about defining conditions to view a summary of syntax rules on the page. For an in-depth guide on using MVEL in Knox Manage, see Dynamic group syntax.
-
In the Group settings section, you can select to push the group’s assigned profiles and apps to a newly-added user or device. You can also select to unassign a group’s profiles and apps when a user or device is removed.
- You can click PREVIEW GROUP MEMBERS or PREVIEW DEVICES to test if selected users or devices will be added into the group. Select up to 25 users or devices, then click VERIFY.
-
Click CREATE. A notification with a progress bar displays.
- Click SHOW ALL NOTIFICATIONS to see details of the group creation process.
- Click CANCEL CREATING GROUP to cancel the group creation process.
When the group is successfully created, a confirmation notification displays where you can take various actions, such as assigning a profile or app.
Duplicate a group
Duplicating a group allows you to quickly create new groups with similar configurations, policies, and settings. This saves time by avoiding the need to manually recreate all group parameters, while ensuring consistency across similar organizational units.
Duplicate a manual group
To duplicate a manual group:
-
Go to Groups.
-
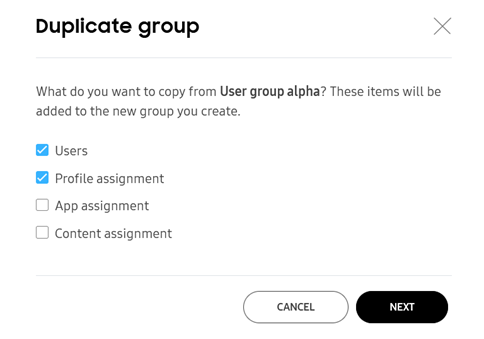
Select a manual group, then click ACTIONS > Duplicate group.
-
Select the information that you want to copy to the duplicate group.
-
Click NEXT. The Create group page opens.
-
Edit the Group name, Group type, and Membership type.
You can edit group members after duplicating the group. If you’re duplicating a User (Manual) group, you can also edit group members on the Create group - Select users page immediately after the Create group page.
-
Click CREATE.
Your duplicate group displays in the group list. The Group successfully added notification appears, prompting you to assign a profile or an app to your group.

Duplicate a dynamic group
To duplicate a dynamic group:
-
Go to Groups.
-
Select a dynamic group, then click ACTIONS > Duplicate group.
-
Choose between duplicating your group as a dynamic or manual group, and the information that you want to copy to the duplicate group.
-
Click NEXT. The Create group page opens.
-
Edit the Group name, Group type, and Membership type.
If you’re duplicating your User (Dynamic) group as a User (Manual) group, you can also edit group members on the Create group - Select users page immediately after the Create group page. Otherwise, you can edit group members after you duplicate your dynamic group as a manual group.
-
Click CREATE AND EDIT CONDITIONS.
-
Edit the conditions as necessary, then click SAVE.
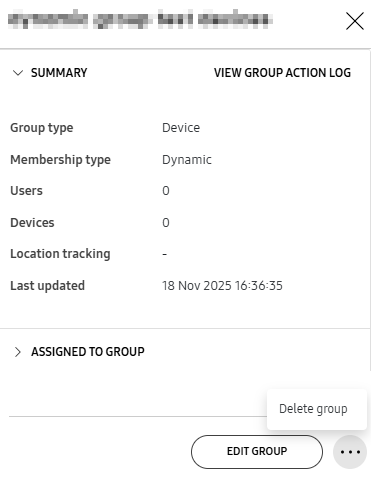
Delete a group
Deleting a group allows you to remove organizational structures that are no longer necessary. This action automatically unassigns all associated profiles, apps, and content from users’ devices, while keeping the users themselves active, helping maintain a clean and up-to-date management environment.
To delete a group:
-
Go to Groups.
-
Select one or more groups to delete.
-
Click ACTIONS > Delete group(s).
Alternatively, you can delete a group by clicking the group name to open the sliding panel > (More actions icon) > Delete group.
On this page
Is this page helpful?