View and manage groups
Last updated June 17th, 2026
After you’ve created a group, you can view or edit its details, such as its group name or its members.
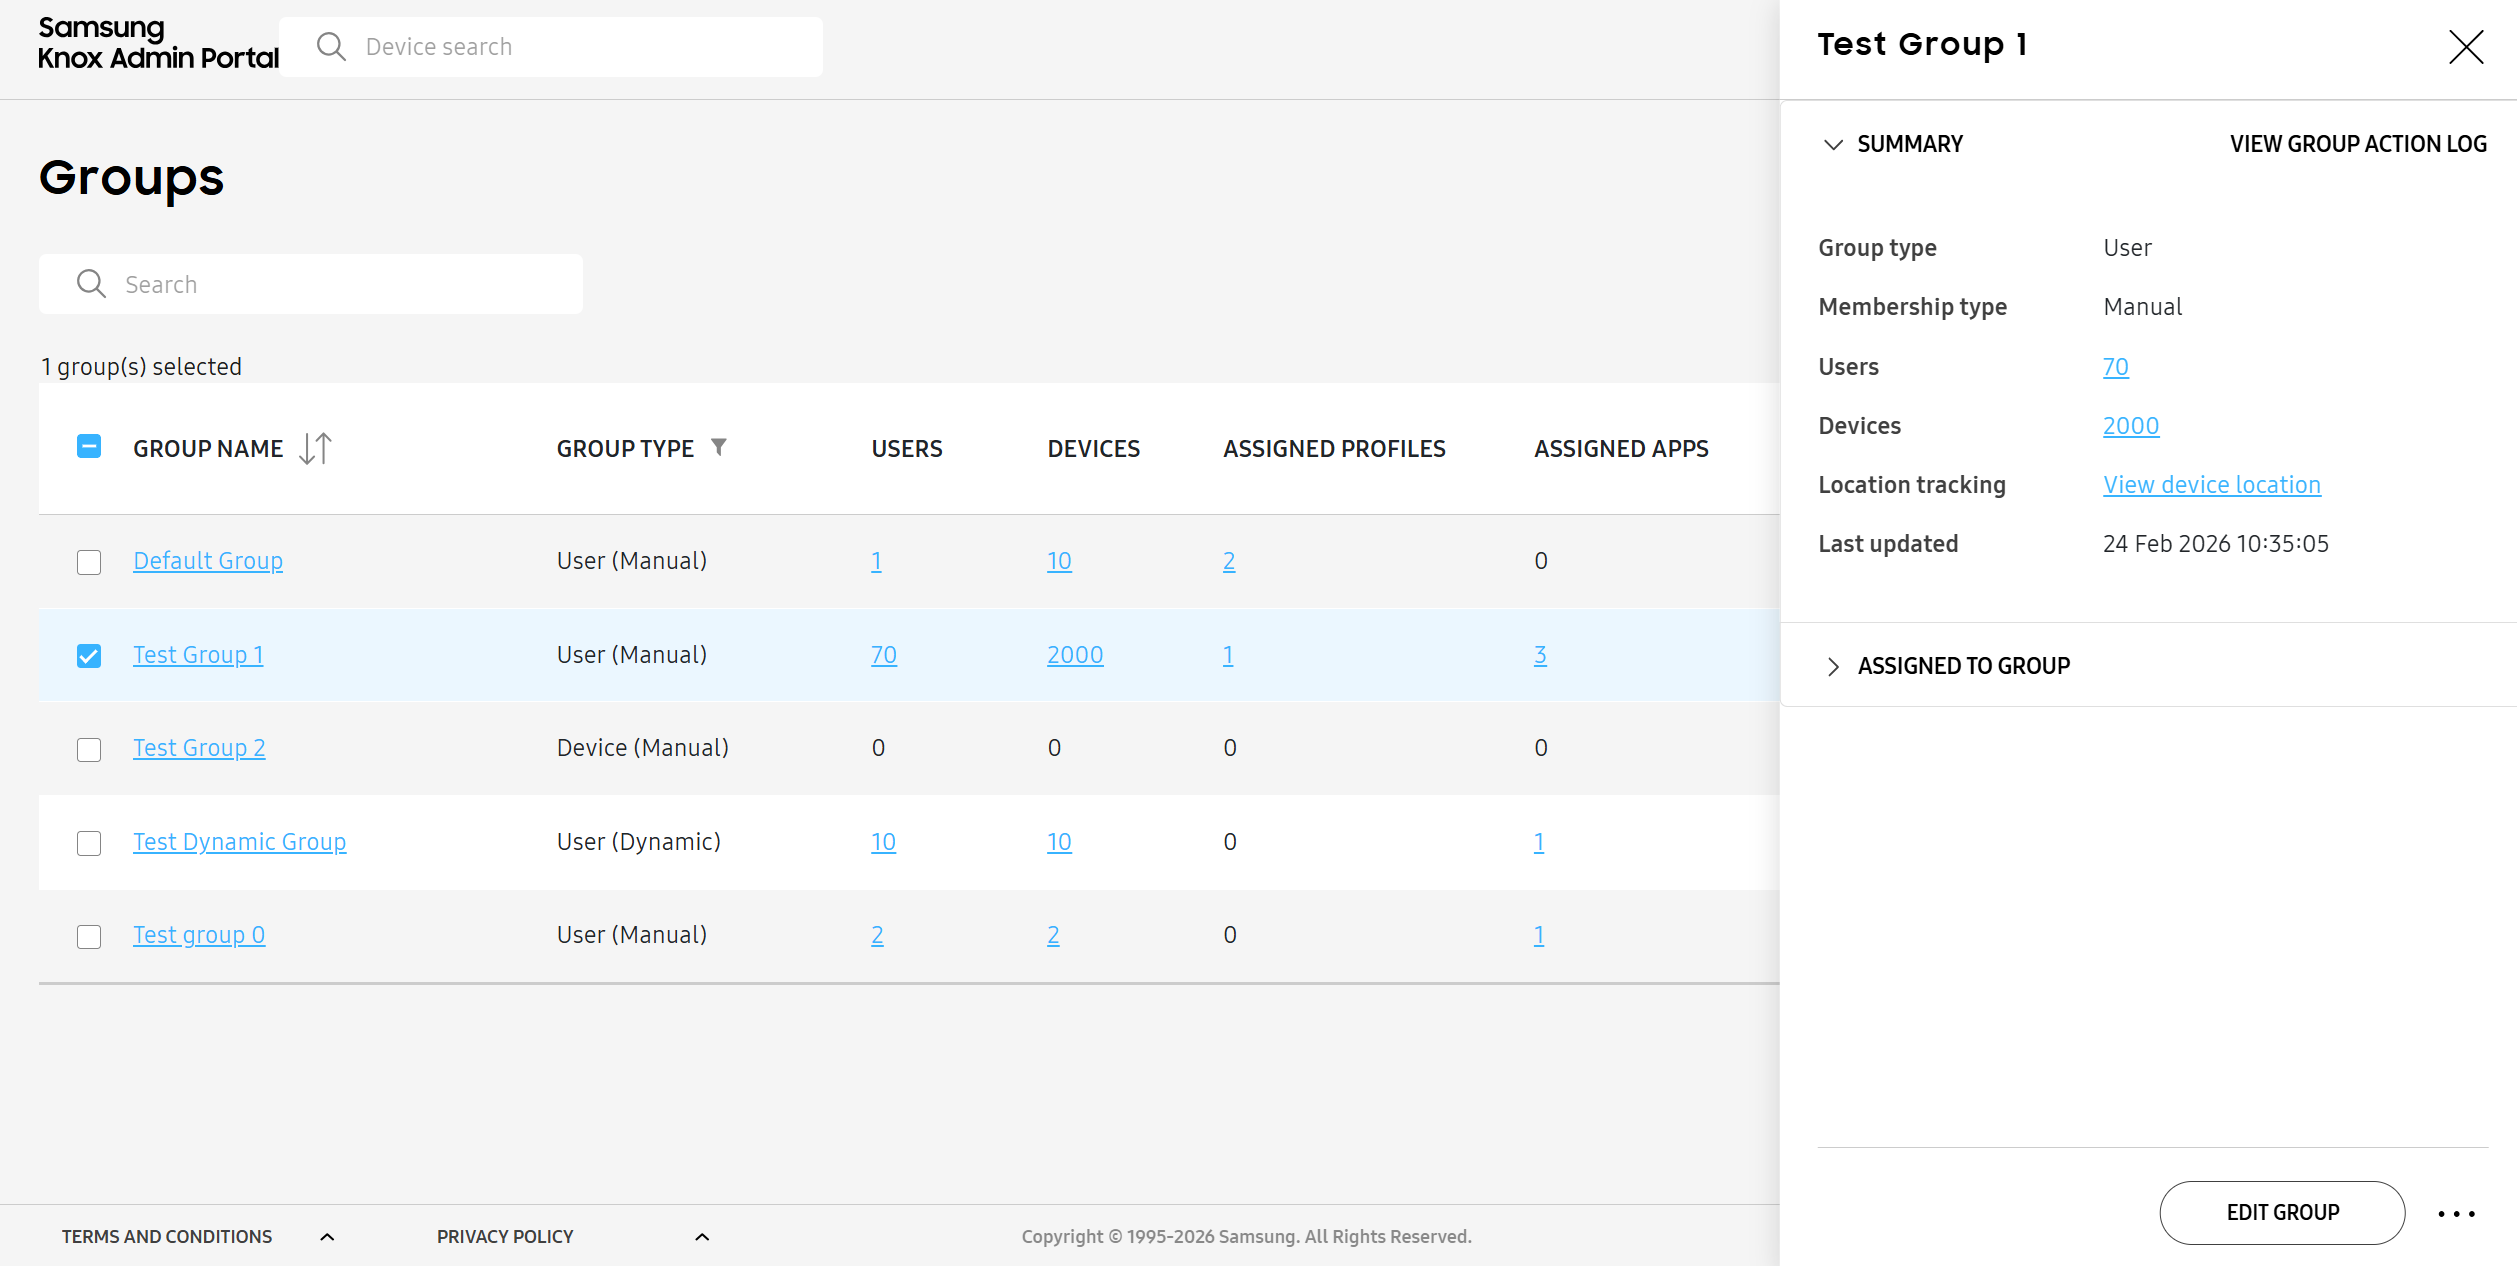
View groups
On the Groups page, you can view all of your groups, sort them by name, and filter them by group type. You can also click the name of a group to open the group details panel, which displays further details.
Manage groups
You can use the ACTIONS drop-down to perform various actions on selected groups, such as assigning apps, assigning profiles, duplicating groups, and deleting groups.
You can also edit a group’s name, or manage its members. Instructions differ depending on whether the group contains users or devices.
Manage users in a user group
There are four ways to manage users in a user group, depending on the membership type:
- Manual group — Add users on the Users page.
- Manual group — Manage users with group actions on the Groups page.
- Manual group — Manage users through the group details panel on the Groups page.
- Dynamic group — Manage users on the Groups page.
Add users to a manual group on the Users page
- Go to Users.
- Select one or more users to add to the group.
- Click ACTIONS > Add users to group.
- Select the manual group to add users to.
- Click ADD USERS TO GROUP.
The new users are added to the manual user group.
Manage users in a manual group with group actions on the Groups page
-
Go to Groups.
-
Select the group you’d like to manage.
To manage users, select only one group at a time.
-
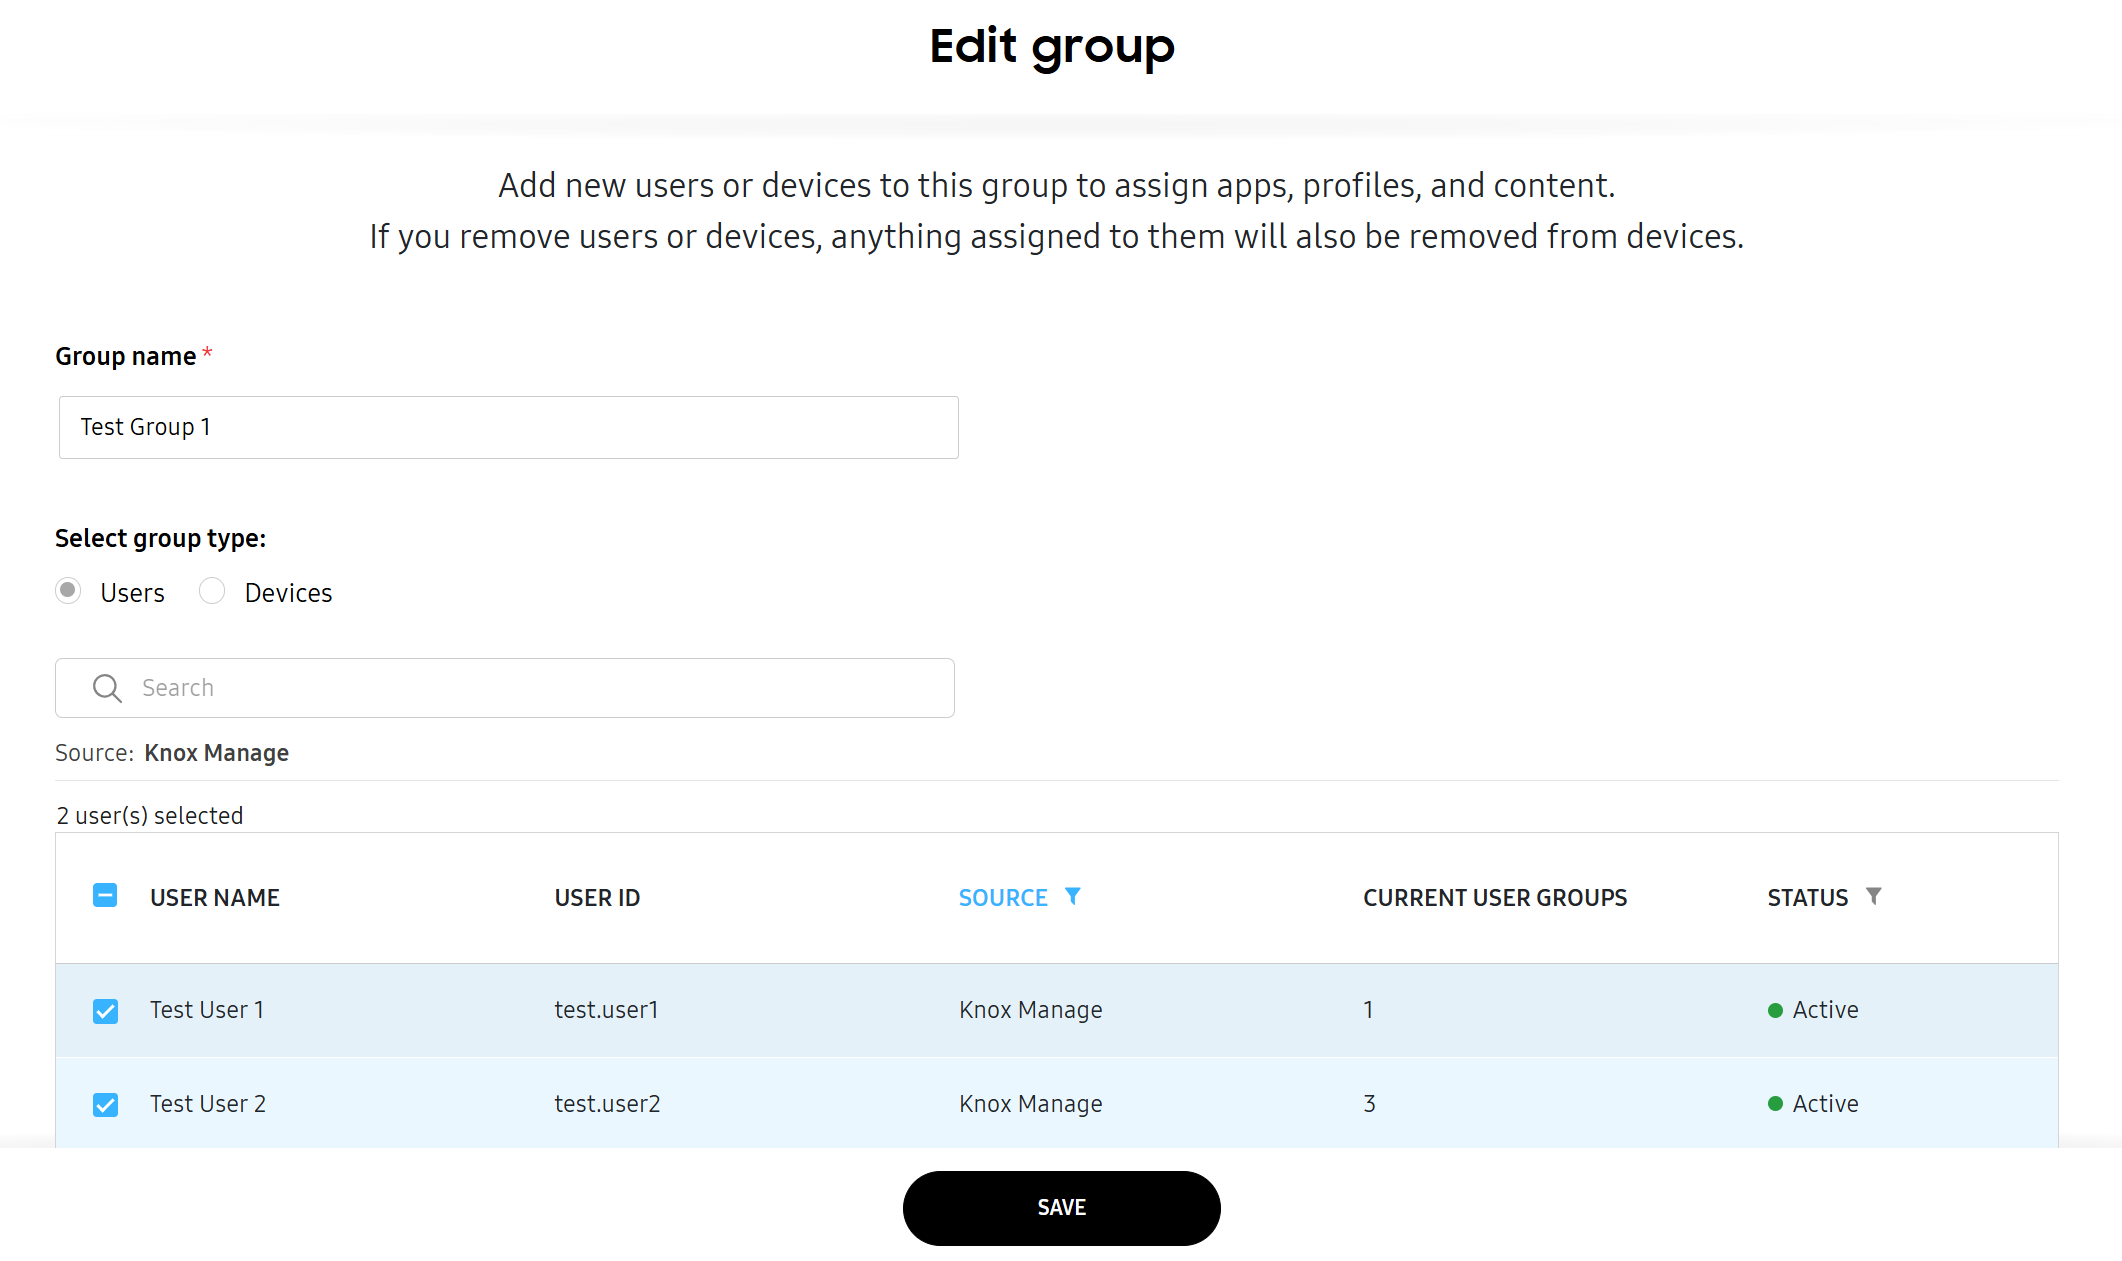
Click ACTIONS > Edit group. The Edit group page opens.
-
Select one or more users to add to, or remove from, the group.
-
(Optional) Click the back arrow to edit basic group information, such as the Group name, then click NEXT.
-
Click SAVE.
The new users are added to, or removed from the manual user group.
Manage users in a manual group through the group details panel on the Groups page
-
Go to Groups.
-
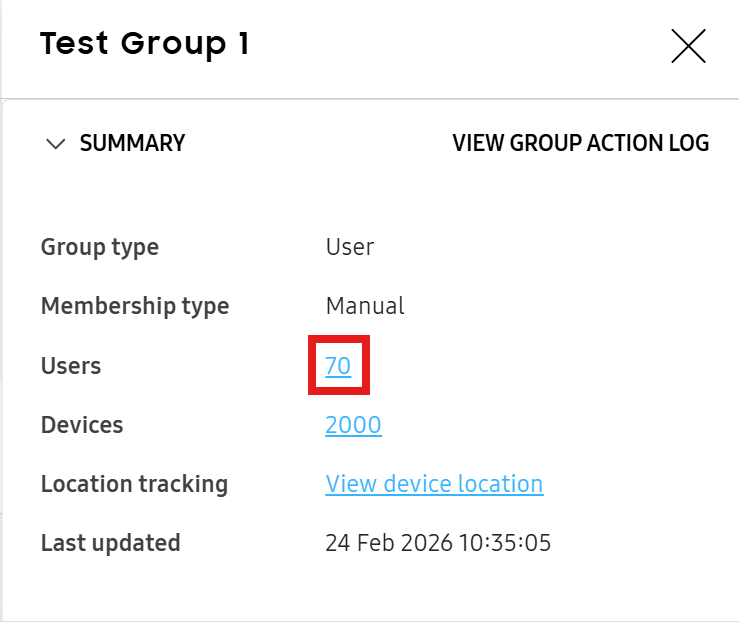
Click the group name of the group that you’d like to manage. The group details panel opens.
-
Under Summary, click the number of users.
-
On the Users assigned to your group page that opens, you can:
- Add a user by clicking ACTIONS > Add users to group. The Add users page opens. Select one or more users, then click ADD USERS.
- Remove a user by selecting them in the list, then clicking ACTIONS > Remove users from group. On the confirmation prompt that opens, click REMOVE.
Manage users in a dynamic group on the Groups page
-
Select a dynamic user group from the groups list.
-
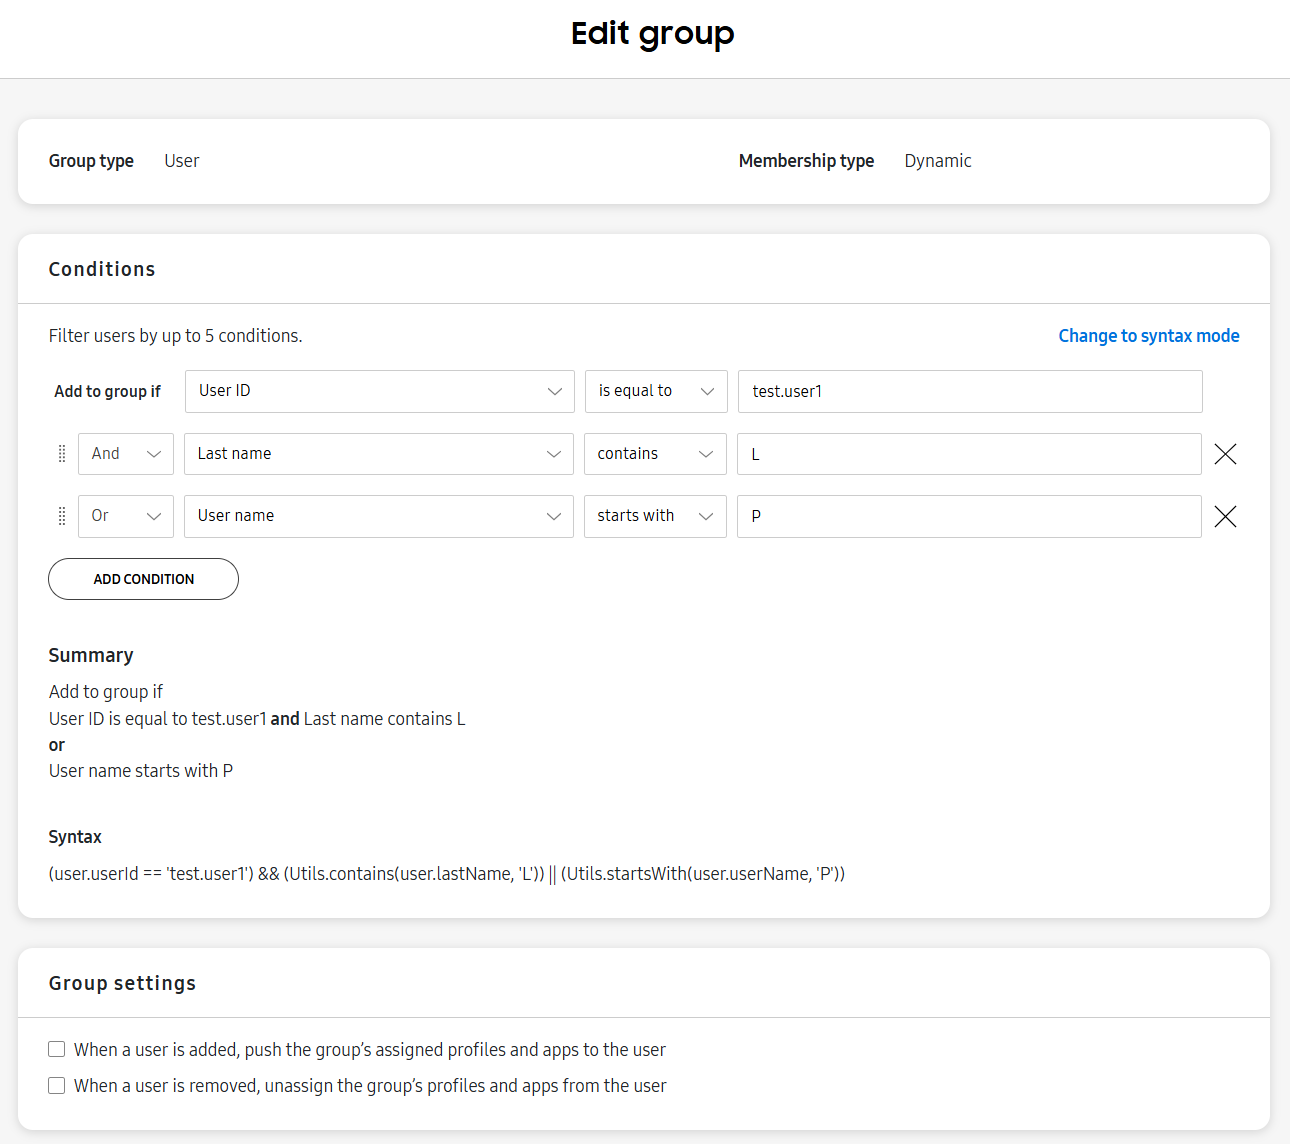
Click ACTIONS > Edit group. The Edit group page opens.
-
Edit the group as required. You can:
- Click ADD CONDITION and specify a new condition in simple mode.
- Click Change to syntax mode to specify a new condition in MVEL.
- Delete a condition to remove users.
- Click PREVIEW GROUP MEMBERS to test if selected users will be added into, or removed from, the group. Select up to 25 users, then click VERIFY.
-
Click SAVE.
The new users are added to, or removed from, the dynamic user group.
Manage devices in a device group
There are three ways to manage devices in a device group, depending on the membership type:
- Manual group — Manage devices on the Groups page.
- Manual group — Manage devices on the Devices assigned to group page.
- Dynamic group — Manage devices on the Groups page.
Manage devices in a manual group on the Groups page
-
Go to Groups.
-
Select the group that you’d like to manage.
To manage devices, you can only select one group at a time.
-
Click ACTIONS > Edit group to open the Edit group page.
-
Select one or more devices to add to, or remove from, the group.
-
(Optional) Click the back arrow to edit basic group information, such as the Group name, then click NEXT.
-
Click SAVE.
The new devices are added to, or removed from, the manual device group.
Manage devices on the Devices assigned to group page
To add one or more devices:
- On the Groups page, click the name of the group that you’d like to manage. The Devices assigned to group page opens.
- Click ACTIONS > Add devices to group to open the Add Devices page.
- Select one or more devices, then click ADD DEVICES.
To delete one or more devices:
- On the Groups page, click the name of the group that you’d like to manage. The Devices assigned to group page opens.
- Select one or more devices in the list, then click ACTIONS > Remove devices from group.
- On the confirmation dialog that opens, click REMOVE.
Manage devices in a dynamic group on the Groups page
- Select a dynamic device group from the groups list.
- Click ACTIONS > Edit group.
- Edit the group as required. You can:
- Click ADD CONDITION and specify a new condition in simple mode.
- Click Change to syntax mode to specify a new condition in MVEL.
- Delete a condition to remove devices.
- Click PREVIEW DEVICES to test if selected devices will be added into, or removed from, the group. Select up to 25 devices, then click VERIFY.
- Click SAVE.
The new devices are added to, or removed from, the dynamic device group.
On this page
Is this page helpful?