Update an existing profile
Last updated September 27th, 2023
End of support for Wearable profiles
Due to the discontinuation of Tizen OS for wearable devices, Knox Configure will no longer support the creation or editing of Wearable profiles after the 26.06 release. If you already have devices configured with a wearable profile, you can continue to use these devices and view their configuration details. However, you won’t be able to update your profile, add or change wearable apps, or assign an existing profile to other wearable devices in the fleet after this release.
IT Administrators can now optionally assign a wearable device profile to a previously configured wearable device and update the profile with a push modification.
When an IT admin pushes an updated configuration, each device utilizing the updated profile receive the configuration update. With this enhancement, an IT admin can select individual devices for push updates from the portal’s PROFILES tab or at the time of profile modification. This helps administrators update just those specific devices intended to receive a specific update and exclude those devices that do not need to receive the updates.
Profile configuration dashboard
To customize your profile, navigate to the Profile configuration dashboard:
-
Within Knox Configure, select Profile from the left-hand navigation menu.
-
Access the Profile configuration dashboard by clicking the profile link of the target profile.

Assign a device to an existing profile
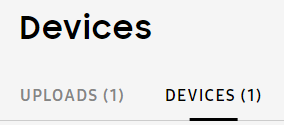
Under Devices, you can view UPLOADS and DEVICES.
- Devices — View all the unassigned wearable devices that have yet to received a profile. Optionally, you can search by exact device ID or custom ID.
- Uploads — View devices organized by the groups in which they were purchased. This grouping option is only available to an upload consisting of 100% compatible models. If you haven’t yet, ensure you’ve first uploaded a device to Knox Configure.
To assign an uploaded device to an existing profile:
-
From the left-hand navigation, select Devices.
-
Click the DEVICES tab.
-
Select the target device(s).
-
Click Actions > Assign profile.
-
Select the target profile’s radio button.
-
Click ASSIGN.
Upon completion, you will receive a success message and are redirected back to the profile page. The new profile displays in the profile list. The listed profile displays how many wearable devices have been configured successfully or have failed. Refer to the device troubleshooting guide to review error codes.
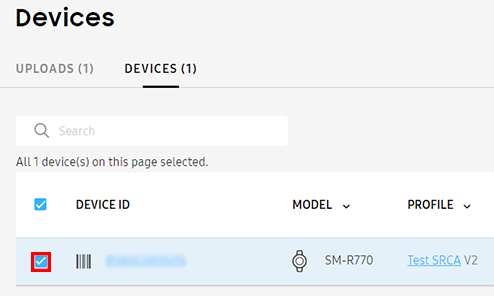
Unassign a device from a profile
When unassigning a device from a profile, it’s important to note that it would result in being unable to control the device until after a profile is configured again, and being unable to send push updates.
To unassign a device from a profile:
-
From the left-hand navigation, select Profiles.
-
Click the link of the target profile.
-
From the Profile configuration dashboard, select DEVICES.
-
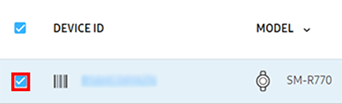
Select the checkbox of the target device.
-
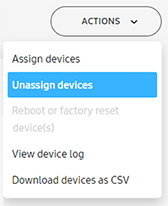
Click ACTIONS > Unassign devices
-
Read the warning message, then click Confirm.
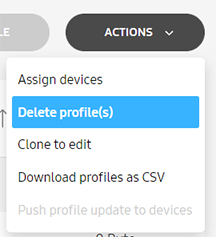
Delete a profile
To delete a profile:
-
From the left-hand navigation, select Profiles.
-
Select a target profile to delete.
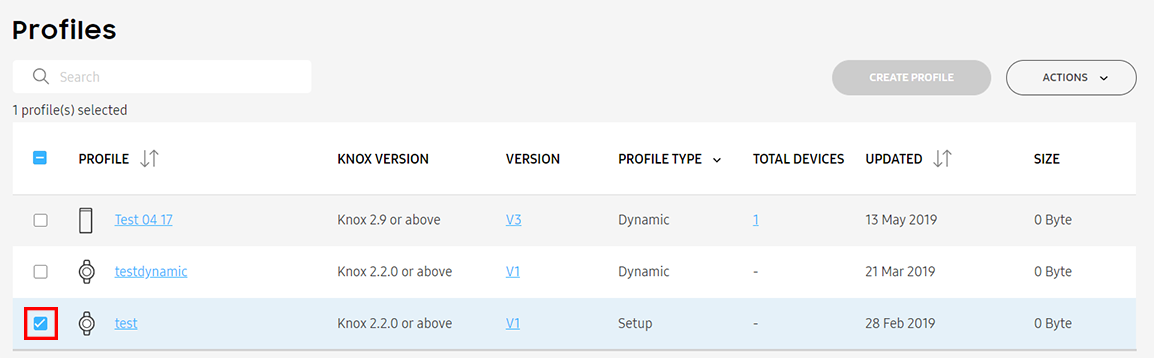
-
Click ACTIONS > Delete profile(s).
-
Read the confirmation message then click DELETE.
If the profile has been selected for auto assignment to devices uploaded by a reseller, it’s a default profile. A prompt will appear in the confirmation message to notify the admin that a default profile is being deleted.
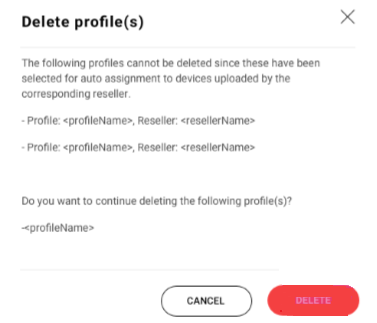
If a profile is assigned to a device, the option to delete profile will be unavailable. Ensure that the profile isn’t assigned to a device prior to deleting.
Change profile assignment
To date, when the profile of configured device is changed or updated, a profile push update is automatically done regardless of the profile’s edition.
An update to Knox Configure now restricts Setup edition profiles from receiving a push update. A Setup edition profile can no longer update another Setup edition profile, nor can a Dynamic edition profile push update a Setup edition profile.
To change a wearable device’s existing profile assignment:
-
Select Profiles from the left-hand navigation menu.
-
Select the check box of an existing profile to replace a device’s currently assigned profile. Keep in mind, the selected replacement profile needs to support the same device model.
-
Select Assign devices from the ACTIONS drop-down menu.
The Assign devices with Profile screen displays the devices with the same model number as those utilizing the profile. By default, the Status column has a filter applied and only devices with an Unassigned status display. If there are no unassigned devices, the table lists devices with other statuses, but only with the same valid model number.
-
Select the checkboxes of the target device(s) intended to receive the profile push update.

-
Select the SUBMIT button from the Assign Devices With Profile screen to proceed with the device profile update.
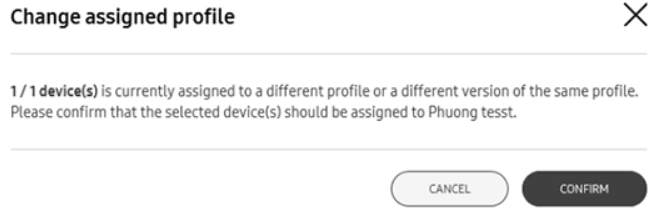
A Change assigned profile screen may display stating a portion of the selected devices are currently assigned a different profile or a different version of the same profile. Additionally, the screen states these selected devices will unassigned from their previous profiles and updated with your selected the selected profile upon confirmation.
-
If displayed, optionally select the Push update without requesting end user consent to push the updates directly to the assigned devices without consent from the device end user. Leave this option unselected affords the device user the ability to approve the profile update before its pushed to their device.
-
Select Confirm to proceed with the device push update and profile overwrite. Select Back to move back to the previous Assign devices with profiles screen.
A profile upload could potentially contain devices with different model numbers and statuses. When this is the case, profiles supporting the different model numbers can be selected from separate device model drop-down menus. Each drop-down menu contains only relevant profiles for the listed device model. Select Submit once profiles are selected for all device models.
Change display configurations
To customize the display options for an existing profile:
- On the left navigation, select Profiles.
- Click on the target profile(s) link.
- On the Profile configuration dashboard, click DISPLAYS.
- Click the EDIT button on the top right corner of the page.
- Select Displays from the dashboard.
- Set the custom display settings.
- Click the SAVE button on the top right corner of the page.
Push an update
To push an update to an existing profile:
-
Select Profiles from the left-hand navigation menu.
-
Select the check boxes of the target device(s) to receive the profile push update.
-
Select Push update from the ACTIONS drop-down menu.
-
Select the Push update without requesting end user consent to push the updates directly to the assigned devices without consent from the device end user.
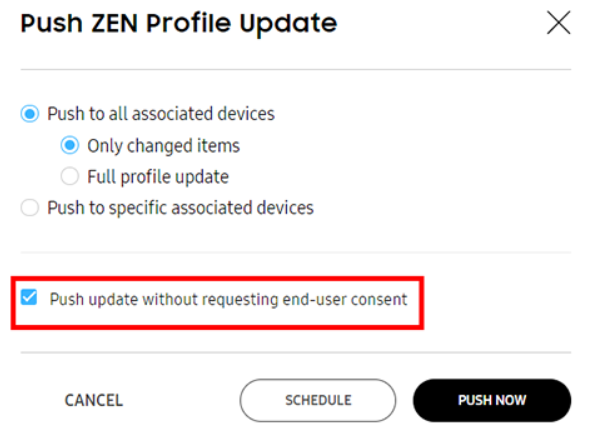
-
Click the PUSH NOW button to proceed with the device profile update.
Pushing an update without requesting end user consent
When an IT admin wants to push a profile to update an application or to change a configuration, they may now do so by selecting the silent update option. Using this option the end user can still keep using their device while the IT admin makes the change or update. Once the update is made, IT admins can also check the status of the update without having to configure the user interface.
Background push updates permitted
This enhancement enables an IT admin or system integrator to push an updated profile or application to Samsung Gear wearable devices without any related UI displaying on the target device. This enables the wearable device user to continue to use their device without interruption, as profile or application updates occur in the background.
Push a reboot/factory reset command
IT admins can push a reboot or factory reset command to wearable devices through the Knox Configure portal. This feature is available to Setup and Dynamic profiles, and can be pushed to specified devices selected by the IT admin or as a bulk action using csv files. Note that the reboot push command feature can be triggered by the IT admin from the KC portal without requiring the device user’s consent.
To push a reboot or factory reset command through the KC portal follow the steps below:
Reboot/factory reset a single device
-
Select Profiles from the left-hand navigation menu.
-
Click on the target profile.
-
Select DEVICES from the Profile configuration dashboard.
-
Select the checkboxes of the target device(s) intended to receive the reboot/factory reset command push.
-
Select Reboot or factory reset device(s) from the ACTIONS drop-down menu.
-
Select one of the following two options:
-
Reboot devices(s) — The device will be reset and maintain configurations previously set by the IT admin.

-
Factory reset device(s) — The device will be reset to factory standard specifications. This means that the device will have no restrictions or customization once reset and will need to be configured again.

-
-
Select CONFIRM.
Bulk reboot/factory reset
-
Select BULK ACTIONS from the left-hand navigation menu.
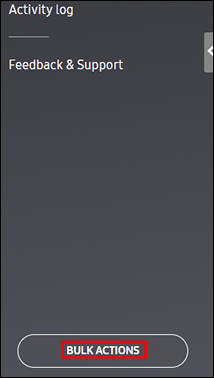
-
Select REBOOT/FACTORY RESET DEVICES from the Bulk actions menu.
-
Follow the directions for STEP 1:
-
Upload the device list using the CSV file template.
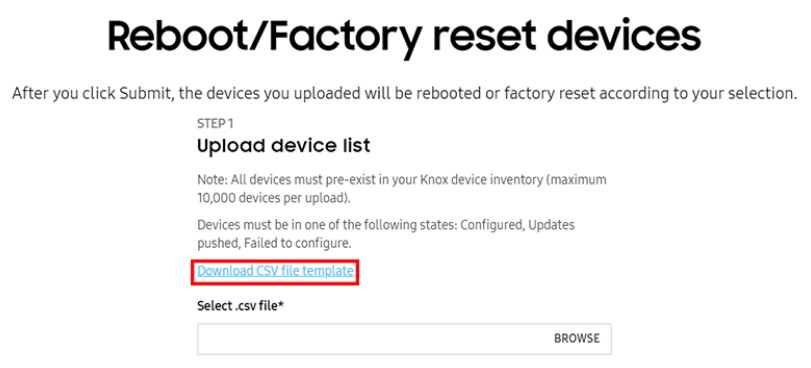
-
Click Browse and select the target CSV file for upload.
-
-
For STEP 2, select one of the following two options:
- Reboot devices(s) — The device will be reset and maintain configurations previously set by the IT admin.
- Factory reset device(s) — The device will be reset to factory standard specifications. This means that the device will have no restrictions or customization once reset and will need to be configured again.
-
Click SUBMIT.
-
Click CONFIRM after reading the warning notification window.
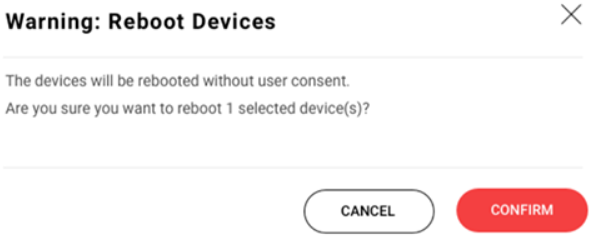
After sending a push command to reboot or factory reset a device, the IT admin will receive a report through the KC portal that the reboot/factory reset has been successful. Note that this report will be separate from the configuration report.
Add a new application
There are two ways to upload an app to an existing profile:
Upload App to the console
You can upload wearable apps to the Knox Configure console by following the steps below:
-
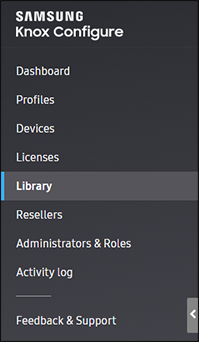
From the Knox Configure dashboard, select Library from the left-hand navigation menu.
-
Select the WEARABLE APPS tab.
-
Click ADD NEW WEARABLE APPLICATION.
-
Click UPLOAD APPLICATION.
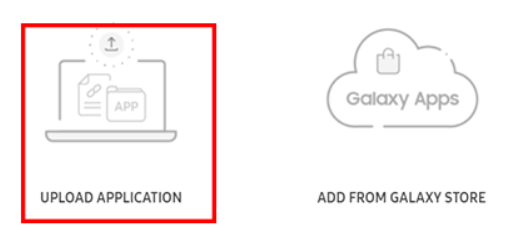
-
Click BROWSE to select a TPK or WGT file.
-
Fill in the following information:
- Application name — Enter a unique name for the in-house app.
- Description — (optional) Provide additional details about the app.
- (Optional) If the file you’re uploading is a watch face app, ensure you select This is a watch face application.
-
Click UPLOAD.
An error message will appear if an unsupported file format is uploaded, or if the file exceeds a specific size, an error message. The supported file format is .tpk.
Add from the Galaxy Store
You can add apps from the Galaxy store by following the steps below:
-
From the Knox Configure dashboard, select Library from the left-hand navigation menu.
-
Select the WEARABLE APPS tab.
-
Click ADD NEW WEARABLE APPLICATION.
-
Select ADD FROM GALAXY STORE.
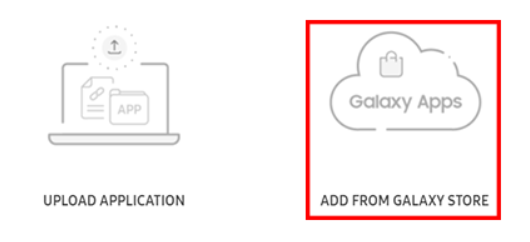
-
In the Add Wearable Application window, fill in the following information:
- Package ID — For Tizen apps, a package ID uses the identifier “org.tizen.message” or “org.tizen.call”. Ensure you enter the package ID, not the application ID. The Application name, App version, icon, and description may autofill upon clicking SUBMIT. If a field remains blank, manually enter the remaining details.
- Application name — Enter a unique name for the in-house app.
- App version — Enter the app version.
- Icon — (optional) Upload an app icon.
- Description — (optional) Provide additional details about the app.
-
Click UPLOAD.
Tizen apps, a package ID uses the identifier “org.tizen.message” or “org.tizen.call”. Ensure you enter the package ID, not the application ID.
Add an new app to an existing profile
Once you’ve uploaded the new app, you can now proceed to add the new app to an existing profile:
-
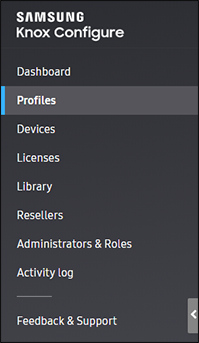
From the Knox Configure Dashboard, select Profiles.
-
Select the target profile by clicking the profile link
-
From the Profile configuration dashboard, click APPLICATIONS.
-
Click EDIT.
-
Highlight the applications you need.
-
Click SAVE.
Once you’ve added the new app to the target profile. You can then push the updated profile to registered devices.
On this page
Is this page helpful?