Enroll a device
Last updated June 24th, 2025
Enrollment allows you to view device data and perform actions like managing tags, locking and unlocking devices, and viewing logs. Depending on the current state of the device, there are three methods to enroll.
-
If the device is new or has been factory reset:
-
If the device is already in use:
A profile must have been assigned to a device before it can be enrolled.
Enroll a device using OOBE
Out-of-box experience (OOBE) is the process of automatically enrolling a device in Knox Configure after its initial setup is complete (after turning on a new or factory reset device). To enroll using OOBE, the device user must:
-
Turn on the device and tap Start.
-
Review the EULA (End User Licence Agreement), Privacy Policy statement, and the consent to send diagnostic data (optional), then tap Agree.
-
Connect to a Wi-Fi or data network.
-
Continue with the phone setup procedure.
-
When the Knox Configure screen appears, tap Next.
-
Review the Knox Configure Privacy Policy, then tap Agree. The profile downloads to the device.
Once the enrollment process is complete, the device updates with the profile’s settings.
Enroll a device using a QR code
To enroll a device that isn’t purchased from a Samsung authorized reseller, the device user must use QR code enrollment.
If you have multiple profiles, QR codes allow device users to choose which profile to enroll with. To learn how to generate a QR code, see the QR code enrollment section of Create a profile.
To enroll using QR code, the device user must:
-
Turn on the device. On the Welcome screen, draw a plus sign (+). The Knox Deployment page appears.
-
Tap QR code and scan the QR code.
-
Review the EULA (End User Licence Agreement), Privacy Policy statement, and the consent to send diagnostic data (optional), then tap Agree.
-
Connect to a Wi-Fi or data network.
-
Continue with the phone setup procedure.
-
When the Knox Configure screen appears, tap Next.
-
Review the Knox Configure Privacy Policy, then tap Agree. The profile downloads to the device.
Once the enrollment process is complete, the device updates with the profile’s settings.
Enrollment through QR code automatically assigns the corresponding profile to the device. The device user can’t assign a different profile to the device using a QR code until the device has been unassigned.
Enroll a device using a browser
Browser enrollment allows a device that is already in use to be enrolled in Knox Configure. To do this, the device user must:
-
Open the device’s browser and go to configure.samsungknox.com.
-
Depending on whether the device has previously been set up with Knox Configure or not, tap either FIRST-TIME ENROLLMENT or RE-ENROLL.
Alternatively, the device user can request the updated profile data from their device.
-
For devices running Android 13 or higher, the user can pull a profile update using Device settings > Advanced features > Configuration service > Profile information > Update.
-
For devices running older versions of Android, the user can pull a profile update using Device settings > About phone > Software information > Knox Configure > Apply latest profile.
Unassign a device
When unassigning a device from a profile, be aware that an admin is unable to manage the device until after a profile is configured again. An admin is also unable to send push updates until a new profile assignment is made.
A device can be unassigned from its assigned profile when:
-
A customer manually unassigns the device from its profile.
-
The device is using a staggered license and the service period has ended.
-
The device is using a non-staggered license and the 30-day license expiration grace period has ended.
Additionally, when a device is unassigned from its profile, the following occurs regardless of profile type:
-
The Knox Configure server sends a push update to revoke policies.
-
The Knox Configure client keeps apps and content.
-
The Knox Configure client will not be uninstalled.
-
A factory reset is allowed.
Devices can be unassigned from the DEVICES screen when the selected device has a status of Profile assigned, Error, Canceled by user, Configured, Failed to configure, or Updates pushed.
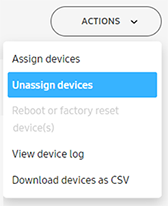
To unassign a device from its current profile assignment:
-
Click Devices from the left-hand navigation menu.
-
Select the device from which you want to unassign its current profile.
-
Click ACTIONS, then click Unassign profile.
-
Review the warning statement on the Unassign profile screen, then click CONFIRM to unassign the profile from the device.
On this page
Is this page helpful?