Deploy devices
Last updated September 27th, 2023
End of support for Wearable profiles
Due to the discontinuation of Tizen OS for wearable devices, Knox Configure will no longer support the creation or editing of Wearable profiles after the 26.06 release. If you already have devices configured with a wearable profile, you can continue to use these devices and view their configuration details. However, you won’t be able to update your profile, add or change wearable apps, or assign an existing profile to other wearable devices in the fleet after this release.
Once a profile is configured, it can be assigned to specific wearable devices. Wearable device assignment is the final step in the configuration process, though wearable devices can be locked by carriers and resellers post deployment.
Prerequisites
Note that for a wearable device to receive push updates, it must first be connected to a network. Ensure that the user is connected through the following options:
- Without phone connection (WPC) mode
- Connect the wearable device to a network by Wi-Fi and receive push updates set by the IT admin through an access point (AP).
- Or connect the wearable device to a mobile network.
- Bluetooth companion mode
-
Connect the wearable device to a network through a mobile device when using companion mode.
Companion mode overrides the watch’s Wi-Fi configurations and always on/off policies set by the IT admin since it automatically follows the mobile device’s network connections. To prevent configuration override, you can disable Bluetooth to prevent the user from switching from WPC to companion mode.
-
Assign a device to a profile
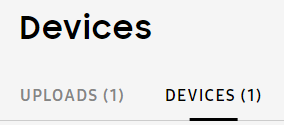
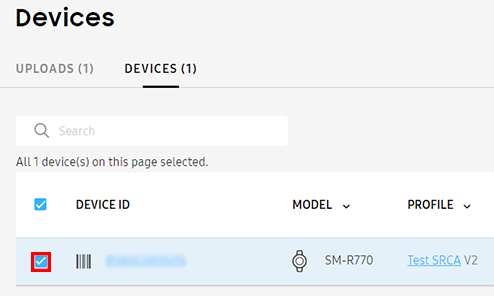
Under the Devices page, you can view UPLOADS and DEVICES.
- Devices — View all the unassigned wearable devices that have yet to received a profile. Optionally, you can search with various filters.
- Uploads — View devices organized by the groups in which they were purchased. This grouping option is only available to an upload consisting of 100% compatible models. If you haven’t yet, ensure you’ve first uploaded a device to Knox Configure.
To assign an uploaded device:
-
From the left-hand navigation, select Devices.
-
Click the DEVICES tab.
-
Select the target device(s).
-
Click Actions > Assign profile.
-
Select the target profile’s radio button.
-
Click ASSIGN.
Once a profile is assigned you’ll receive a success message, and you’ll be able to control the device through custom profile configurations. On the Profiles page, you’ll be able to find the profile list which displays how many wearable devices have been configured successfully or how many have failed.
A profile push can be completed by the end user pressing Finish on their device, or after a 5 second auto-timer expiration. The device FINISH and RESTART buttons still display, but there is a 5 second timer underneath them to complete the action with less user input. If there is no user input before the 5 second timer countdown is completed, the device screen automatically moves to the device home screen or restarts. This reduces the labor required with large deployments, where the FINISH or RESTART button must be pressed to deploy each device.
Enroll a device
Use Knox Configure:
To reduce the labor required with large deployments, a wearable device profile push can be completed by the end user pressing FINISH on their device, or after a 5 second auto-timer expiration. The device FINISH and RESTART buttons still display, but there is a 5 second timer underneath them to complete the action with less user input. If there is no user input after the 5 second timer countdown, the device screen automatically moves to the device home screen or restarts.
- Turn on the wearable device and go through the device setup procedures. Factory reset the wearable device if the wearable device has already been in use.
- If you have not done so already, connect to a Wi-Fi network. Knox Configure prompts you to begin the enrollment process for the wearable device.
- Tap Continue. Read the EULA and tap Agree to enroll the device.
- The following processes occur:
- The wearable device downloads its target profile
- If their are Tizen-based wearable apps are in the profile, the device downloads and installs those apps
- Knox Configure activates a license
- The wearable device downloads other required content
- When the wearable device is successfully enrolled, a confirmation screen displays. If configured as a ProKiosk, a reboot is required.
View device details and device logs
To view a wearable device’s details and logs:
-
Select Devices from the left-hand navigation menu.
-
Under the DEVICE ID column, click the link to view the target device’s details.
-
Refer to the and select the link of a listed device.
-
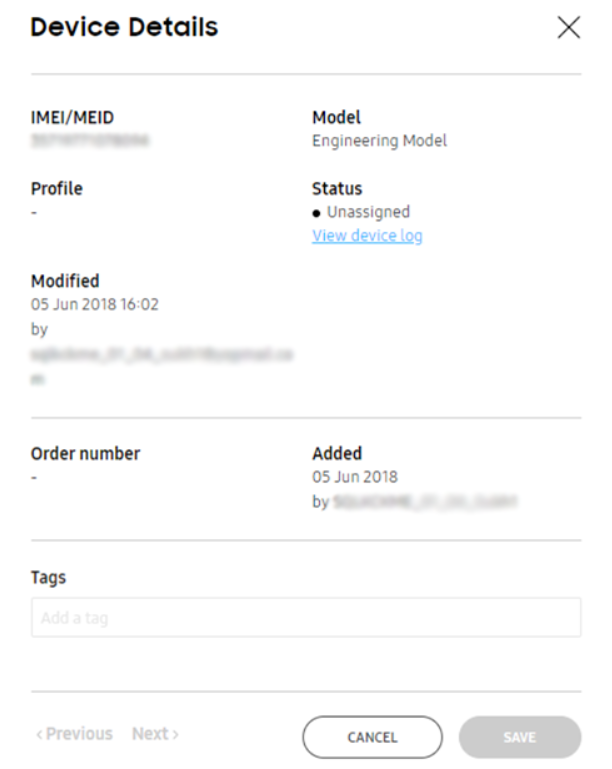
Refer to the following information for the selected device, or select < Previous or Next > from the top, right-hand side of the screen to scroll to the next listed device’s details screen.
- IMEI/MEID — Lists the device’s unique International Mobile Equipment Identity (IMEI) number or mobile equipment identifier (MEID).
- Model — Lists the model designation applied to the device upon assignment of the device’s profile.
- Profile — Lists the name of the selected device’s assigned profile. To review Knox Configure profile in formation in greater detail, go to: Create profiles.
- Status — Displays the configuration and/or profile assignment status of the selected device.
- Modified — Lists a data stamp when the selected device last had a configuration or profile update.
- Order number — Lists the selected device’s system assign order number and the date the order occurred.
- Added — Lists a date stamp when the device was added as a Knox Configure managed device and who added it.
- Tags — Lists any existing tags applied to the selected device. Tags allow you to organize and categorize devices. If required, select Add a tag to apply a new tag to this device.
-
Select the View device log link for a configuration and profile assignment event history for the selected device.
-
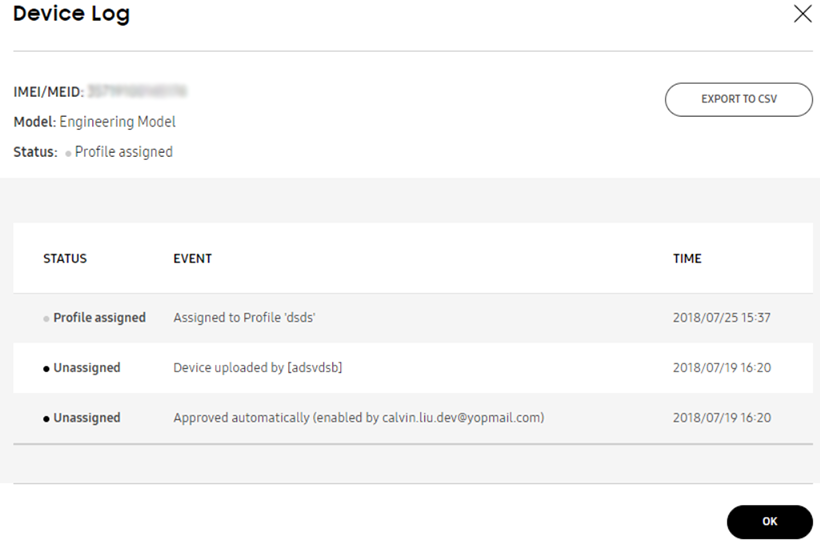
Refer to the following Device log information for the selected Knox Configure managed device:
- STATUS — Lists the configuration or profile assignment activity logged on behalf of the selected device.
- EVENT — Lists the specific device configuration or profile assignment event logged on behalf of the selected device. Errors and warnings can display selectable links to review the error or warning event in greater detail.
- TIME — Lists a date stamp when the displayed event occurred.
- EXPORT TO CSV — Archive the device log file in CSV format
-
Select OK to return to the selected device’s Device details screen.
On this page
Is this page helpful?