Step 2 — Add a license
Last updated July 19th, 2024
After accessing the console, the next step is to add a license. You can generate a license file with your license key and your server’s hardware serial number through the self-service Knox E-FOTA On-Premises Resources web page > Download License Files.
License keys can’t be reused once they’ve been used to generate a license file.
Use these commands to get the hardware serial number of your server machine:
On Windows Powershell:
Get-WmiObject -class Win32_Bios | Out-String -stream | Select-String -Pattern Serial
On Linux:
sudo dmidecode -t2 | grep Serial
Once you’ve prepared your generated license file, you can add the license:
-
In the Knox E-FOTA On-Premises console, click your account icon.
-
In the menu that’s shown, click Settings.
-
The navigation sidebar pane refreshes with a new set of tabs. Click License.
-
Click UPLOAD LICENSE.

-
In the popup that’s shown, click BROWSER to launch the file explorer, where you can locate your license file to upload. Select the file, then click Open.
-
Click UPLOAD to finish uploading the license.
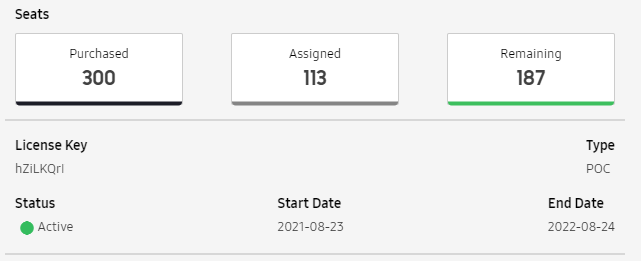
The License screen then displays the details of your license.
Refer to Manage licenses to learn more.
Tutorial progress
You’ve completed 2 of 7 steps!
On this page
Is this page helpful?