Add devices
Last updated November 19th, 2025
When you have an active Knox E-FOTA license, you can add devices to Knox E-FOTA.
Devices that you add to Knox E-FOTA are placed in a candidate pool of devices. From this pool, you can select devices that you want to enroll in Knox E-FOTA. Devices you enroll consume license seats. Once you’ve enrolled devices you can then assign them to update campaigns.
There are different ways to add devices:
Register devices purchased from a reseller
When you purchase devices from a reseller, you must provide them with your Knox Customer ID, which can be found on the Resellers page. The reseller uses this ID to upload devices to your account. You can manually approve their uploads or auto-approve all uploads from a reseller. To learn more, see how you can Manage resellers.
After you approve a reseller upload, you must do one of the following steps before they appear in the Knox E-FOTA device list:
- Go to the Knox Admin Portal Devices page and select your devices. Then, click Actions > Assign campaign to assign them to a campaign.
- Go to the Enrollment page and click Create profile. Select Knox E-FOTA, then assign this enrollment profile to your devices.
To learn more, see how to Register devices to your Knox cloud services.
Add device groups from your EMM
For devices that were synced from an EMM, most operations can only be performed in the EMM groups tab.
You can add device groups from your EMM to Knox E-FOTA. The device groups that you add are automatically synced from the EMM periodically every 24 hours.
At a high level, you need to do the following:
- Perform the prerequisite procedure to obtain authentication information from your EMM.
- Connect to your EMM.
To learn more, see About EMM Groups.
Add devices by uploading a CSV file
With Knox E-FOTA, you can directly add devices to the admin portal by uploading a CSV file containing the IMEIs or serial numbers of the devices.
-
Sign in to the Knox Admin Portal. In the left sidebar, click Knox E-FOTA.
-
In the left navigation bar, click Devices.
-
Under the Devices heading, click the Bulk Actions tab.
-
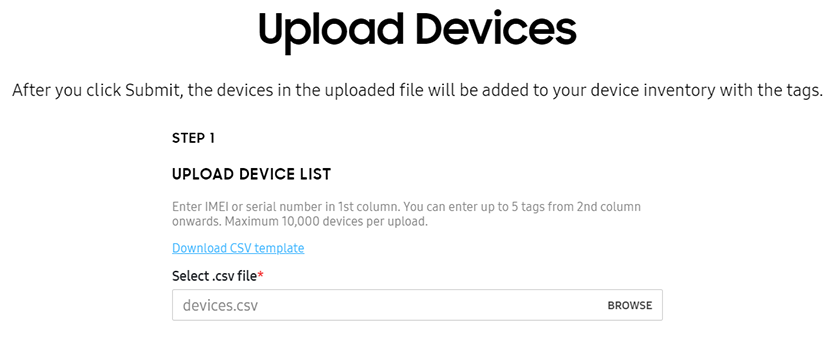
Select UPLOAD DEVICES.
-
Click Download CSV template and open the downloaded file.
-
In the first column, enter the IMEIs or serial numbers of the devices you want to upload. Enter one IMEI or serial number per row.
Do not include a header row, do not leave any rows empty, and do not duplicate IMEIs or serial numbers.
-
Save the file.
-
In the Knox E-FOTA console, click Browse and select your CSV file.
-
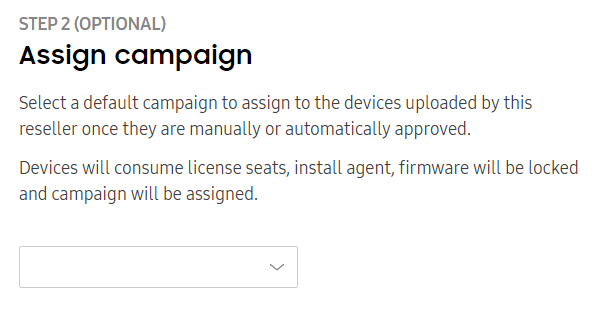
(Optional) Select a default campaign to assign devices to. Devices uploaded by this reseller will be automatically assigned to the default campaign once they are approved. If you skip this step, you can still assign a campaign at any time.
-
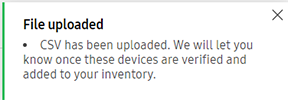
Click Submit. A message appears confirming that the CSV file was uploaded. When your devices are verified and added to your inventory, they’ll appear in Devices with the status Not enrolled.
Tutorial Progress
You’ve completed 3/5 steps! Go to the next step.
On this page
Is this page helpful?