Create layout
This section shows you how to create the layout for the app.
Create the buttons and Textview
This app contains 5 buttons.
- createAndroidProfileBtn — prompts the user to create an Android work profile.
- activateLicenseBtn — activates the Knox KPE license key.
- deactivateLicenseBtn — deactivates the Knox KPE license key.
- toggleCameraBtn — Invokes a policy that enables or disables the camera in the work profile.
- enforceMfaBtn — Invokes a policy that enforces multi-factor authentication in the work profile.
Open activity_main.xml and insert the following XML markup to create your screen layout:
<RelativeLayout xmlns:android="http://schemas.android.com/apk/res/android"

    xmlns:tools="http://schemas.android.com/tools"
    android:id="@+id/mainpage"
    android:layout_width="match_parent"
    android:layout_height="match_parent"
    tools:context="com.samsung.knox.example.knoxworkspace.MainActivity">

    <TextView
        android:id="@+id/logview_id"
        android:gravity="bottom"
        android:layout_width="320dp"
        android:layout_height="230dp"
        android:textColor="#3F51B5"
        android:background="@drawable/background"
        android:scrollbars="vertical"
        android:paddingStart="10dp"
        android:paddingEnd="10dp"
        android:layout_marginTop="22dp"
        android:layout_alignParentTop="true"
        android:layout_centerHorizontal="true" />

    <Button
        android:id="@+id/createAndroidProfileBtn"
        android:layout_width="210dp"
        android:layout_height="wrap_content"
        android:layout_marginTop="25dp"
        android:layout_below="@+id/logview_id"
        android:layout_centerHorizontal="true"
        android:text="@string/android_po" />
    <Button
        android:id="@+id/activateLicenseBtn"
        android:layout_width="210dp"
        android:layout_height="wrap_content"
        android:layout_alignStart="@+id/createAndroidProfileBtn"
        android:layout_below="@+id/createAndroidProfileBtn"
        android:text="@string/activate_license" />

    <Button
        android:id="@+id/deactivateLicenseBtn"
        android:layout_width="210dp"
        android:layout_height="wrap_content"
        android:layout_alignStart="@+id/activateLicenseBtn"
        android:layout_below="@+id/activateLicenseBtn"
        android:text="@string/deactivate_license" />

    <TextView
        android:id="@+id/StandardText"
        android:layout_width="wrap_content"
        android:layout_height="wrap_content"
        android:layout_below="@id/deactivateLicenseBtn"
        android:layout_centerHorizontal="true"
        android:layout_marginTop="20px"
        android:text="Call Standard permission API"
        />

    <Button
        android:id="@+id/toggleCameraBtn"
        android:layout_width="200dp"
        android:layout_height="wrap_content"
        android:layout_below="@+id/StandardText"
        android:layout_centerHorizontal="true"
        android:text="@string/toggle_camera" />

    <TextView
        android:id="@+id/PremiumText"
        android:layout_width="wrap_content"
        android:layout_height="wrap_content"
        android:layout_below="@+id/toggleCameraBtn"
        android:layout_centerHorizontal="true"
        android:layout_marginTop="20px"
        android:text="Call Premium permission API" />

    <Button
        android:id="@+id/enforceMfaBtn"
        android:layout_width="200dp"
        android:layout_height="wrap_content"
        android:layout_below="@+id/PremiumText"
        android:layout_centerHorizontal="true"
        android:text="@string/enforce_mfa" />

</RelativeLayout>
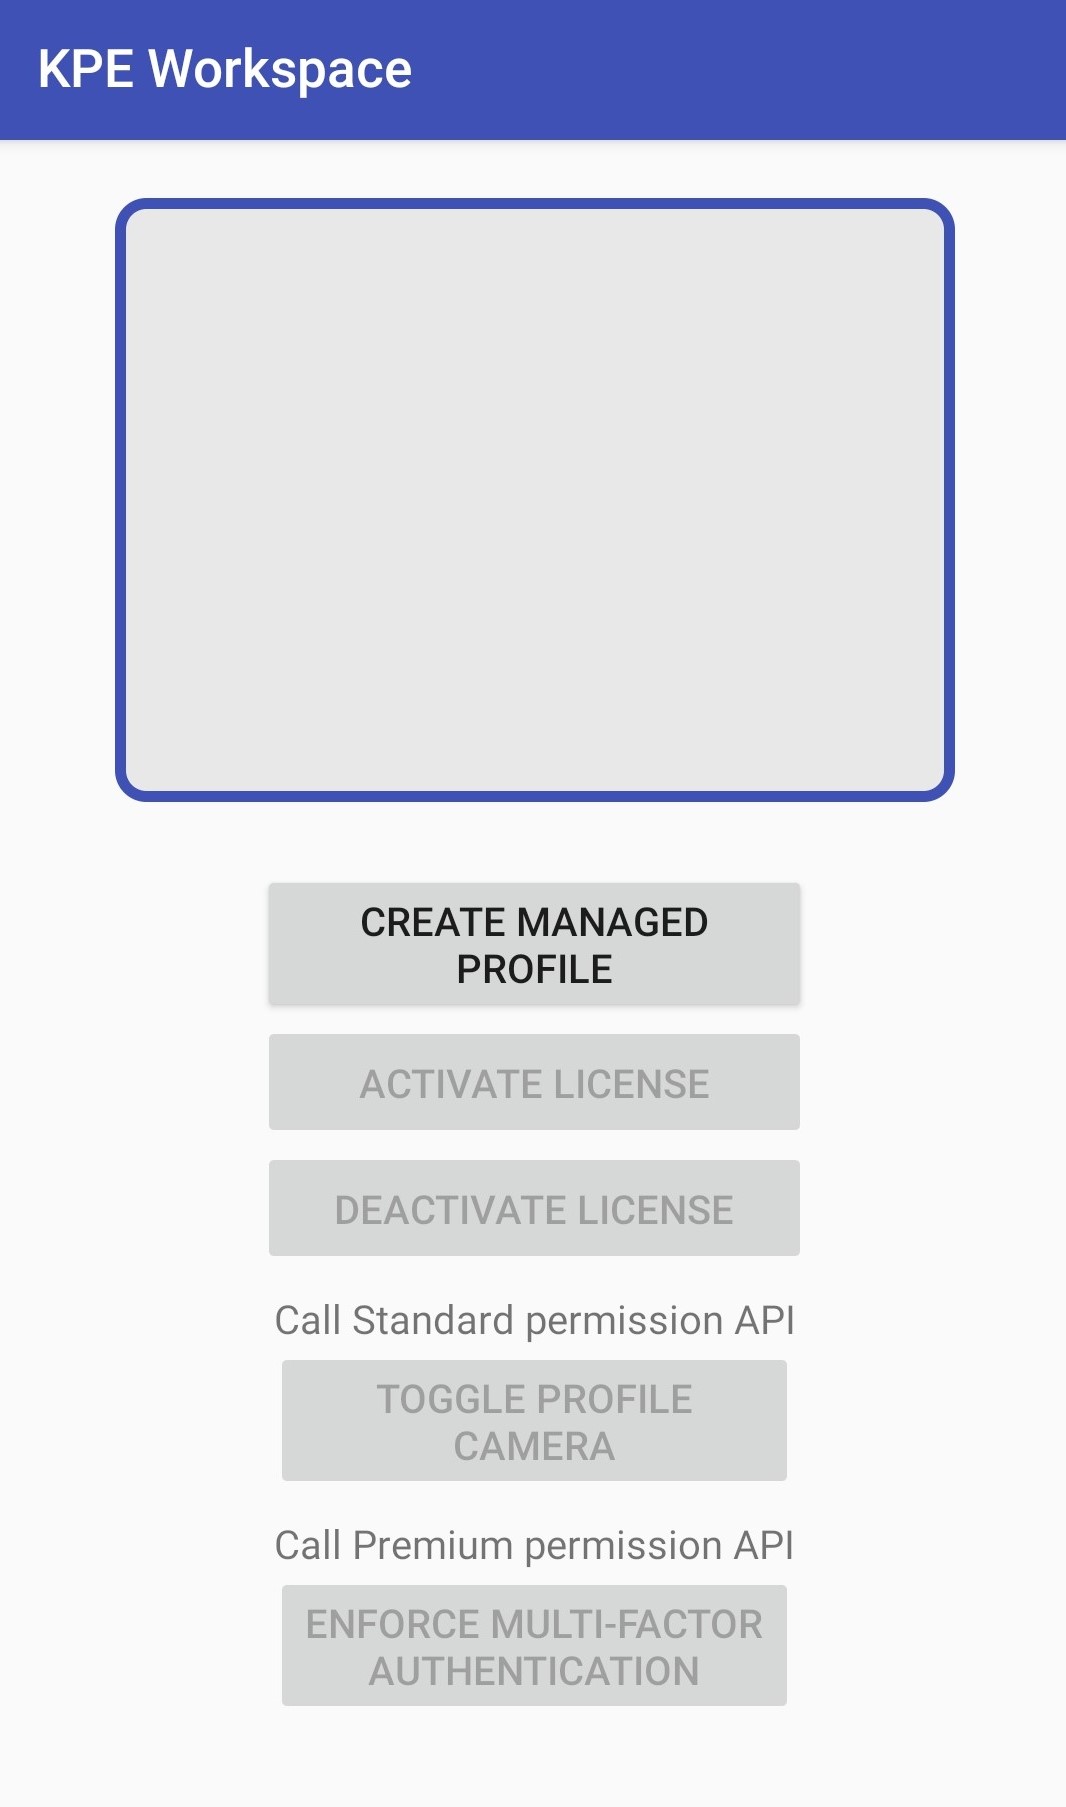
Depending on your device’s Knox version, you should now see 5 or 6 buttons in the middle of the screen:
- CREATE MANAGED PROFILE
- ACTIVATE LICENSE
- DEACTIVATE LICENSE
- TOGGLE PROFILE CAMERA
- ENFORCE MULTI-FACTOR AUTHENTICATION
You will later assign methods to these buttons to control their respective actions. The
TextViewat the top of the screen also displays log messages.
To resolve the @string errors, copy the strings.xml file from the sample app into your project.
For information on creating Android layouts, see Create your first Android app.
Tutorial progress
You’ve completed 1 of 6 steps!
NextOn this page
Is this page helpful?