Create layout
This section describes how to create the app layout.
Create the buttons and Textview
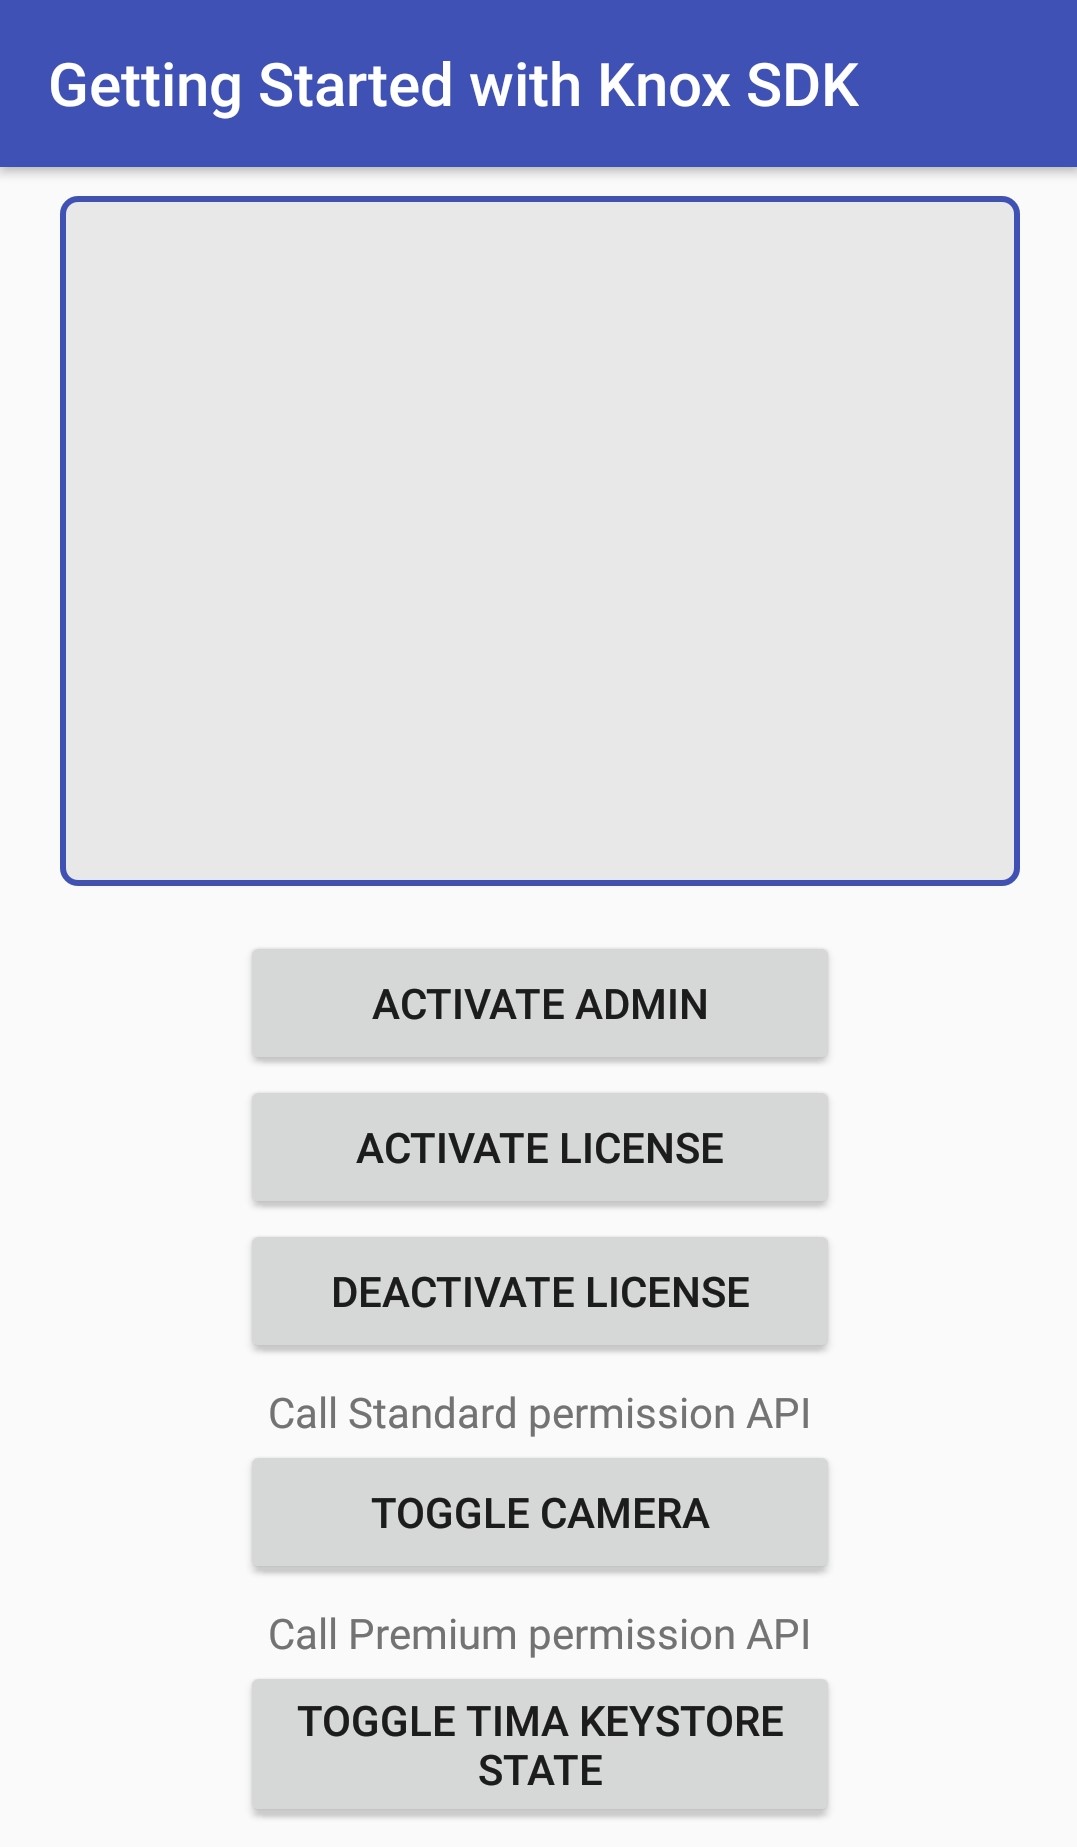
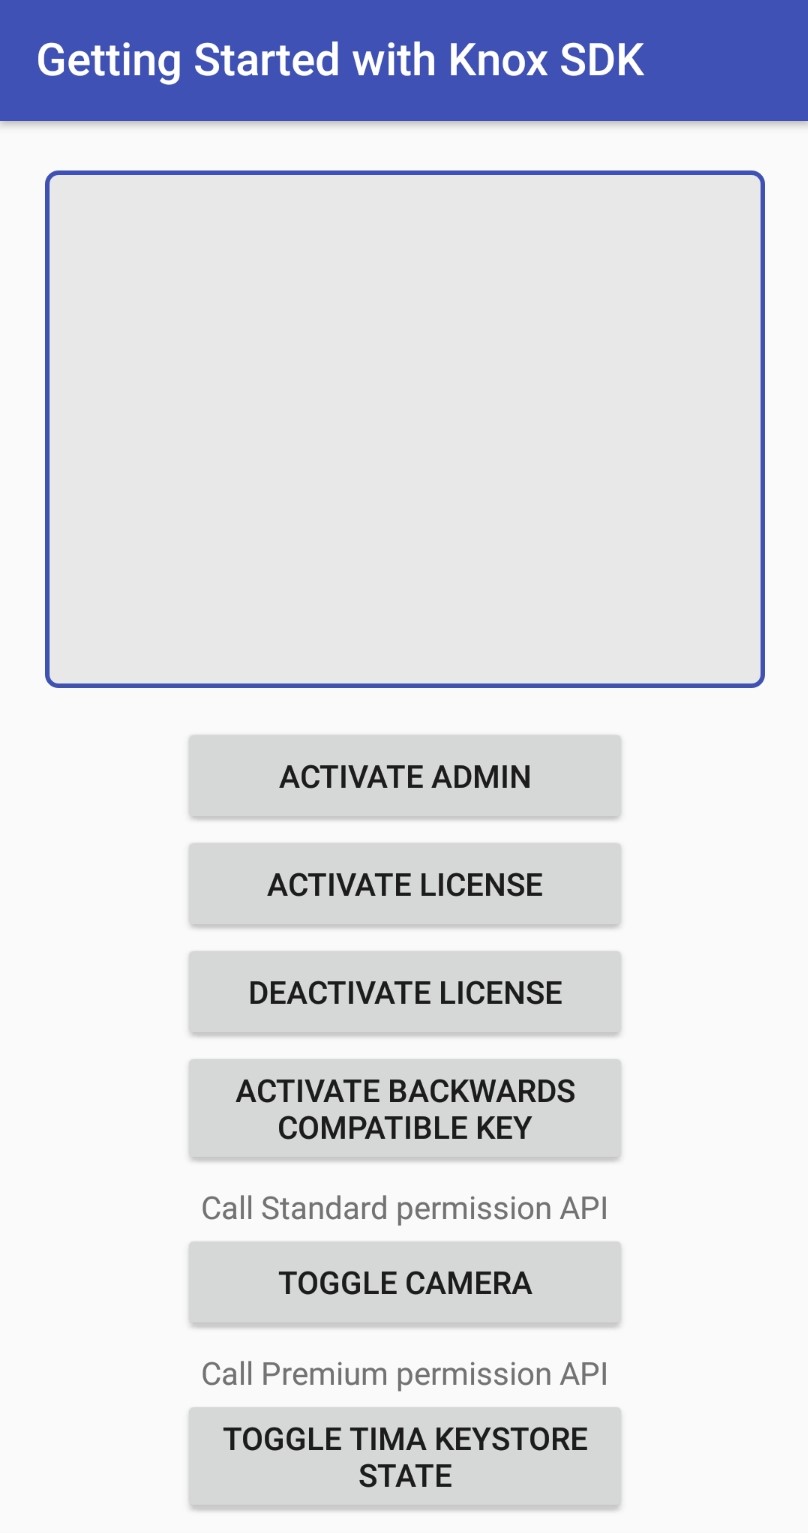
This app contains 6 buttons.
- toggleAdminBtn — prompts the user to activate device administrator for the app.
- activateLicenseBtn — activates the Knox KPE license key.
- deactivateLicenseBtn — deactivates the Knox KPE license key.
- activateBackwardsCompatibleKeyBtn — activates the Knox backwards compatibility license key.
- toggleCameraBtn — Invokes a policy that enables or disables the camera.
- toggleTimaKeystoreState — Invokes a policy that enables or disables the TIMA keystore state.
Open activity_main.xml and insert the following XML mark up to create your screen layout.
To resolve the @string errors, copy these 2 files from the sample app into your project.
- background.xml — KnoxSdkSample\app\src\main\res\drawable
- strings.xml — KnoxSdkSample\app\src\main\res\values\strings
<RelativeLayout
    android:id="@+id/mainpage"
    android:layout_width="match_parent"
    android:layout_height="match_parent"
    tools:context="com.samsung.knox.example.gettingstarted.MainActivity"> //update path to your own mainActivity

    <Button
        android:id="@+id/toggleAdminBtn"
        android:layout_width="200dp"
        android:layout_height="wrap_content"
        android:layout_marginTop="15dp"
        android:text="@string/activate_admin"
        android:layout_below="@+id/logview_id"
        android:layout_centerHorizontal="true" />

    <Button
        android:id="@+id/activateLicenseBtn"
        android:layout_width="200dp"
        android:layout_height="wrap_content"
        android:layout_alignStart="@+id/toggleAdminBtn"
        android:layout_below="@+id/toggleAdminBtn"
        android:text="@string/activate_license" />

    <Button
        android:id="@+id/deactivateLicenseBtn"
        android:layout_width="200dp"
        android:layout_height="wrap_content"
        android:layout_below="@id/activateLicenseBtn"
        android:layout_centerHorizontal="true"
        android:text="Deactivate license" />

    <Button
        android:id="@+id/activateBackwardsCompatibleKeyBtn"
        android:layout_width="200dp"
        android:layout_height="wrap_content"
        android:layout_below="@+id/deactivateLicenseBtn"
        android:layout_centerHorizontal="true"
        android:text="Activate backwards compatible key"
        android:visibility="gone" />

    <TextView
        android:id="@+id/premiumText"
        android:layout_width="wrap_content"
        android:layout_height="wrap_content"
        android:layout_below="@+id/toggleCameraBtn"
        android:layout_centerHorizontal="true"
        android:layout_marginTop="20px"
        android:text="Call Premium permission API" />

    <Button
        android:id="@+id/toggleTimaKeystoreState"
        android:layout_width="200dp"
        android:layout_height="wrap_content"
        android:layout_below="@+id/premiumText"
        android:layout_centerHorizontal="true"
        android:text="@string/toggle_tima_state"
        android:layout_marginBottom="20px" />

</RelativeLayout>
The button to activate the backwards compatibility key only appears if the device’s Knox version is between 2.5 and 2.7.1, or Knox API 17 to 21. Depending on your Knox version, you should now see 5 or 6 buttons in the middle of the screen.
- ACTIVATE ADMIN
- ACTIVATE LICENSE
- DEACTIVATE LICENCE
- ACTIVATE BACKWARDS COMPATIBLE KEY
- TOGGLE CAMERA
- TOGGLE TIMA KEYSTORE STATE You will later assign methods to these buttons to control their respective actions. There is also a TextView at the top of the screen that displays log messages.
For information on creating Android layouts, see Create your first Android app.
Tutorial progress
You’ve completed 1 of 7 steps!
NextOn this page
Is this page helpful?