Start and stop blinking reminder
Last updated July 26th, 2023
When an overdue payment notification isn’t sufficient, you can send a blinking payment reminder to the device as an escalated warning.
Start blink reminder
To start blink reminders for select devices:
-
On the Devices page, select one or more devices.
-
Click ACTIONS > Manage policy > Start blinking reminder.
-
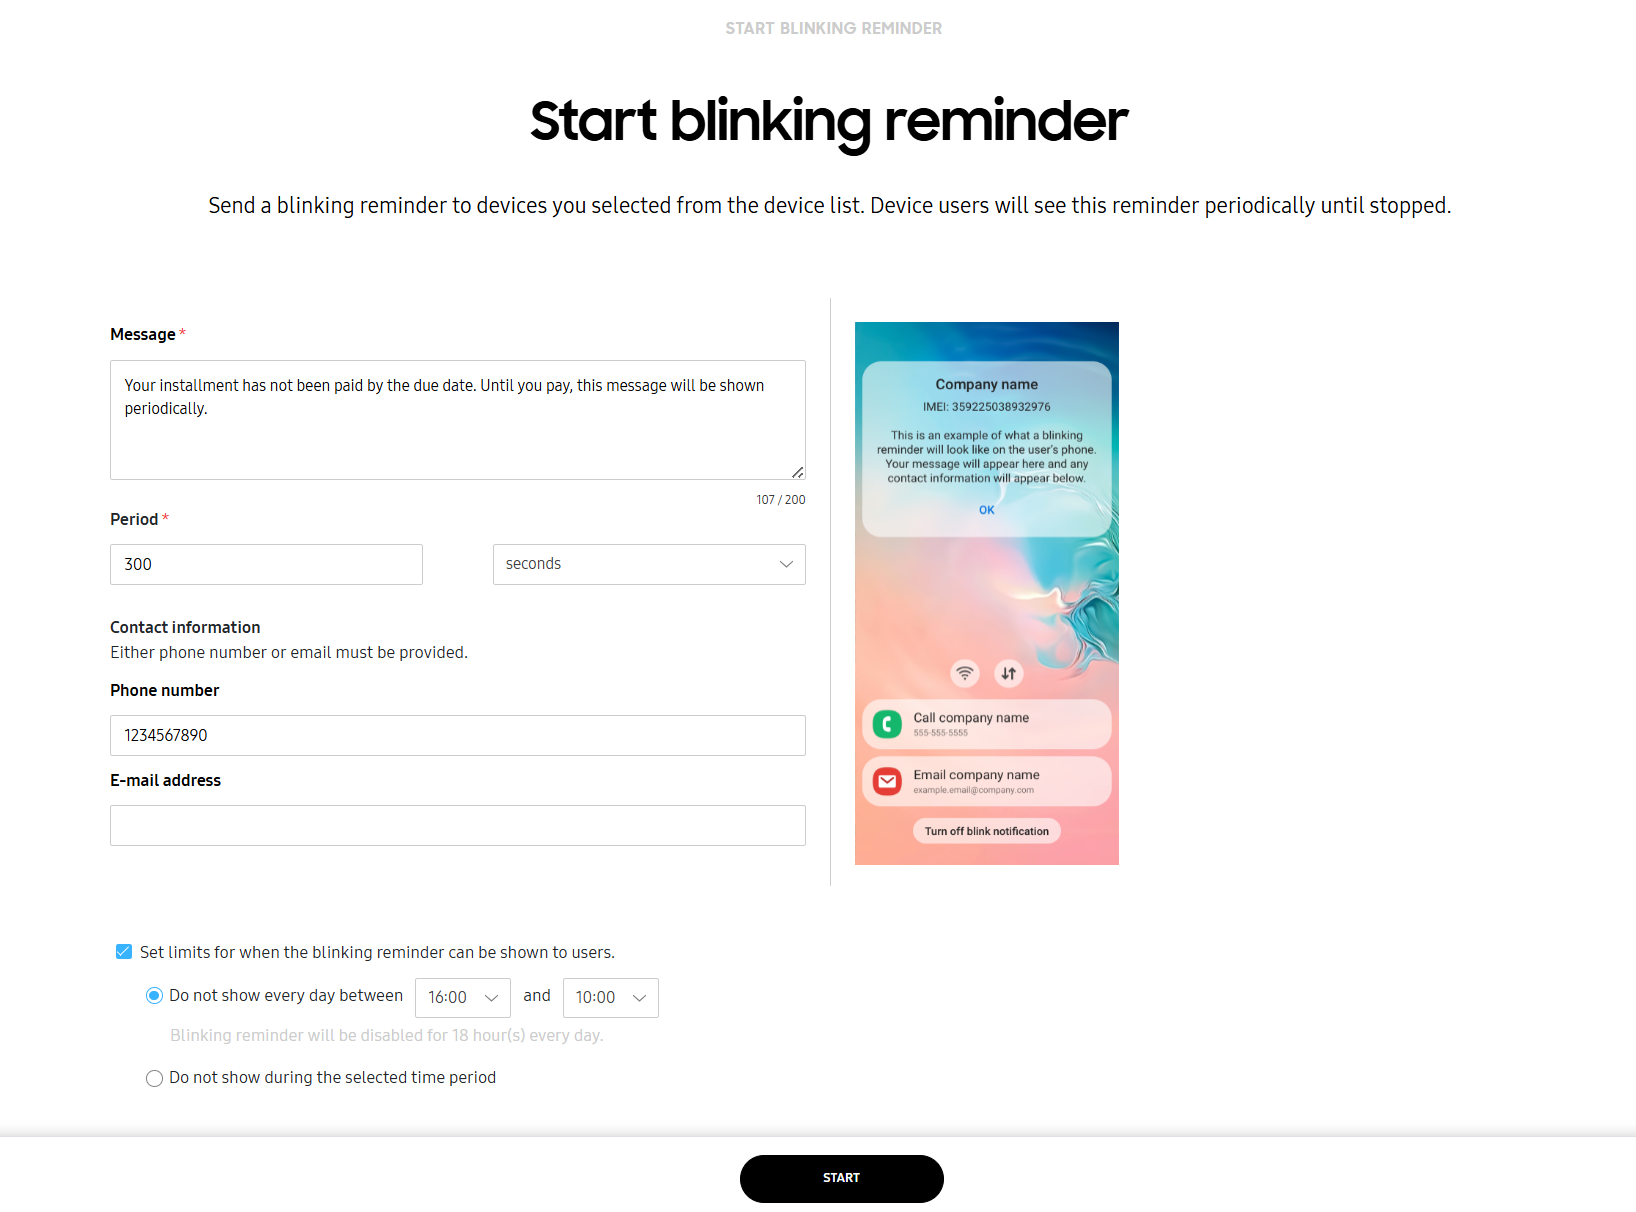
Set the blink message Period in either seconds, minutes, or hours.
-
Enter a Message. You can:
- Specify why the blink reminder is sent to the user.
- List a phone number or email address users can contact to stop the reminder messages.
- Enter a properly formatted URL (https://www…). When the user taps the URL hyperlink, the web page opens in the device’s browser. This can help make device payment queries as seamless as possible.
-
Enter your Contact information. You must provide either a Phone number or E-mail address.
-
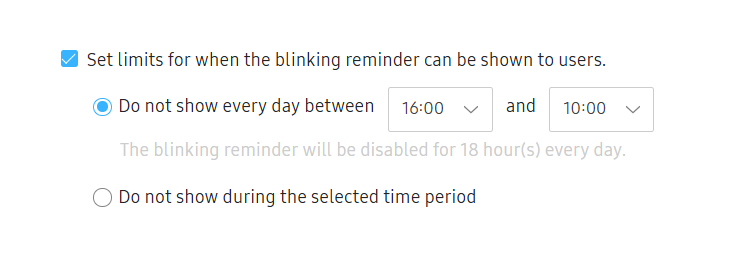
(Optional) Set limits for when the blinking reminder can be shown to users.
- You can define set hours every day during which update reminders won’t be shown.
- Select Do not show during the selected time period to set a specific time period during which update reminders won’t be shown.
-
Click START.
Stop blink reminder
To stop blink reminders for select devices:
-
On the Devices page, select one or more devices.
-
Click ACTIONS > Manage policy > Stop blinking reminder.

-
Click CONFIRM.
Start or stop blink reminder in bulk
You can select devices in bulk by entering their IMEIs or serial numbers into a standardized template. The maximum number of devices you can select in one action is 10,000.
To start or stop blink reminders in bulk:
-
Click BULK ACTIONS in the bottom of the left navigation pane.
-
To download a standard template, click Download CSV template.
For more information on how to create a properly formatted CSV file, click Instructions for all bulk actions from the bottom left-hand side of the Bulk actions screen.
-
In the MESSAGING section of the Bulk actions screen, select one of the following and upload your CSV file containing the device IDs.
- START BLINKING REMINDER — Refer to steps 4 to 8 of the Start blink reminder section to configure your blink reminder settings.
- STOP BLINKING REMINDER
-
Click CONFIRM.
On this page
Is this page helpful?