Manage admins and roles
Last updated November 19th, 2025
Your Knox Guard account can be managed by multiple admins. With role-based access control (RBAC), super admins responsible for account creation can invite other admins and assign to them the roles and permissions required to manage accounts.
To manage your admins and roles, navigate to the Administrators and roles page of your Knox Guard console.
Admins
The Administrators tab displays a list of all admins associated with your Knox Guard account. The super admin, who created the enterprise’s tenant, is shown with a crown next to their name.
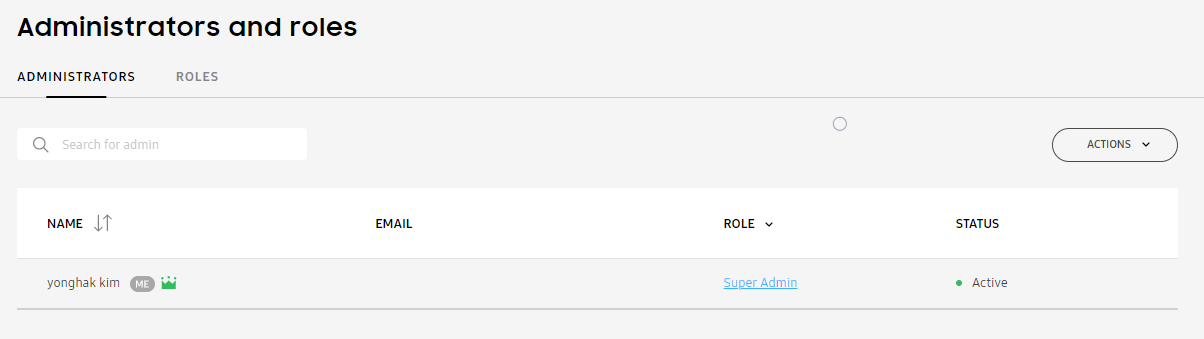
The list shows the following admin information:
| Column | Description |
|---|---|
| NAME | Name of the admin. Click an admin’s name to view or edit their details and the role they are assigned. |
| Work email address of the admin. | |
| ROLE | Either Super Admin or the name of a custom role. Click on the role name to view role permissions. |
| STATUS | Approval status of the administrator — Pending, Active, or Inactive. |
Invite an admin
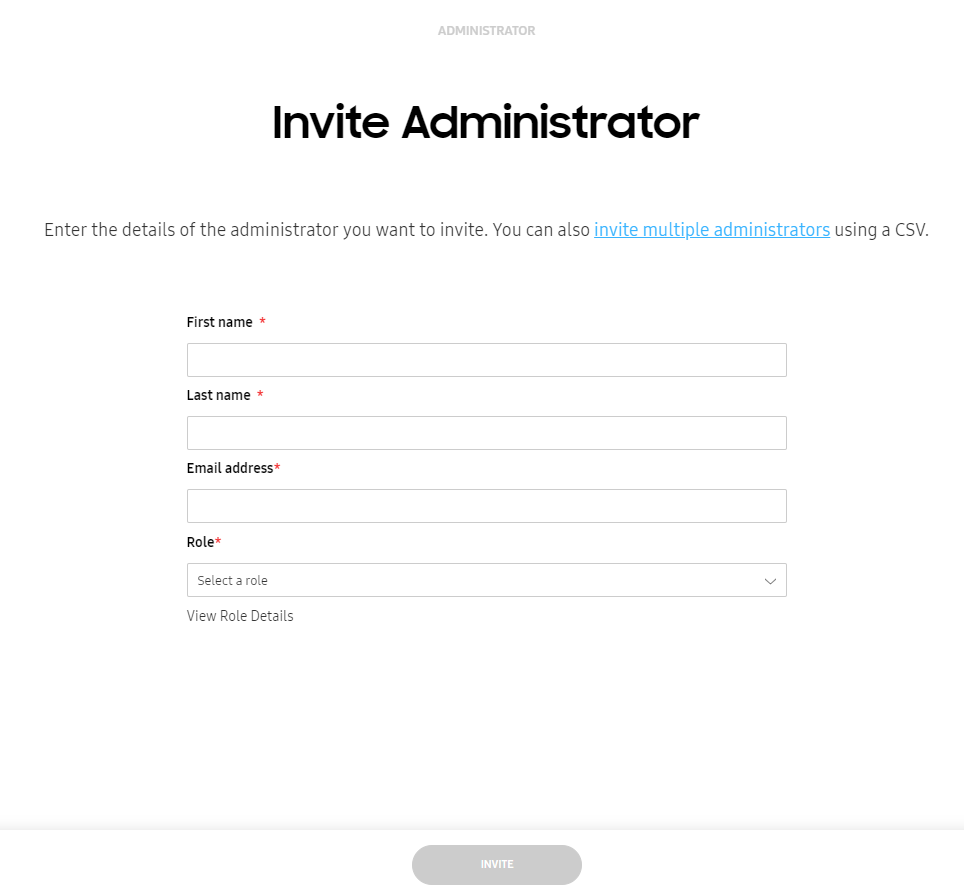
You can invite individual users to add them as admins. When you create an invite for an admin, you must also assign them a role.
To add a new admin to Knox Guard:
-
Click ACTIONS > Invite Administrator. The Invite Admin dialog displays.
-
(Optional) If you haven’t created any roles yet, click CREATE ROLE to create one and assign it to the admin. For more information, see Create a role.
-
Provide admin details to create the invite:
- To invite a single admin, enter their First name, Last name, Work email, and select a Role.
- To invite admins in bulk, upload a CSV file containing the first names, last names, and work email addresses of the admins.
-
Click INVITE. The invited admins are displayed on the Administrators and roles page with the status Pending.
Edit an admin
Only the admins who are assigned the Invite and manage administrators or Create and manage roles permission can edit other admins.
To edit an admin’s details:
- Click the name of an admin in the admin list. The Edit administrator dialog displays.
- You can modify the admin’s first and last names, as well as their role.
Delete an admin
If you want to prevent an admin from managing Knox Guard, you can delete their account, changing their status to Inactive. Only admins in the Active status can be deleted.
To delete a Knox Guard admin:
- On Administrators and roles page, click the name of the admin you want to delete. The Edit administrator dialog displays.
- Click MORE ACTIONS > Delete account. The Delete account? dialog displays.
- You can provide a Reason for account deletion (optional). Click DELETE to confirm the change.
The deleted admin will no longer have access to Knox Guard and is removed as a location manager in Samsung Account for Business, but will remain in the admin list.
To remove an admin from the admin list, you must delete them from Samsung Account for Business.
Roles
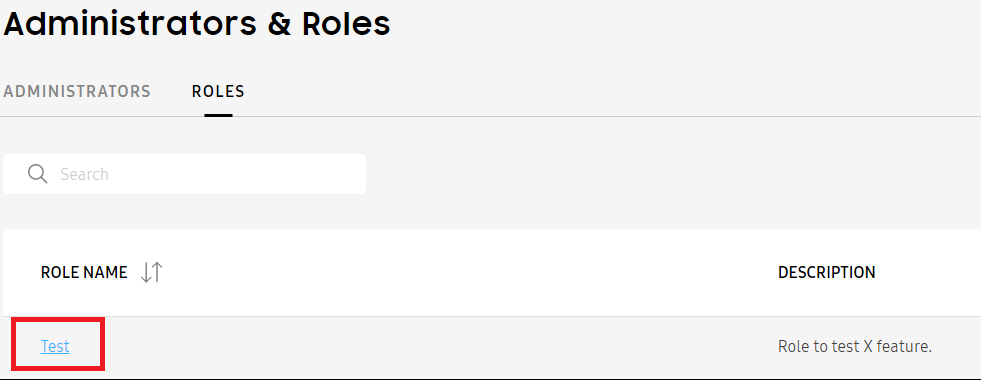
You can use the ROLES tab to define custom permissions for admins. Use the search bar to find roles by name.
The roles list displays the following information:
| Column | Description |
|---|---|
| ROLE NAME | Either Super Admin or the name of a custom role. Click on the role name to view role permissions. |
| DESCRIPTION | (Optional) Purpose of the role in your organization. |
| ADMINISTRATORS | Number of admins assigned to the role. Click a number to see the full list of admins and their information. |
Create a role
To create a new role:
- On the Roles tab, click CREATE ROLE. The Create role page displays.
- Enter a Role name.
- (Optional) Provide a Description for the role.
- Under Permissions, ensure the Allow access to the Knox Guard portal with the following permission setting is enabled.
- Select the permissions you want to assign to the role. For information on specific permissions, see Role-based access control.
- Click SAVE.
Edit a role
To edit an existing role:
- Click the ROLE NAME in the Roles tab. The Edit role page displays.
- Modify the role name, description, and permissions, as required.
- Click SAVE.
Delete a role
You can choose to delete a role:
-
Click the ROLE NAME in the Roles tab. The Edit role page displays.
-
Click DELETE at the bottom of the page to remove the role from the list and remove the associated permissions for all admins who are assigned to the role. The Delete role dialog displays.
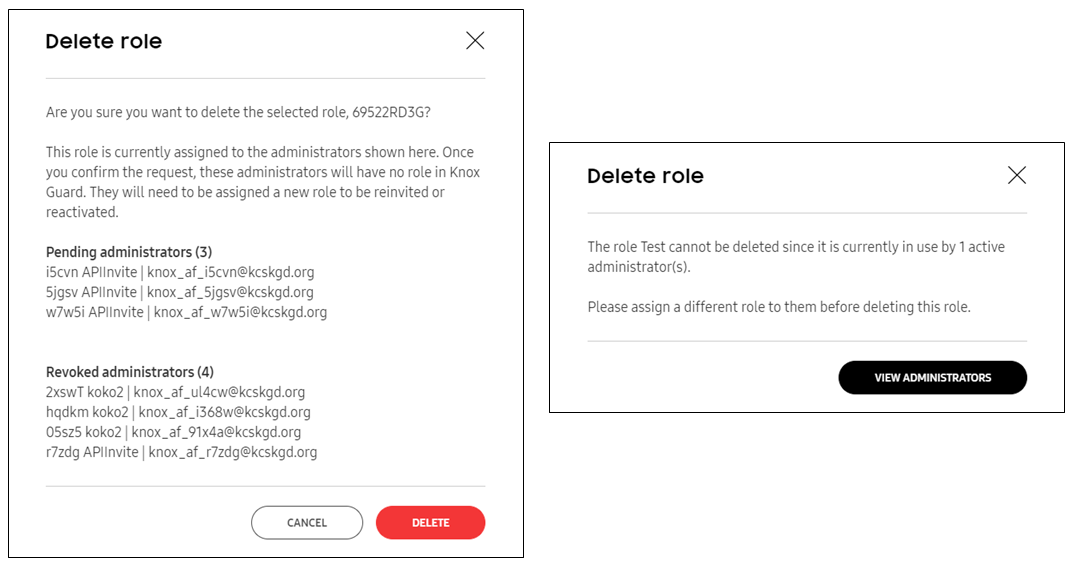
-
Click DELETE. This action can’t be undone.
Role-based access control
With role-based access control, you can regulate access to Knox Guard features by granting specific permissions to each role. This ensures admins only have access to the functions they are responsible for managing.
When defining a role, you can select the required permissions on the Create role page. The permissions available to you are described in the following sections.
While admins can create roles with any permissions, they can assign only the roles that contain the permissions that they have themselves.
Devices
Select permissions to determine how admins can manage devices:
- View only — Admins can only view device configurations. No device administration permissions are granted.
- Manage devices (Select at least one permission)
- Accept and reject devices
- Upload devices
- Complete device management
- Send notifications
- Start/Stop blinking reminder.
- Lock and unlock devices and manage the Lock screen settings.
- Apply SIM control to devices, and manage default SIM control settings
- Turn on/off mobile number lock
- Delete devices
- View when devices were last seen by the Knox Guard server
- Auto-lock devices
- Wipe devices
- Block and unblock factory reset
- Manage ADB command and developer mode
- Manage AE provisioning
- Manage firmware update control settings
- Apply function restrictions
- Firmware auto download over Wi-Fi
Only select partners can submit a request to Samsung admins for permission to use Android Debug Bridge (adb) command and developer mode features. For detailed information, see Block and unblock adb command and developer mode.
Policies
Select permissions to determine how admins can manage policies:
- View only — Admins can only view policy configurations. No policy administration permissions are granted.
- Manage policies (Select at least one permission. Lock screen, Blinking reminder, and SIM control are managed separately in Device permissions above.)
- Enrollment management
- Manage offline lock default settings
- Customize notification icon
- Manage application installation
Licenses
Select permissions to determine how admins can manage licenses:
- View only — Admins can only view license configurations. No license administration permissions are granted.
- Manage licences
- Delete
- Add and edit
Resellers
Select permissions to determine how admins can manage resellers:
- View only — Admins can only view reseller details. No reseller administration permissions are granted.
- Manage resellers
- Register and edit (manage auto accept settings)
- Delete
Activity log
Determines whether the admin can view the Knox Guard activity log.
- View activity log — If checked, allows the admin to view the Activity log page.
Administrators and roles
Select permissions to determine whether the admin can manage other admins and roles.
- Invite and manage administrators — If checked, allows the admin to invite and manage other admins in Knox Guard.
- Create and manage roles — If checked, allows the admin to add and edit roles to include any permissions.
Knox Cloud APIs portal
If checked, grants admins access to the Knox Cloud APIs portal.
- Allow access to Knox Cloud APIs portal
On this page
Is this page helpful?