Send notifications
Last updated July 26th, 2023
You can send notifications directly to devices. You can customize the message and how they are shown on the device.
To configure the predefined messages that you can choose from when sending notifications to devices, see the tenant-wide Notifications policy.
Send notifications
To send notifications to specific devices:
-
On the Devices page, select one or more devices.
-
Click ACTIONS > Manage policy > Send notification.
-
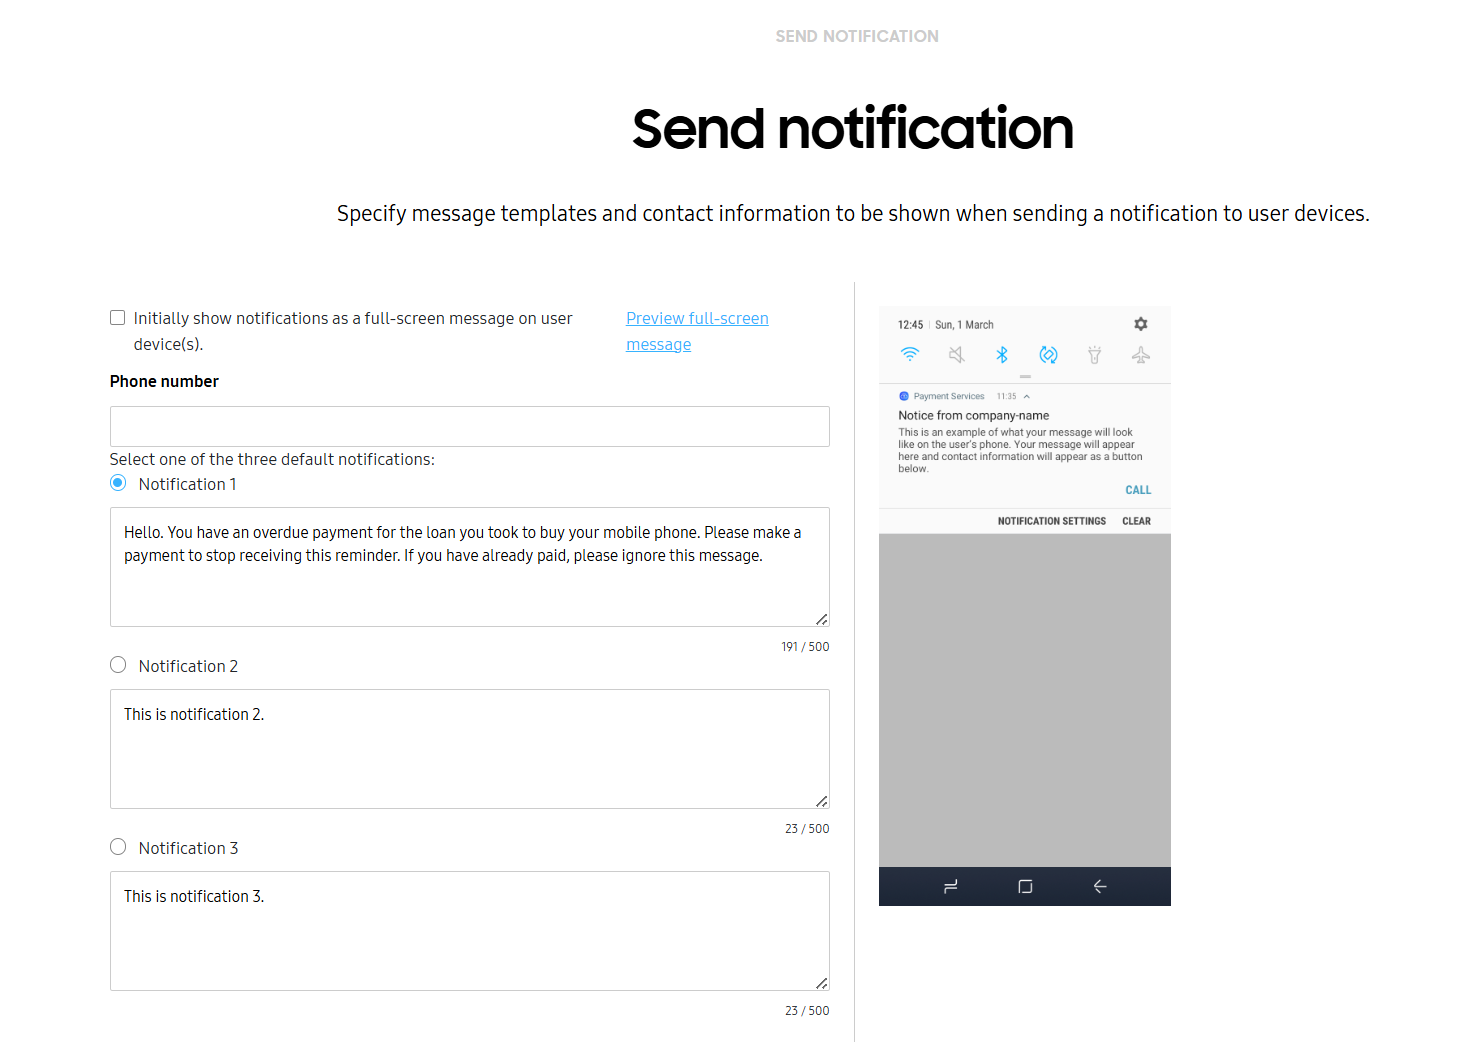
You can Initially show notifications as a full-screen message on user devices before they display on the notification panel. This makes notifications difficult to ignore.
- (Optional) Click Preview full-screen message to view how the message displays on the device.
-
(Optional) Enter a Phone number device users can call to make a payment and stop notifications. Phone numbers can only contain numbers and the following symbols:
#,+,*. -
Select one of predefined notifications defined by the Notifications policy. You can edit the message as needed.
-
Click SEND.
Notifications sent to locked devices will display on the lock screen, but the device user can’t open any links in the message.
Send notifications in bulk
You can select devices in bulk by entering their IMEIs or serial numbers into a standardized template.
To send notifications in bulk:
-
Select BULK ACTIONS in the bottom of the left navigation pane.
-
Under MESSAGING, click SEND NOTIFICATION.
-
Select the type of message you’d like to send and fill in the details as required.
- SEND GENERIC MESSAGE — Choose from messages defined by the Notification policy.
- SEND CUSTOM MESSAGES — Upload a CSV file containing the devices and custom notifications you’d like to send.
-
Click SEND.
Send generic notifications in bulk
To send a predefined notification to devices in bulk:
-
On the Send notification screen, click SEND GENERIC MESSAGE.
-
Upload your CSV file containing the device IDs you wish to send the notifications to. You can send notifications to up to 50,000 devices at once.
For more information on how to create a properly formatted CSV file, click Instructions for all bulk actions from the bottom left-hand side of the Bulk actions screen.
-
You can Initially show notifications as a full-screen message on user devices before they display on the notification panel. This makes notifications difficult to ignore.
- (Optional) Click Preview full-screen message to view how the message displays on the device.
-
(Optional) Enter a Phone number device users can call to make a payment and stop notifications. Phone numbers can only contain numbers and the following symbols:
#,+,*. -
Select one of the predefined notifications specified by the Notifications policy. You can edit the message as needed.
-
Click SEND.
Send custom notifications in bulk
To send custom messages to devices in bulk:
-
On the Send notification screen, click SEND CUSTOM MESSAGES.
-
You can Initially show notifications as a full-screen message on user devices before they display on the notification panel. This makes notifications difficult to ignore.
- (Optional) Click Preview full-screen message to view how the message displays on the device.
-
(Optional) Enter a Phone number device users can call to make a payment and stop notifications. Phone numbers can only contain numbers and the following symbols:
#,+,*. -
Upload the device list and custom messages you wish to send. To download a template, click Download template. You can send custom notifications to up to 100 devices at once.
-
Click SEND.
On this page
Is this page helpful?