Enable and disable auto-lock
Last updated December 6th, 2023
When auto-lock is enabled, Knox Guard enrolled devices automatically lock as soon as they connect to a network. This feature can help prevent theft or misuse of devices in transit.
Enable auto-lock
To enable auto-lock for select devices:
-
On the Devices page, select one or more devices.
-
Click ACTIONS > Manage policy > Enable auto-lock.
-
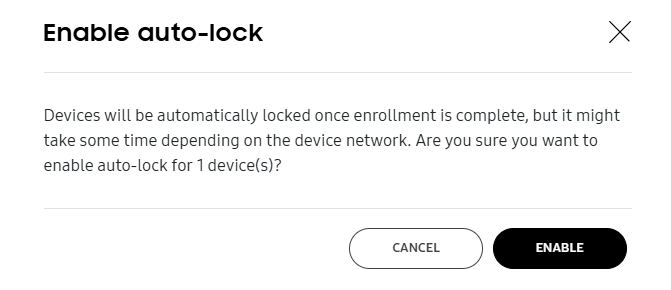
Review the Enable auto-lock pop-up and click ENABLE.
Auto-lock enables on the devices.
Disable auto-lock
To disable auto-lock for select devices:
-
On the Devices page, select one or more devices.
-
Click ACTIONS > Manage policy > Disable auto-lock.
-
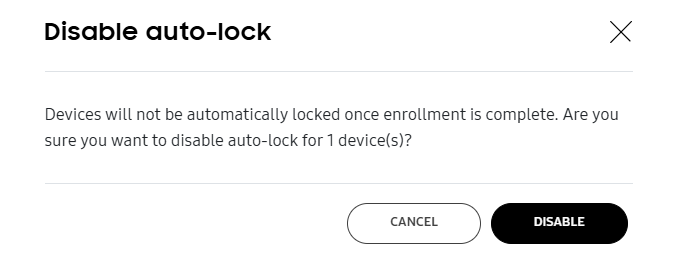
Review the Disable auto-lock pop-up and click DISABLE.
Auto-lock disables on the devices.
Enable or disable auto-lock in bulk
You can select devices in bulk by entering their IMEIs or serial numbers into a standardized template. The maximum number of devices you can select in one action is 10,000.
To enable or disable auto-lock for devices in bulk:
-
Click BULK ACTIONS in the bottom of the left navigation pane.
-
To download a standard template, click Download CSV template.
For information on how to create a properly formatted CSV file, click Instructions for all bulk actions from the bottom left-hand side of the Bulk actions screen.
-
In the ADVANCED CONTROLS section of the Bulk actions screen, select one of the following and upload your CSV file containing the device IDs.
- ENABLE AUTO-LOCK
- DISABLE AUTO-LOCK
-
Click CONFIRM.
Auto-lock is now enabled or disabled for the devices.
On this page
Is this page helpful?