Bulk device actions
Last updated June 17th, 2026
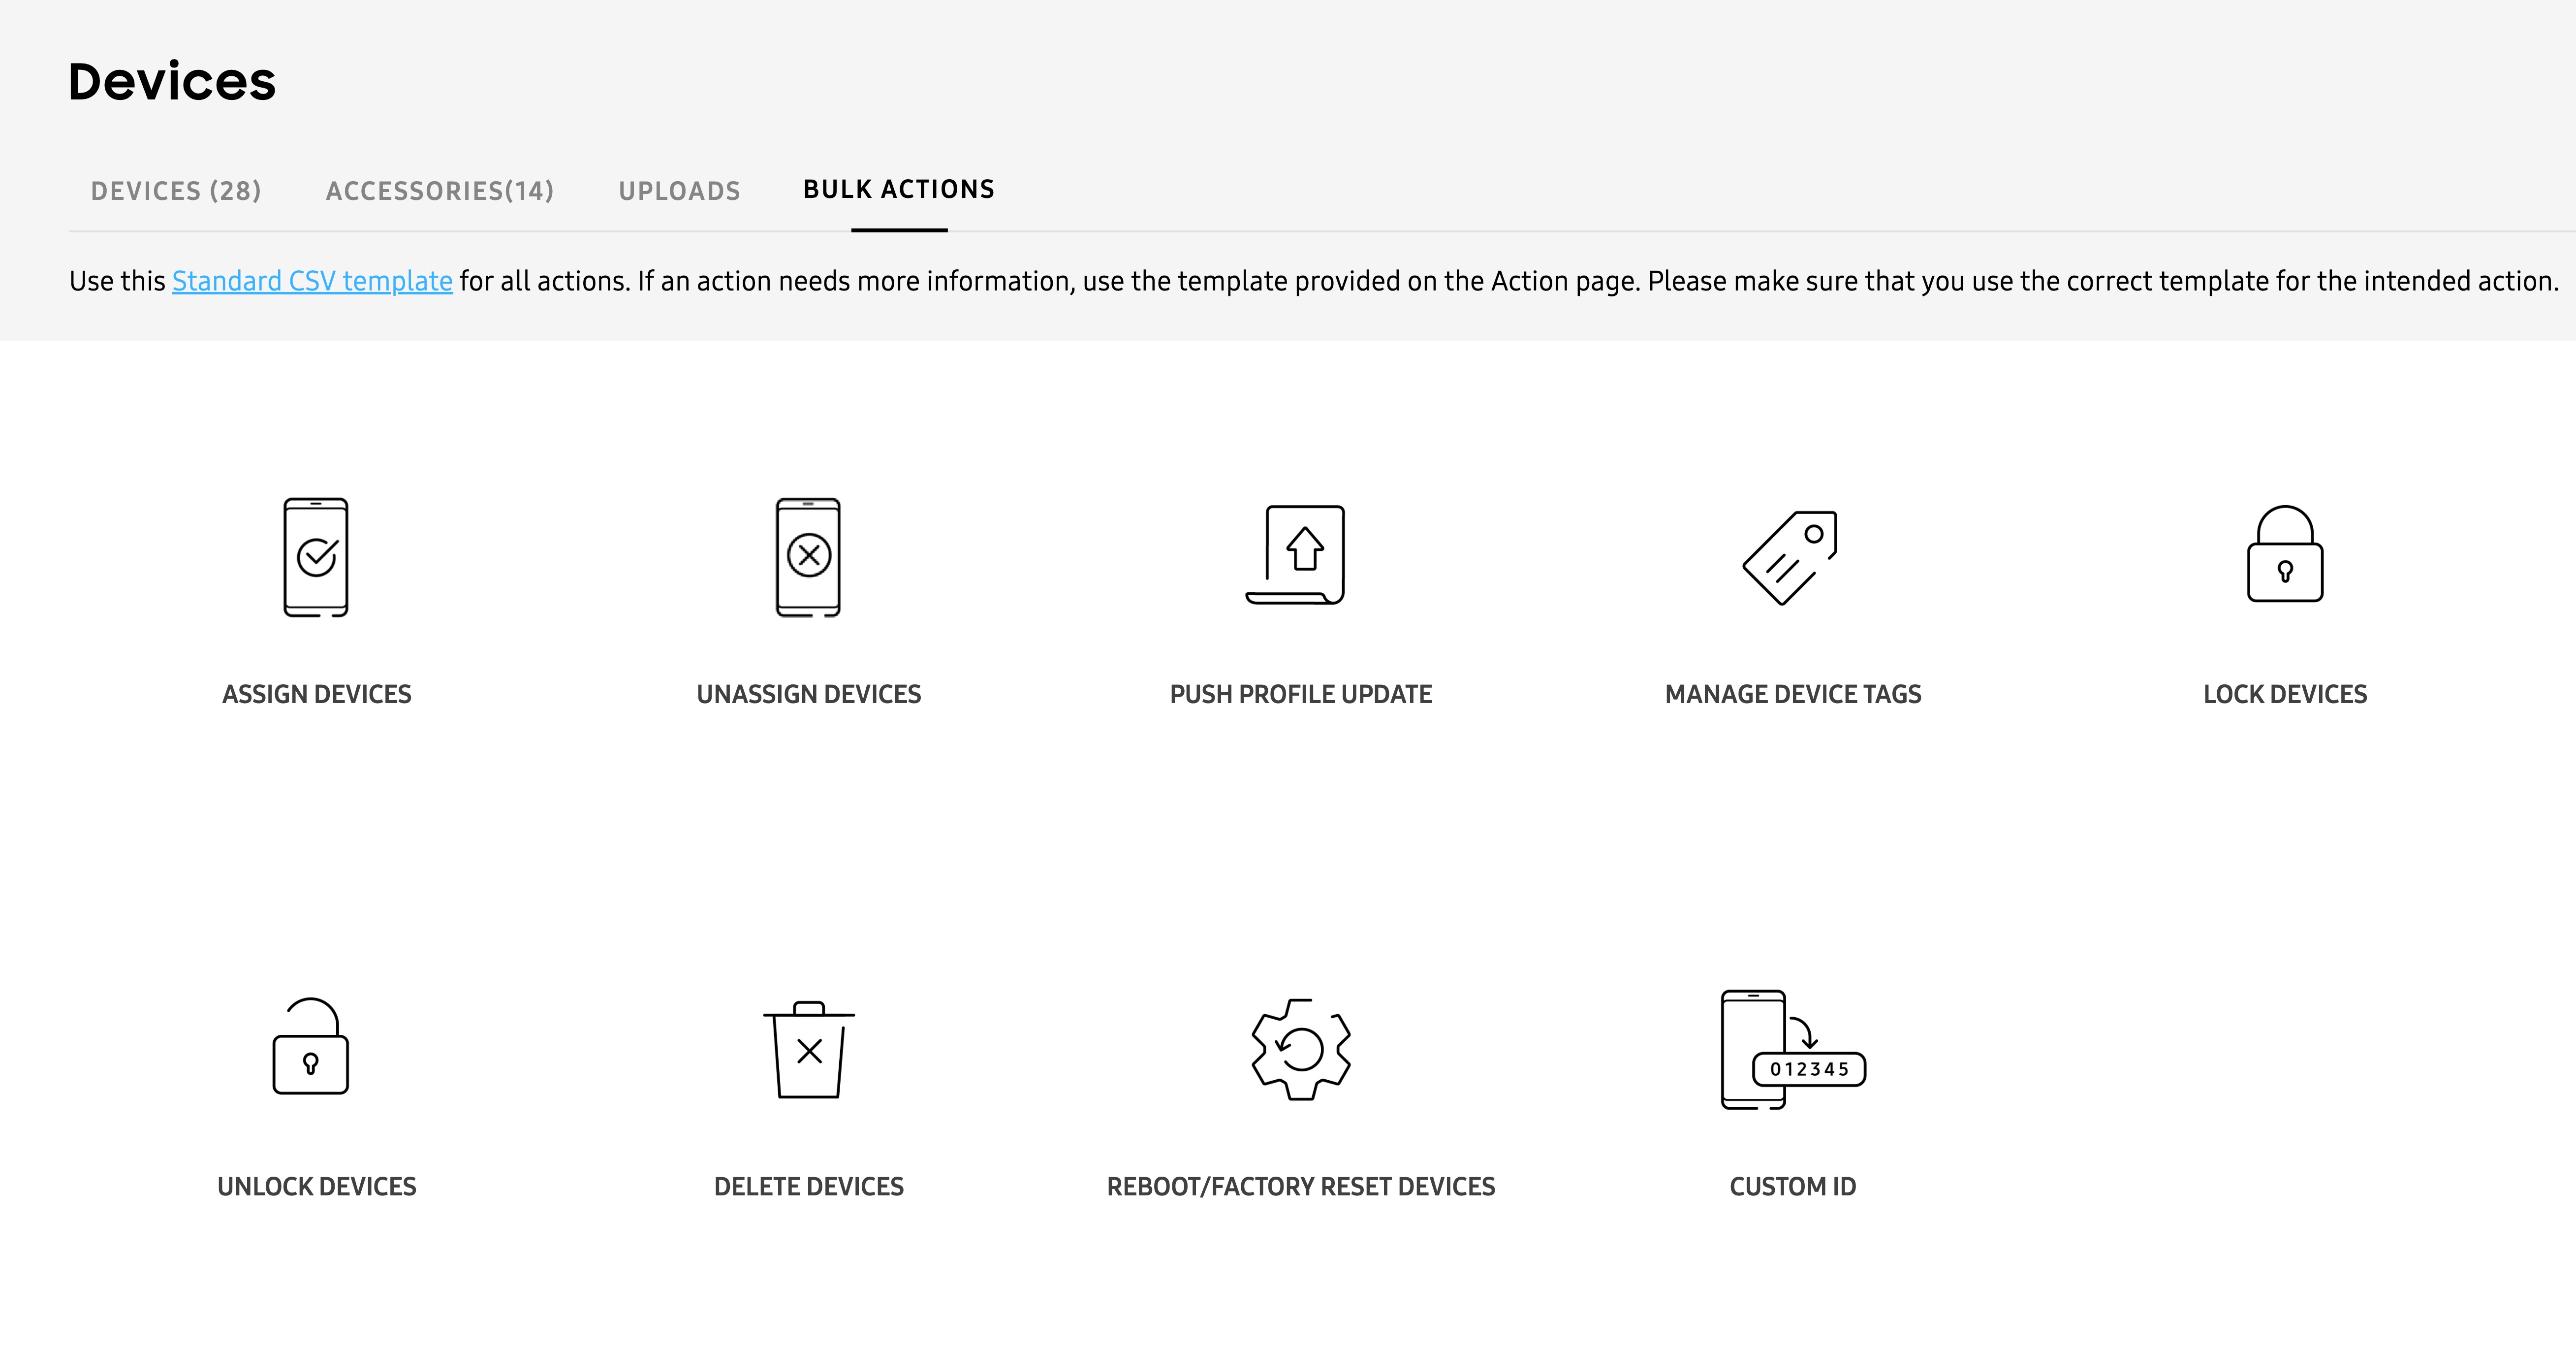
You can manage and configure multiple devices at the same time using a bulk device action. To perform a bulk action on your devices, go to the Devices page, then click the BULK ACTIONS tab.
Bulk actions include the following:
- How to prepare a CSV file
- Assign devices
- Unassign devices
- Push profile updates
- Manage device tags
- Lock and unlock devices
- Delete devices
- Reboot/Factory reset devices
- Custom ID
How to prepare a CSV file
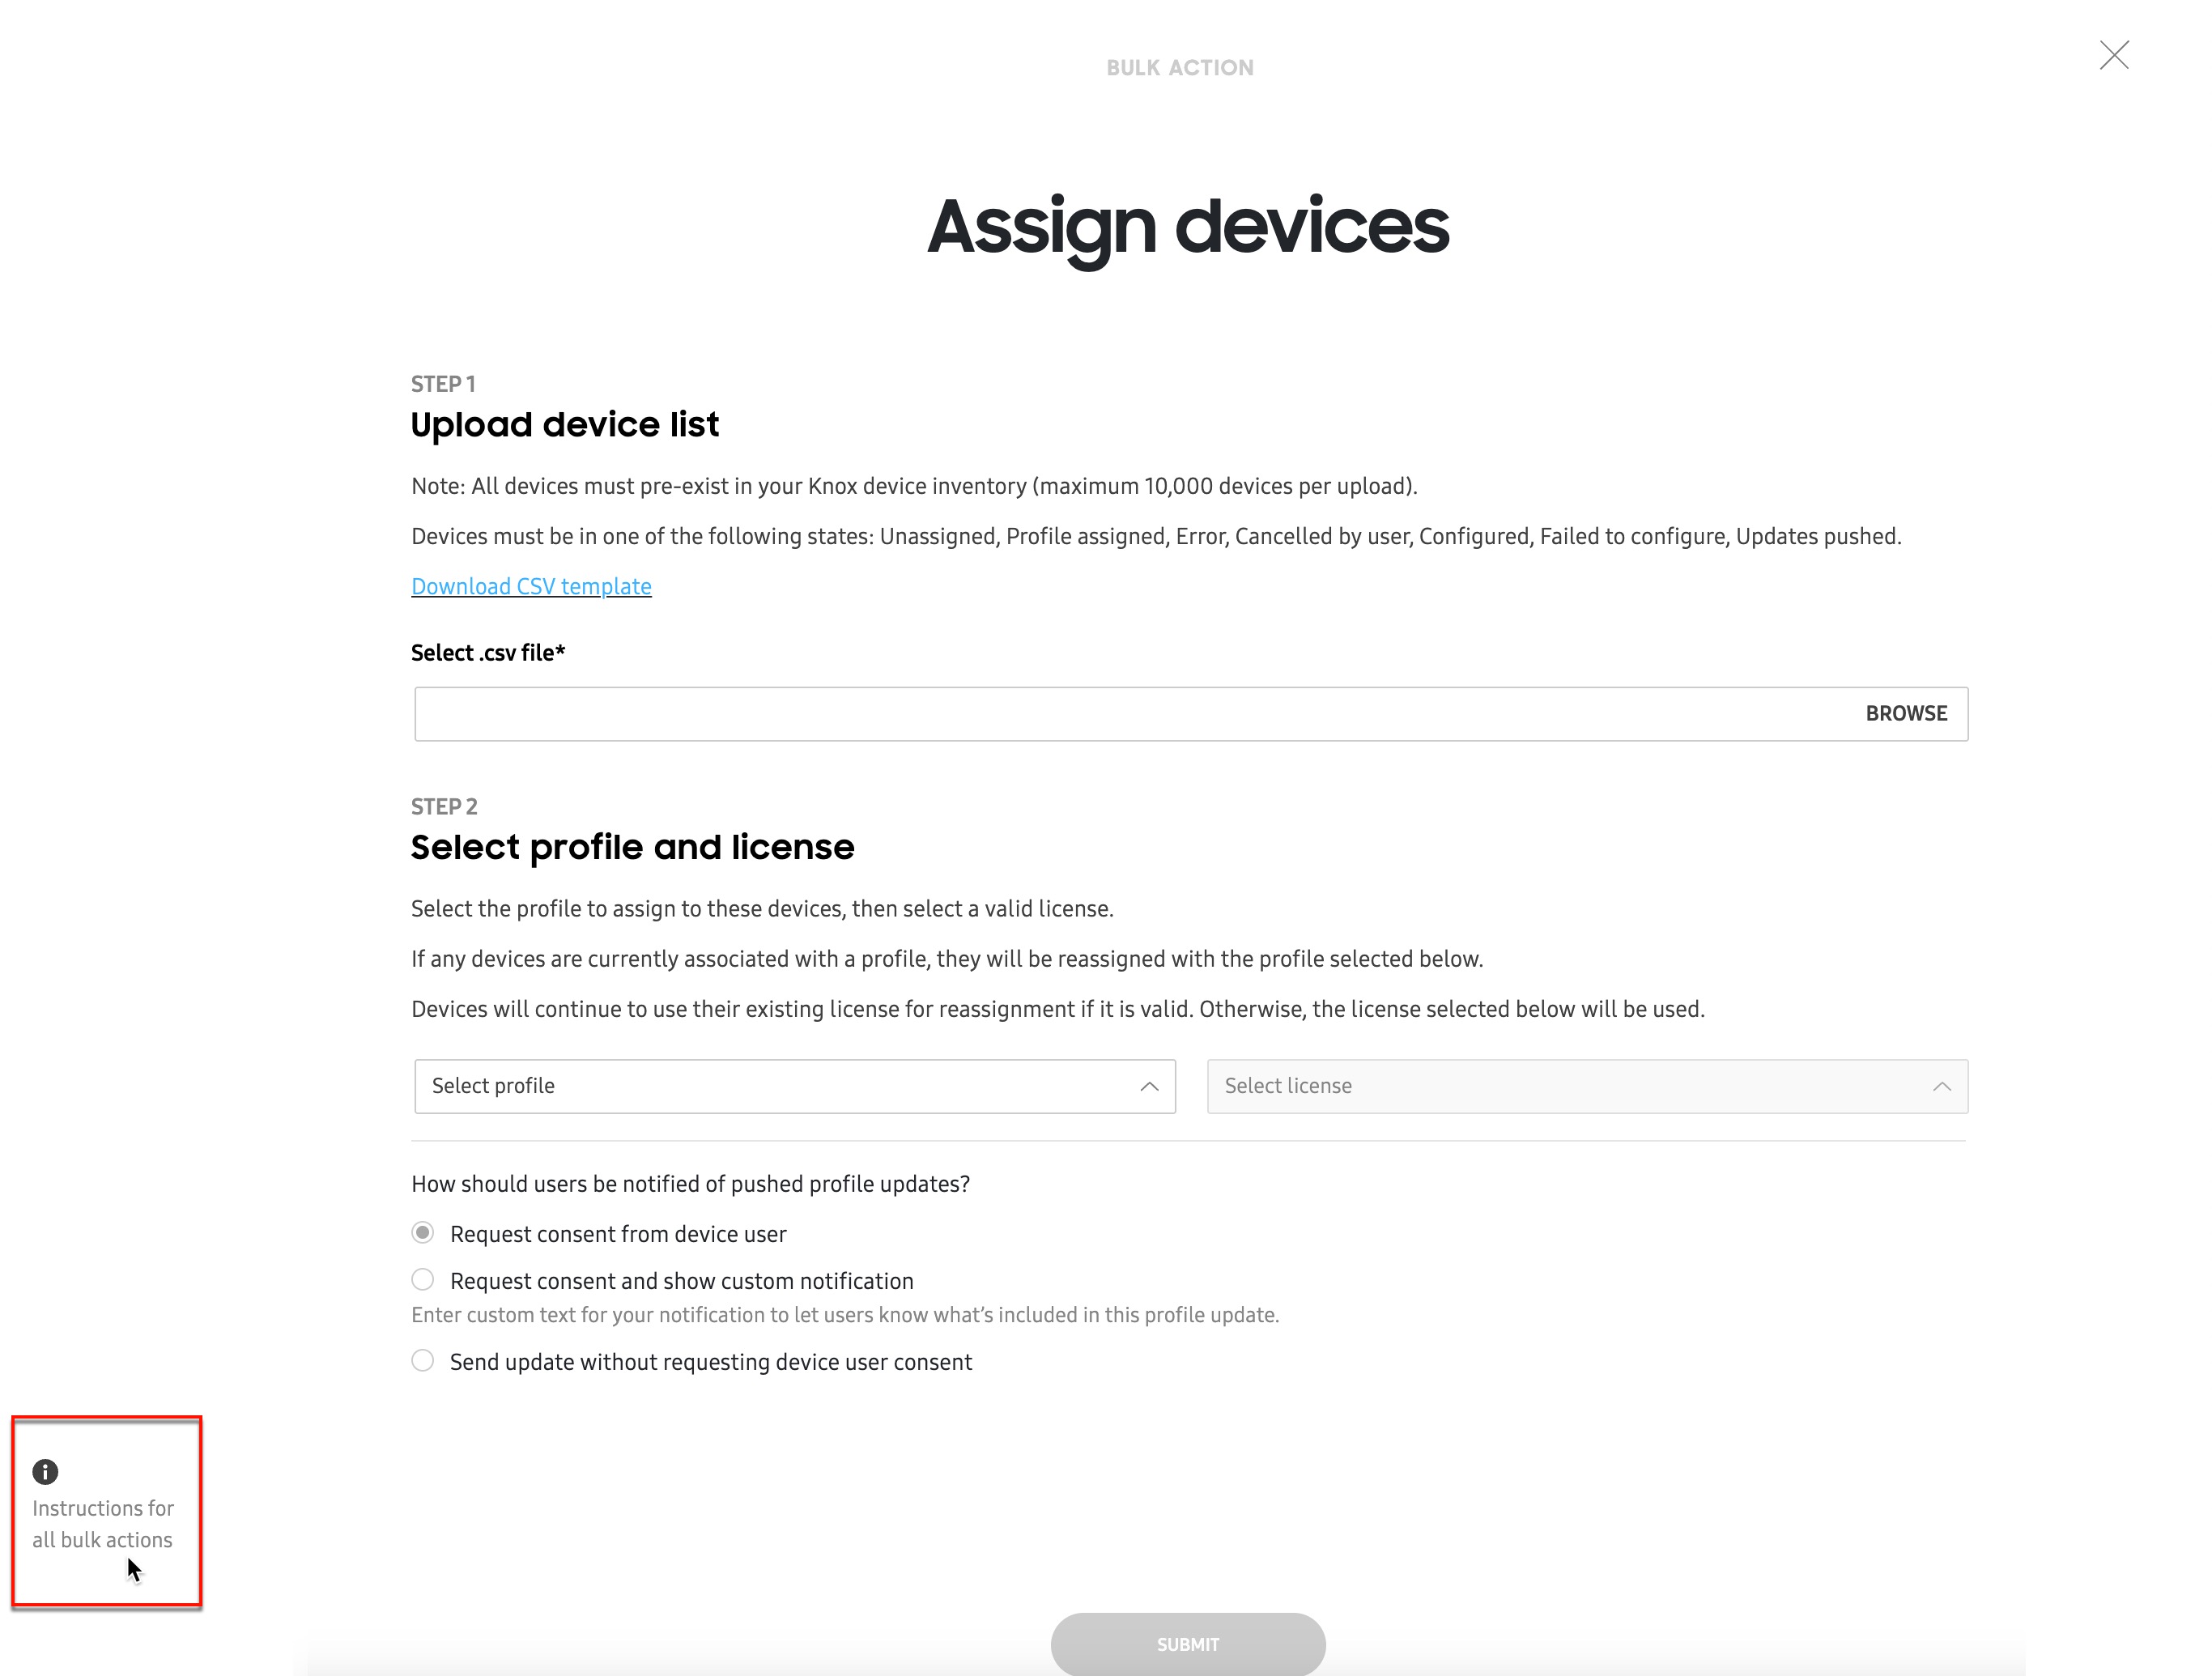
A properly formatted CSV file is required to perform device bulk actions. When you click on a specific bulk action, you’ll see an (information) icon near the bottom left corner of the page. Click this icon for instructions on how to prepare a CSV file for your bulk device action.
For Knox Configure bulk actions, the CSV file must be in a format containing one IMEI number per line, and not contain any comma characters.
Correct CSV format:
- 310156478946
- 318946543413
- 311489441213
Incorrect CSV format:
- 310156478946,
- 318946543413,
- 311489441213,
This button appears on every bulk action page and provides the same set of instructions, regardless of the selected bulk action.
Assign devices
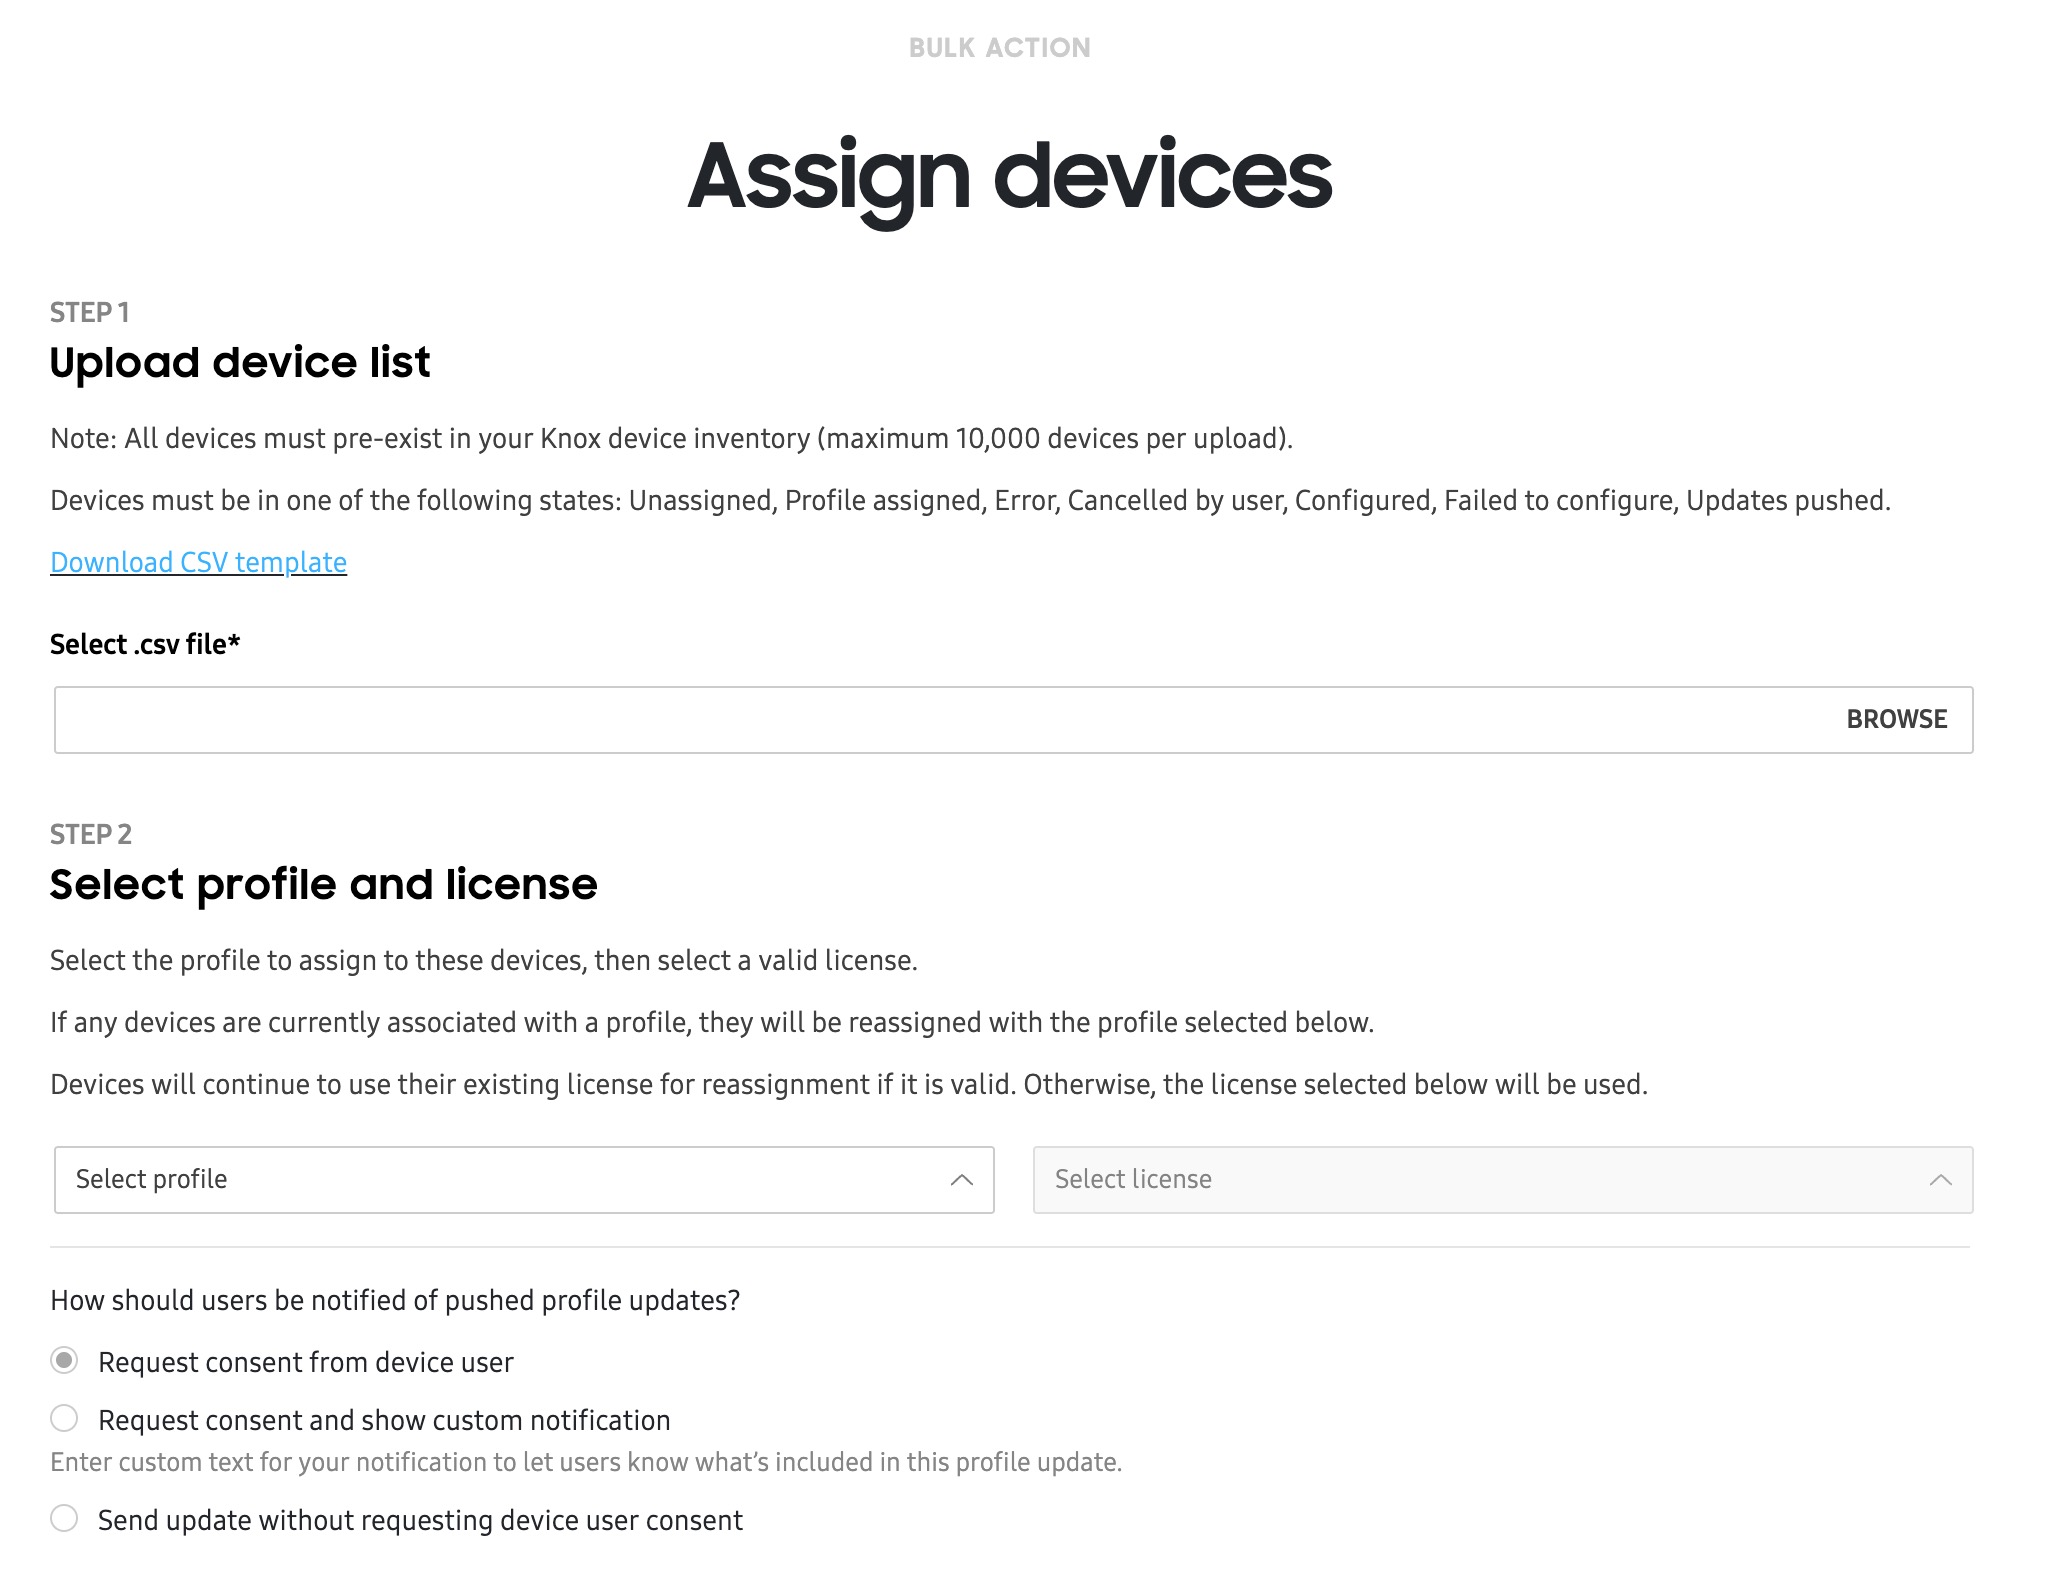
The ASSIGN DEVICES bulk action lets you assign up to 10,000 devices to a single profile using a CSV file. To do this:
-
From the BULK ACTIONS tab, select ASSIGN DEVICES.
-
Click BROWSE to upload your prepared CSV file containing the device IMEI numbers you want to assign. If needed, click Download CSV template, then fill out the template with your device details.
-
Select the profile and available license you want to associate with these devices.
-
Select how you want to notify your device users of the profile assignment — whether you want to assign the profile silently, or if you want to request consent from the user.
- If you choose to request consent, you can also include a custom notification, as well as a hyperlink to direct users to a website or help page for more information during the enrollment process.
-
Click SUBMIT. Once a device is assigned to a profile, its shows as Configured in the DEVICE tab’s STATUS column
Unassign devices
The UNASSIGN DEVICES bulk action lets you unassign up to 10,000 devices from any of their associated profiles using a CSV file. When a profile is unassigned from the device, the following occurs:
- The device keeps all of its apps and content.
- Uninstalling a Dynamic edition profile from a device revokes the (Dynamic edition) license seat, allowing it to be used again with another device.
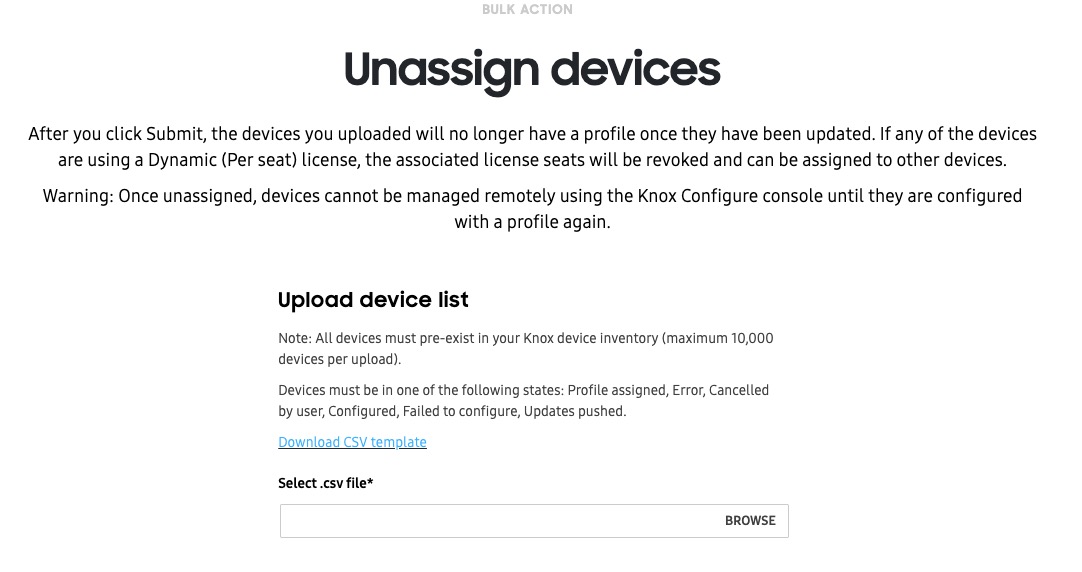
To unassign devices using a bulk action:
-
From the BULK ACTIONS tab, click UNASSIGN DEVICES.
-
Click BROWSE to upload your prepared CSV file containing the device IMEI numbers you want to assign. If needed, click Download CSV template, then fill out the template with your device details.
-
Click SUBMIT to unassign your devices from their respective profiles.
Push profile updates
The PUSH PROFILE UPDATE bulk action lets you push the latest profile configuration for up to 10,000 devices at a time, using a CSV file. This bulk action is particularly useful for when you have multiple updated profiles, and you want to push them to different devices in the fleet. See Defer profile updates to learn how to save your profile changes before using this bulk action.
To push device profile updates in bulk:
-
From the BULK ACTIONS tab, select PUSH PROFILE UPDATE.
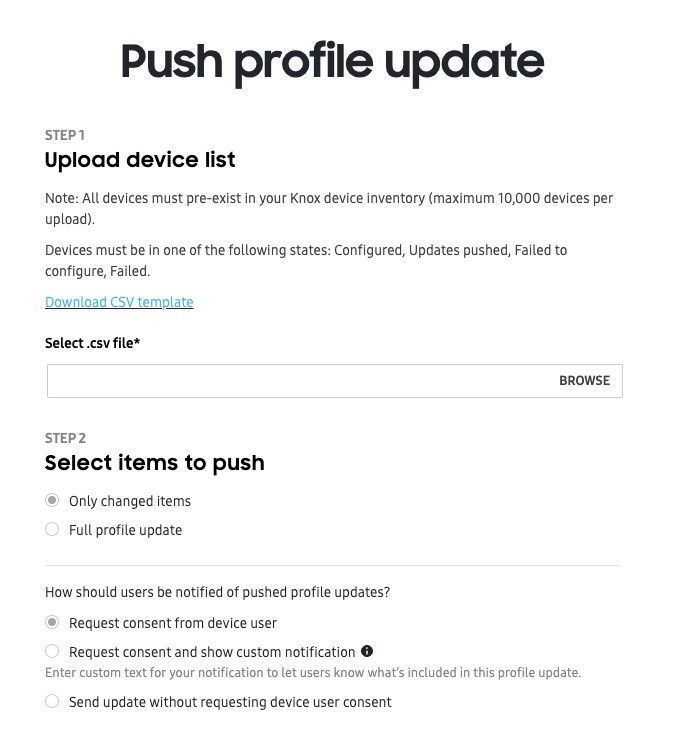
-
Click BROWSE to upload your prepared CSV file containing the device IMEI numbers you want to assign. If needed, click Download CSV template, then fill out the template with your device details.
-
In the Select items to push field, select Only changed items if you only want to push the latest changes since the last update, or Full profile update if you want to push the entire profile to your devices.
-
Select how you want to notify your device users of the profile update — whether you want to update the profile silently, or if you want to request consent from the user.
- If you choose to request consent, you can also include a custom notification, as well as a hyperlink to direct users to a website or help page for more information during the update process.
-
Select PUSH NOW to begin updating your devices immediately, or SCHEDULE to select a date and time for the server to push the update.
Manage device tags
The MANAGE DEVICE TAGS bulk action lets you add unique text labels to help organize devices in your fleet. Using a CSV file, you can add up to 10 unique tags and assign them to up to 10,000 devices at a time.
To manage device tags in bulk:
-
From the BULK ACTIONS tab, select MANAGE DEVICE TAGS.
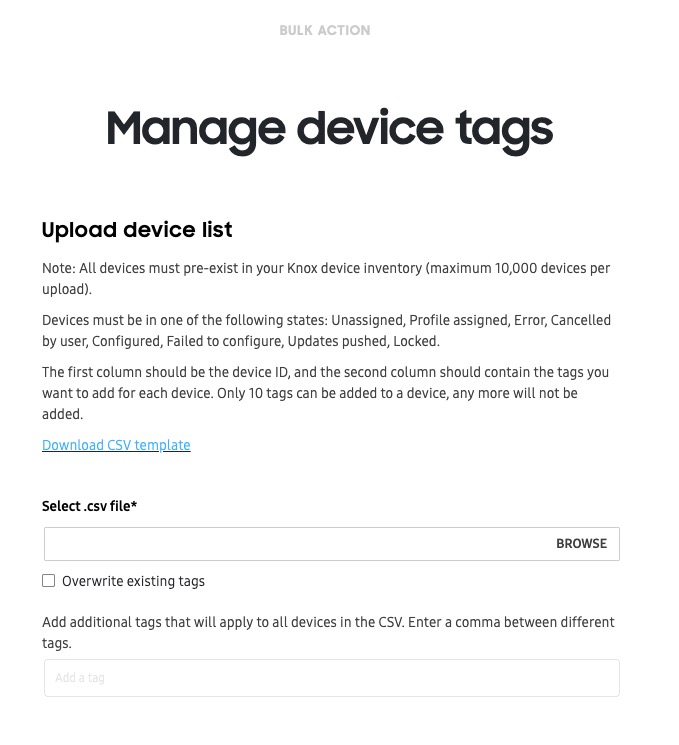
-
Click BROWSE to upload your prepared CSV file containing the device IMEI numbers you want to assign. If needed, click Download CSV template, then fill out the template with your device details. For this bulk action, your CSV file must contain the device IDs in the first column, and the tags in the second column.
-
If you already have tags assigned to devices in your fleet, you can select Overwrite existing tags to replace them with the new tags in the CSV file.
-
In the additional tags field, you can add tags that weren’t included in the CSV file. Note that you can only add up to 10 tags in total.
-
Click SUBMIT to assign the tags to your devices.
Lock and unlock devices
You can lock or unlock up to 10,000 devices at a time using a CSV file. When a device is locked, your company’s contact information is shown on the screen, and the user is unable to perform any task other than entering an unlock code or dialing an emergency number. To learn more about locking devices, see Perform device actions.
To bulk lock or unlock devices in bulk:
-
From the BULK ACTIONS tab, select either LOCK DEVICES or UNLOCK DEVICES.
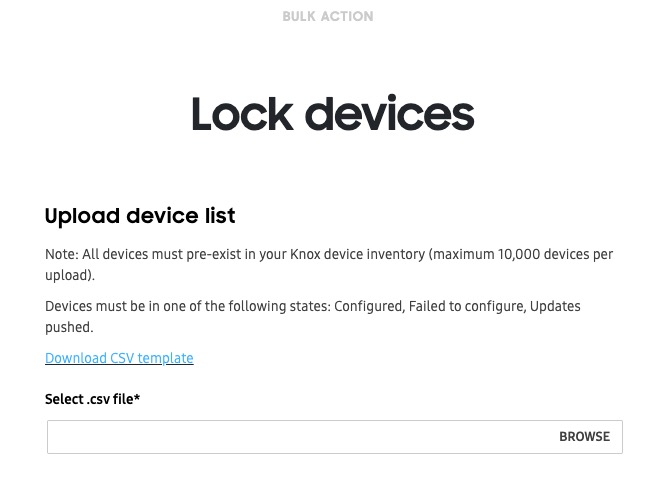
-
Click BROWSE to upload your prepared CSV file containing the device IMEI numbers you want to assign. If needed, click Download CSV template, then fill out the template with your device details.
-
Click SUBMIT to lock or unlock your devices in bulk.
Delete devices
The DELETE DEVICES bulk action lets you delete up to 10,000 devices from the Knox Configure service using a CSV file. To delete your devices using a bulk action:
-
From the BULK ACTIONS tab, select either DELETE DEVICES.
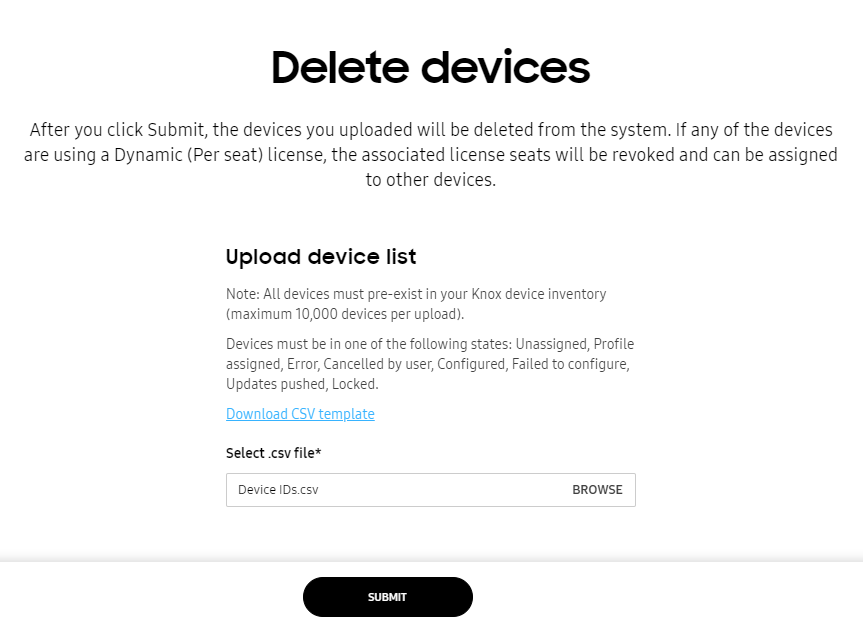
-
Click BROWSE to upload your prepared CSV file containing the device IMEI numbers you want to assign. If needed, click Download CSV template, then fill out the template with your device details.
-
Click SUBMIT to delete your devices from Knox Configure. If any devices are currently using a Dynamic edition license seat, the associated license seats is revoked and made available for assigning to other devices.
Reboot/Factory reset devices
The REBOOT/FACTORY RESET DEVICES bulk action lets you remotely reboot or factory reset up to 10,000 devices using a CSV file. For information on rebooting or factory resetting individual devices, see Perform device actions.
To reboot or factory reset devices in bulk:
-
From the BULK ACTIONS, select REBOOT/FACTORY RESET DEVICES.
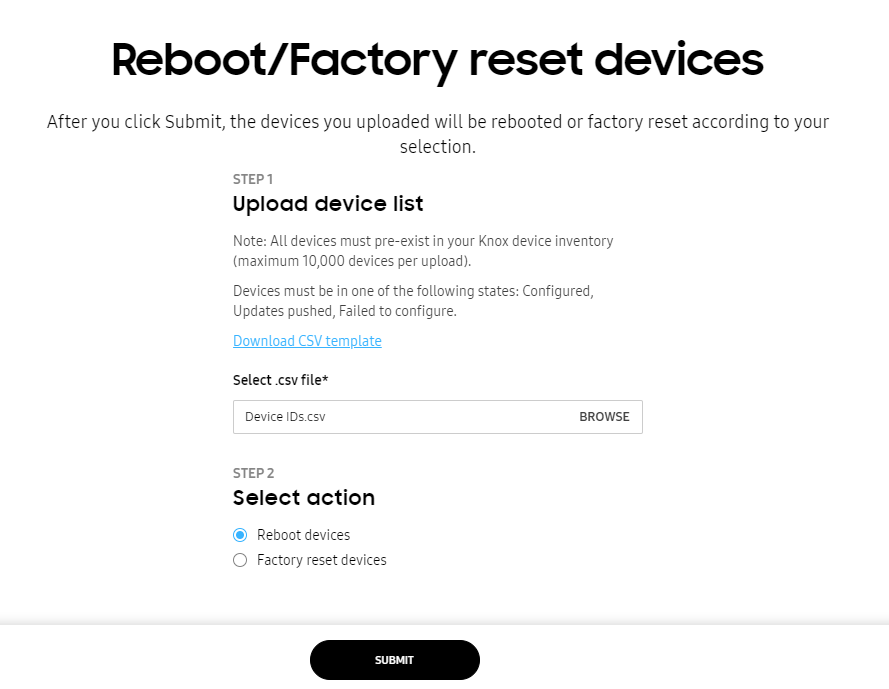
-
Click BROWSE to upload your prepared CSV file containing the device IMEI numbers you want to reboot or factory reset. If needed, click Download CSV template, then fill out the template with your device details.
-
Under Select action, choose an option:
- Reboot devices(s) — The devices will shut down and and restart, maintaining its current configuration.
- Factory reset device(s) — The device will be reset to factory settings, removing all of its current configuration settings. Once reset, you’ll have to assign a profile again if you want to apply a configuration.
- Factory reset and eSIM deletion — The device will be reset to factory settings, and the eSIM will be deleted from the device. Once reset, you’ll have to assign a profile again if you want to apply a configuration, and install a new eSIM if you want to make calls or access a mobile data network.
-
Click SUBMIT to perform the reboot or factory reset action.
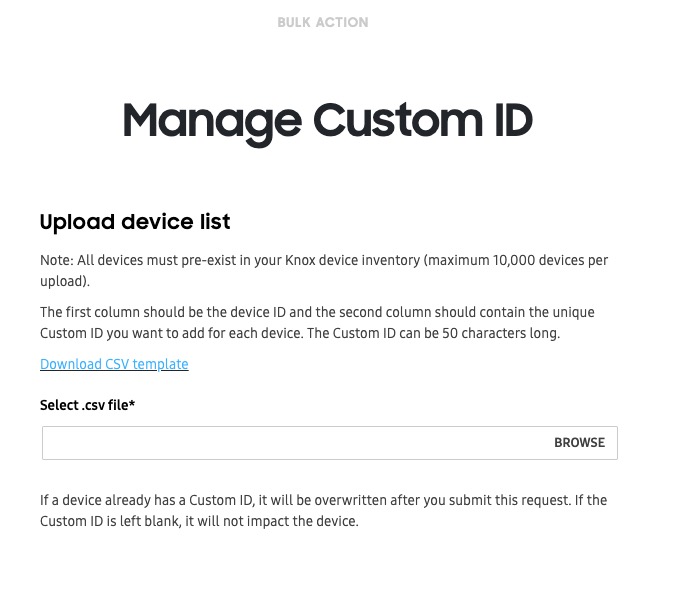
Custom ID
The CUSTOM ID bulk action lets you add a unique text label to help identify devices in your fleet. Using a CSV file, you can add custom IDs that are up to 50 characters long, and assign them to up to 10,000 devices at a time.
Custom IDs can only be used for devices with Knox version 3.7 and higher.
To add custom IDs in bulk:
-
From the BULK ACTIONS, select CUSTOM ID.
-
Click BROWSE to upload your prepared CSV file containing the device IMEI numbers you want to reboot or factory reset. If needed, click Download CSV template, then fill out the template with your device details. For this bulk action, your CSV file must contain the device IDs in the first column, and the tags in the second column.
Custom IDs can’t contain spaces or special characters including the following:
# / $ * % ^ & : \ ( ) + ? { } [ ] < > -
Click SUBMIT to assign the custom ID to your devices. If a device already has an existing custom ID, it will be overwritten with the new value in the CSV file.
On this page
Is this page helpful?