Manage groups
Last updated August 28th, 2026
Groups allow you to categorize users by function or role-based access needs, such as teachers, students, or staff. Managing groups streamlines user organization and permission assignments. You must be an admin with the Super Admin or Group Admin role to manage groups.
Groups and organizational units are separate ways to organize user accounts. Changing a group does not change an organizational unit, and changing an organizational unit does not change a group.
Find and organize groups
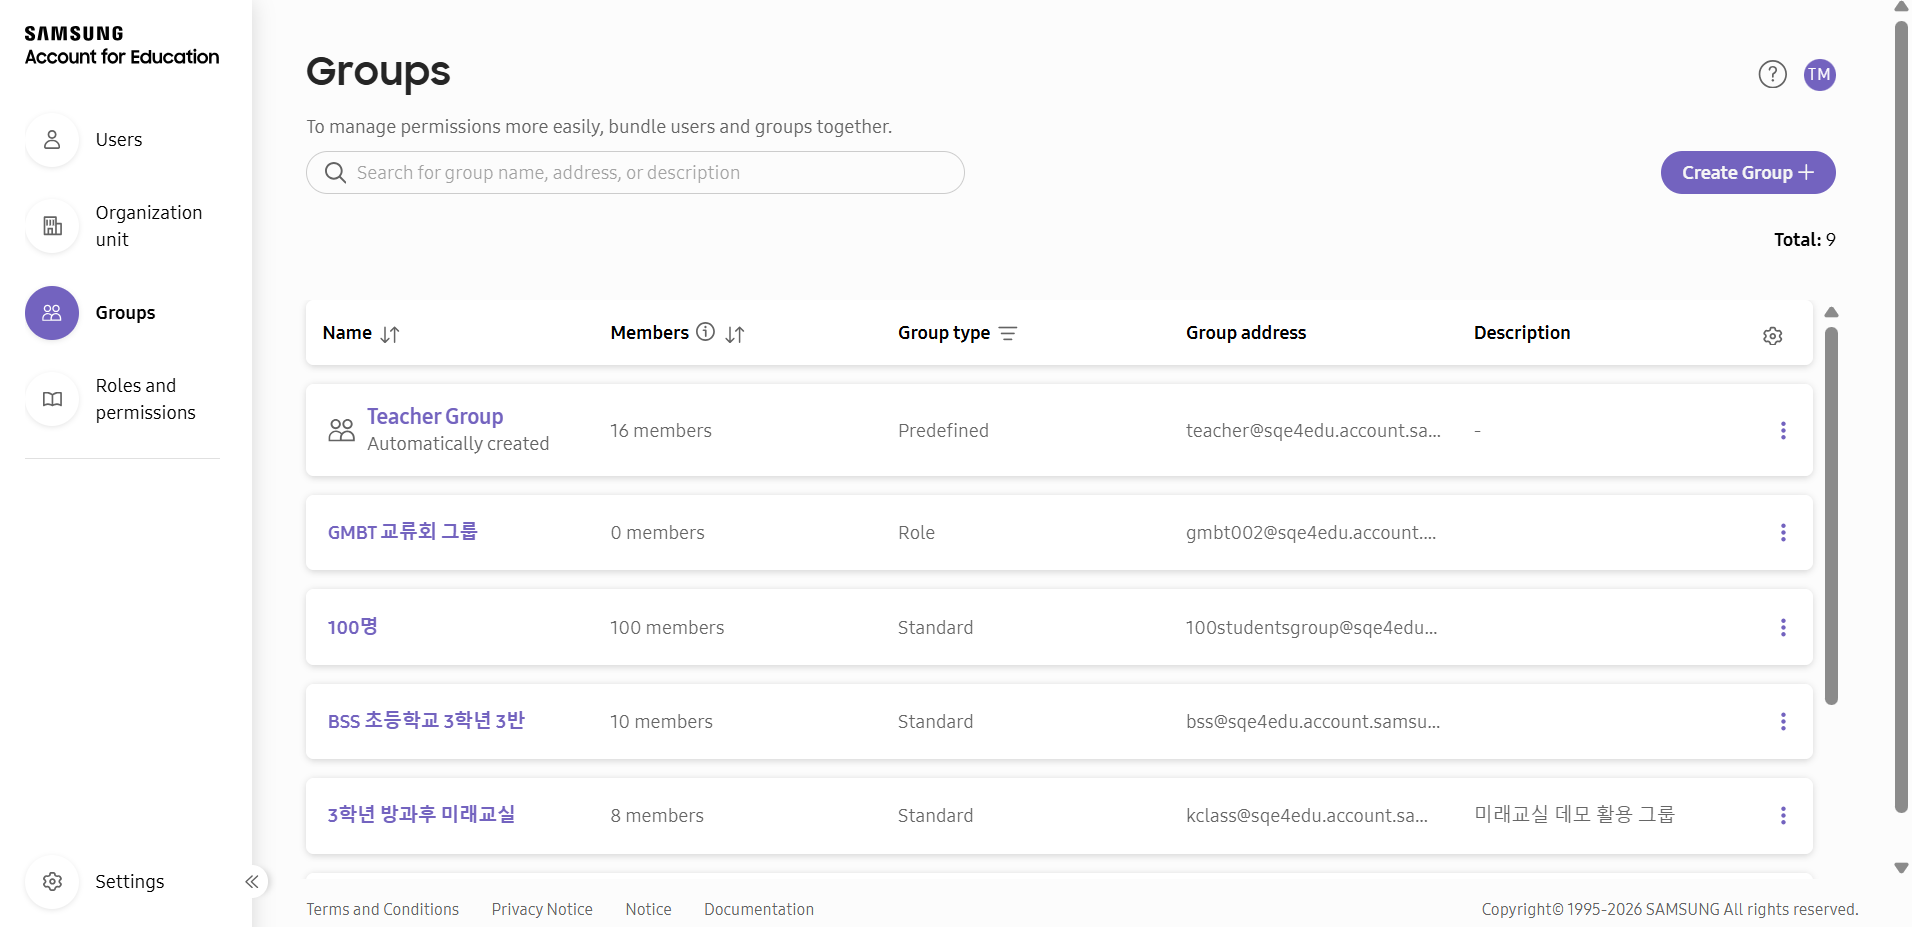
From the Groups page, you can quickly locate specific groups and customize the view:
- To find a group, use the search bar at the top to search by group name or address.
- To customize the columns shown, click the gear icon to show or hide columns in the group list.
- To sort or filter groups, click column headers to sort by that value or use the filter icon to filter results.
Group types
There are three kinds of groups in Samsung Account for Education:
| Type | Description | Can assign roles | Classroom User allowed |
|---|---|---|---|
| Predefined group | A predefined group, such as the Teacher Group | No | No |
| Standard group | A group for general user organization | No | Yes |
| Role group | A group for role-based access control (RBAC) permissions | Yes | No |
You cannot create, modify details, or delete a predefined group — you can only add or remove members.
Create a group
Creating a group lets you categorize users by function or role-based access needs, such as teachers, students, or staff.
To create a group:
- Navigate to Groups.
- Click Create group.
- Enter group details:
- Group name — Enter the name for the group.
- Group address — Enter a unique identifier for the group (must be different from group name).
- (Optional) Description — Enter a description for the group.
- (Super Admin only) Select either Standard or Role as the group type.
- Select a domain from the dropdown.
- Click Create.
The Manage members of group page opens. Proceed to add members, or click Done to skip for now.
Add members to a group
Adding members to groups enables efficient management of users with similar functions or access needs.
You can add group members from the Manage members of group page, which is accessible during group creation, or from Groups > (More actions icon) for the intended group > Manage group members.
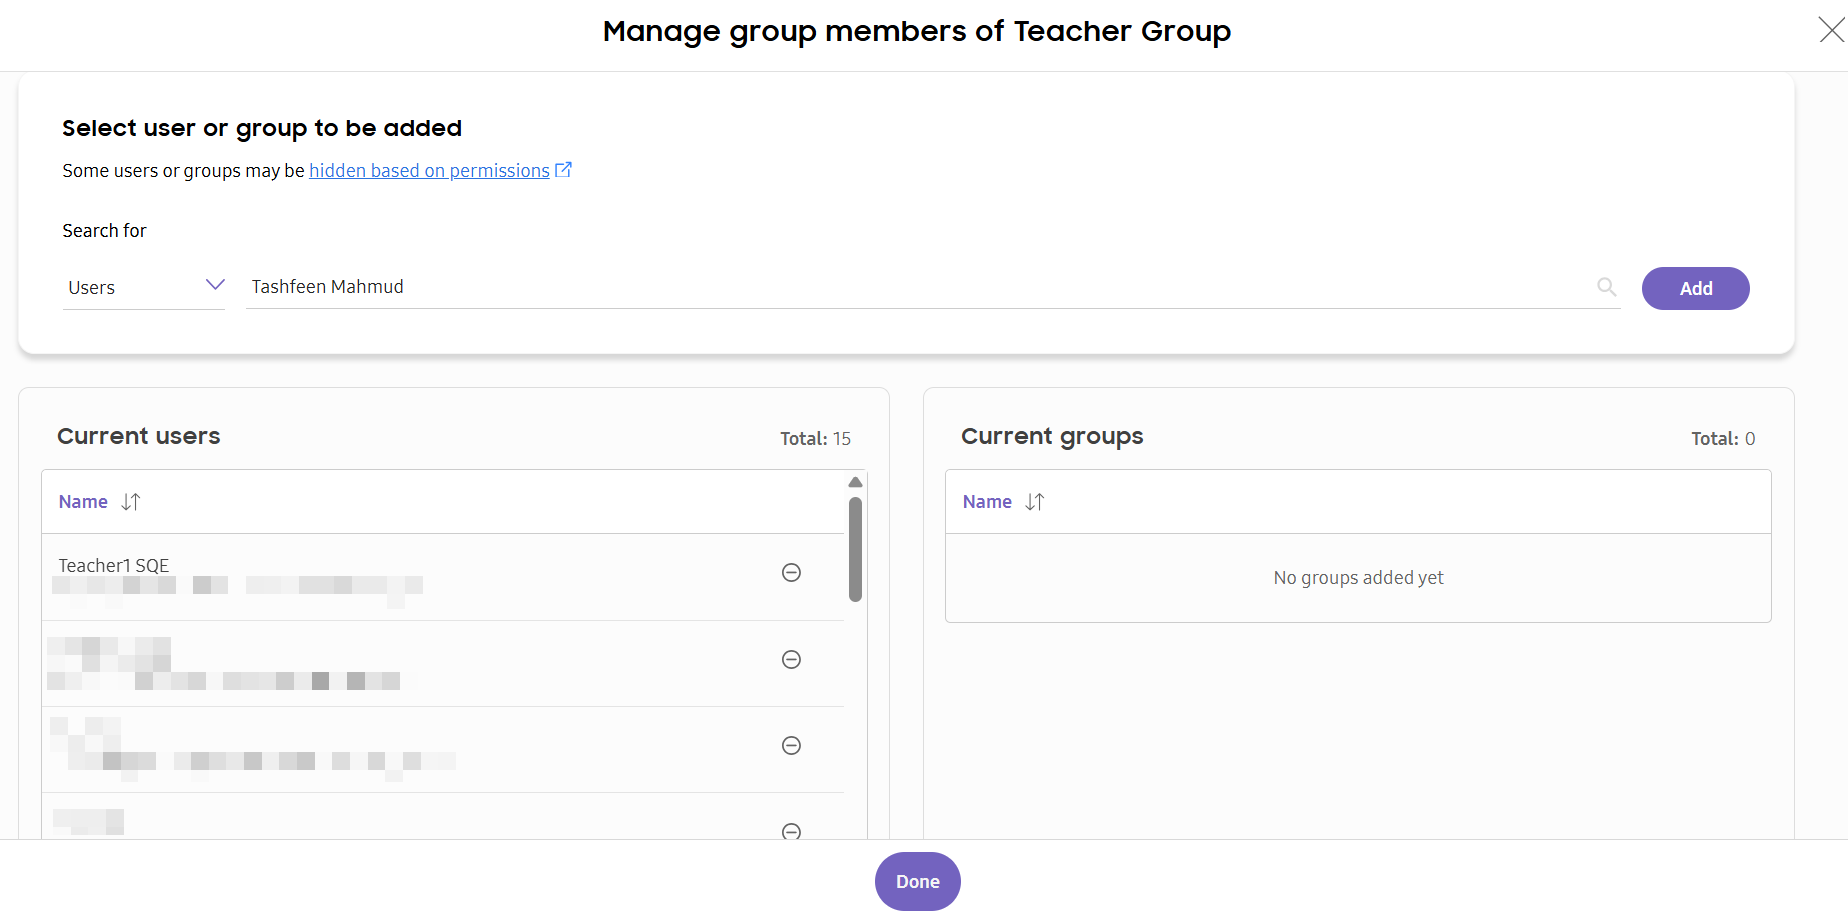
On the Manage members of group page:
- Under Select user or group to be added choose Groups or Users to search for.
- Start typing the intended group/user name or account ID.
- Select the matching group/user and click Add.
- If you select a group, all users in that group are added to the current group.
- You can only add groups of the same type (Standard or Role).
- Click Done to open the latest group list.
Add members to the Teacher Group
If you add a user or group to the predefined Teacher Group, then that user or group is recognized as a teacher in Knox Classroom — allowing them to sign into the Knox Classroom dashboard.
You can add users or groups to the Teacher Group as you would for any other group in the Samsung Knox for Education portal.
Remember to add intended users or groups to the Teacher Group. Otherwise, they won’t be able to sign into Knox Classroom.
Remove members from a group
You can remove members from a group when their role changes or they no longer need group-specific access. To remove group members:
Removing group members only removes group membership. It does not result in user deletion. To delete users, see Delete a user.
- In the Manage group members dialog, click the remove icon (remove) next to the member.
- Confirm by clicking Remove.
- Click Done to save your changes.
Edit group details
You can edit an existing group’s details from the Edit group details panel to keep group information accurate and descriptive.
- Navigate to Groups.
- Select a group to open the details panel.
- Click (More actions icon) for the intended group.
- Select Edit group details.
- Modify the group name or description as required.
- Click Save to persist your changes.
Delete a group
You can delete a group when it’s no longer needed for your educational organization’s organization. Deleting a group automatically removes group membership, but does not delete the user accounts of group members.
To delete a group:
- Navigate to Groups.
- Select a group to open the details panel.
- Click (More actions icon) for the intended group.
- Select Delete group.
- Confirm by clicking Delete.
Teacher Group is a predefined group which cannot be deleted.
Where to go next
- To add users to your educational institution, see Manage users.
- To set up organizational units, see Manage organizational units.
- To manage role assignments, see Manage roles and permissions.
On this page
Is this page helpful?