Send announcements to your class
Last updated August 28th, 2026
Use announcements to share instructions, reminders, and updates with every student in a class at once, keeping everyone informed and on the same page.
Before you post
Create or open the intended class before posting an announcement. Announcements are visible only to students in that class, including students who join the class after an announcement is posted.
Create an announcement
Create an announcement from the class detail page to quickly share important information with all students in the class.
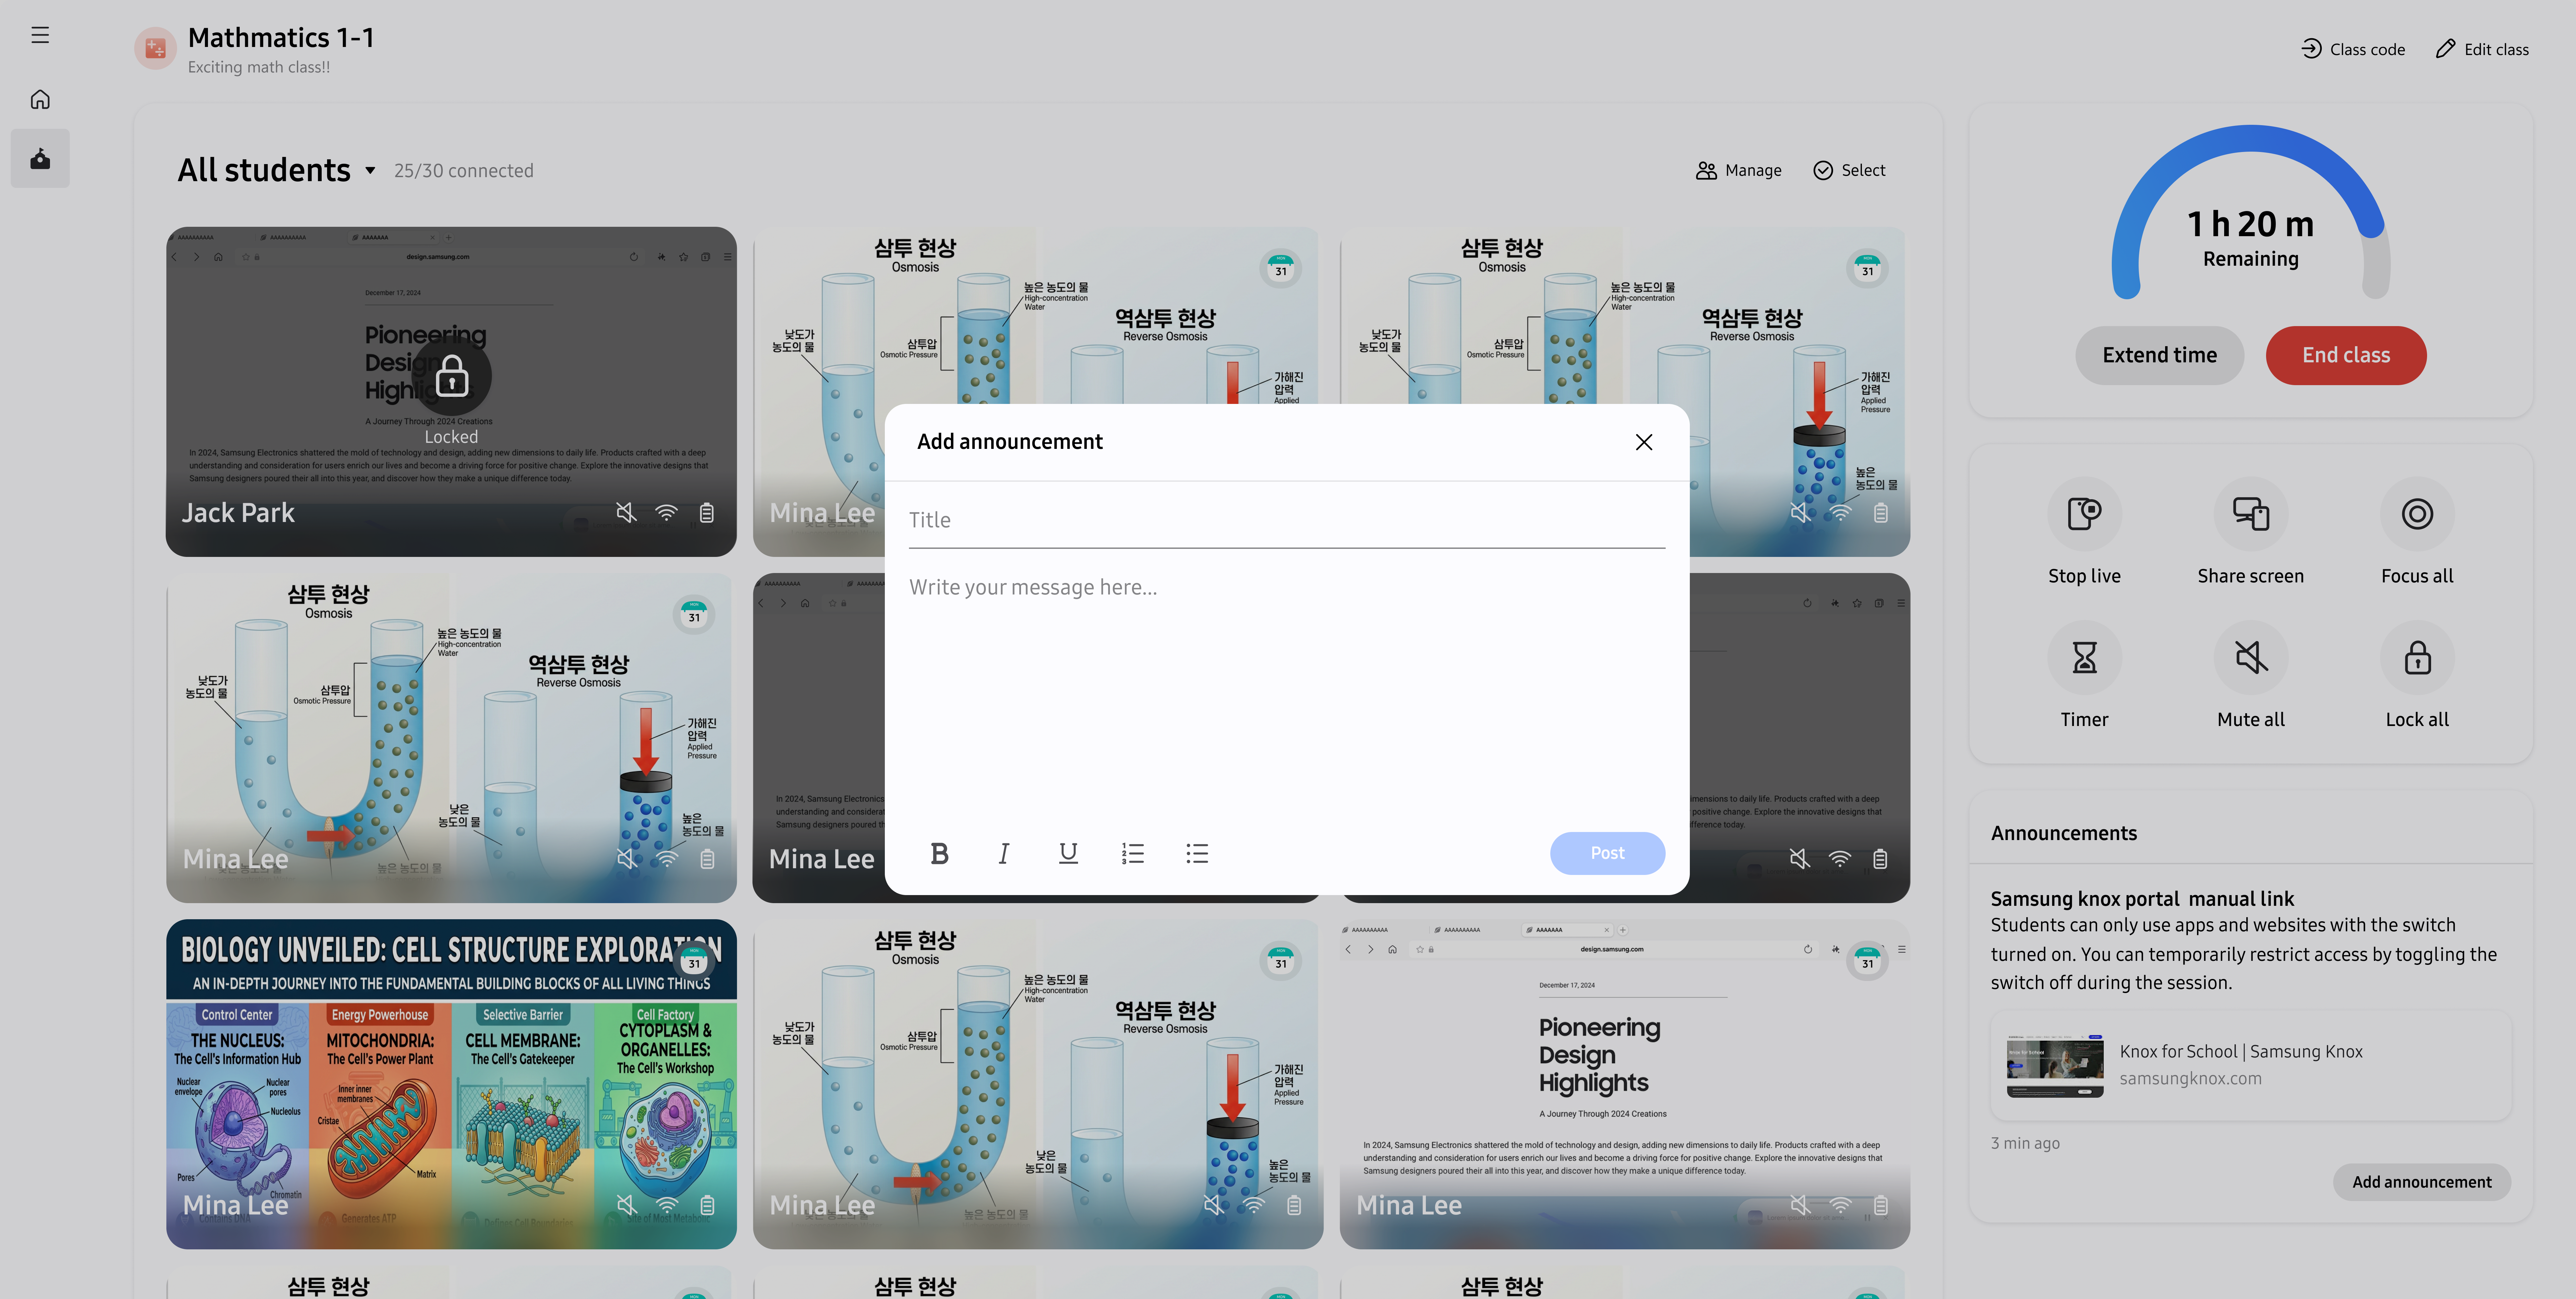
- On the class detail page, select Add announcement.
- Enter a title and message. The title is plain text and supports up to 150 characters. The message supports up to 30,000 characters.
- Use the formatting options as needed. You can apply bold, italic, underline, bulleted-list, and numbered-list formatting to selected text in the message.
- To include a link, paste or type its URL in the message, then press Enter or Space. A preview is added when link metadata is available. Select the remove control on the preview to remove it.
- Select Post.
All students in the class can now see the announcement. If posting fails, check your connection and try again.
Discard an announcement
To close the Add announcement dialog, select Close. If you made changes, select Discard to close without saving them, or select Cancel to continue editing.
View past announcements
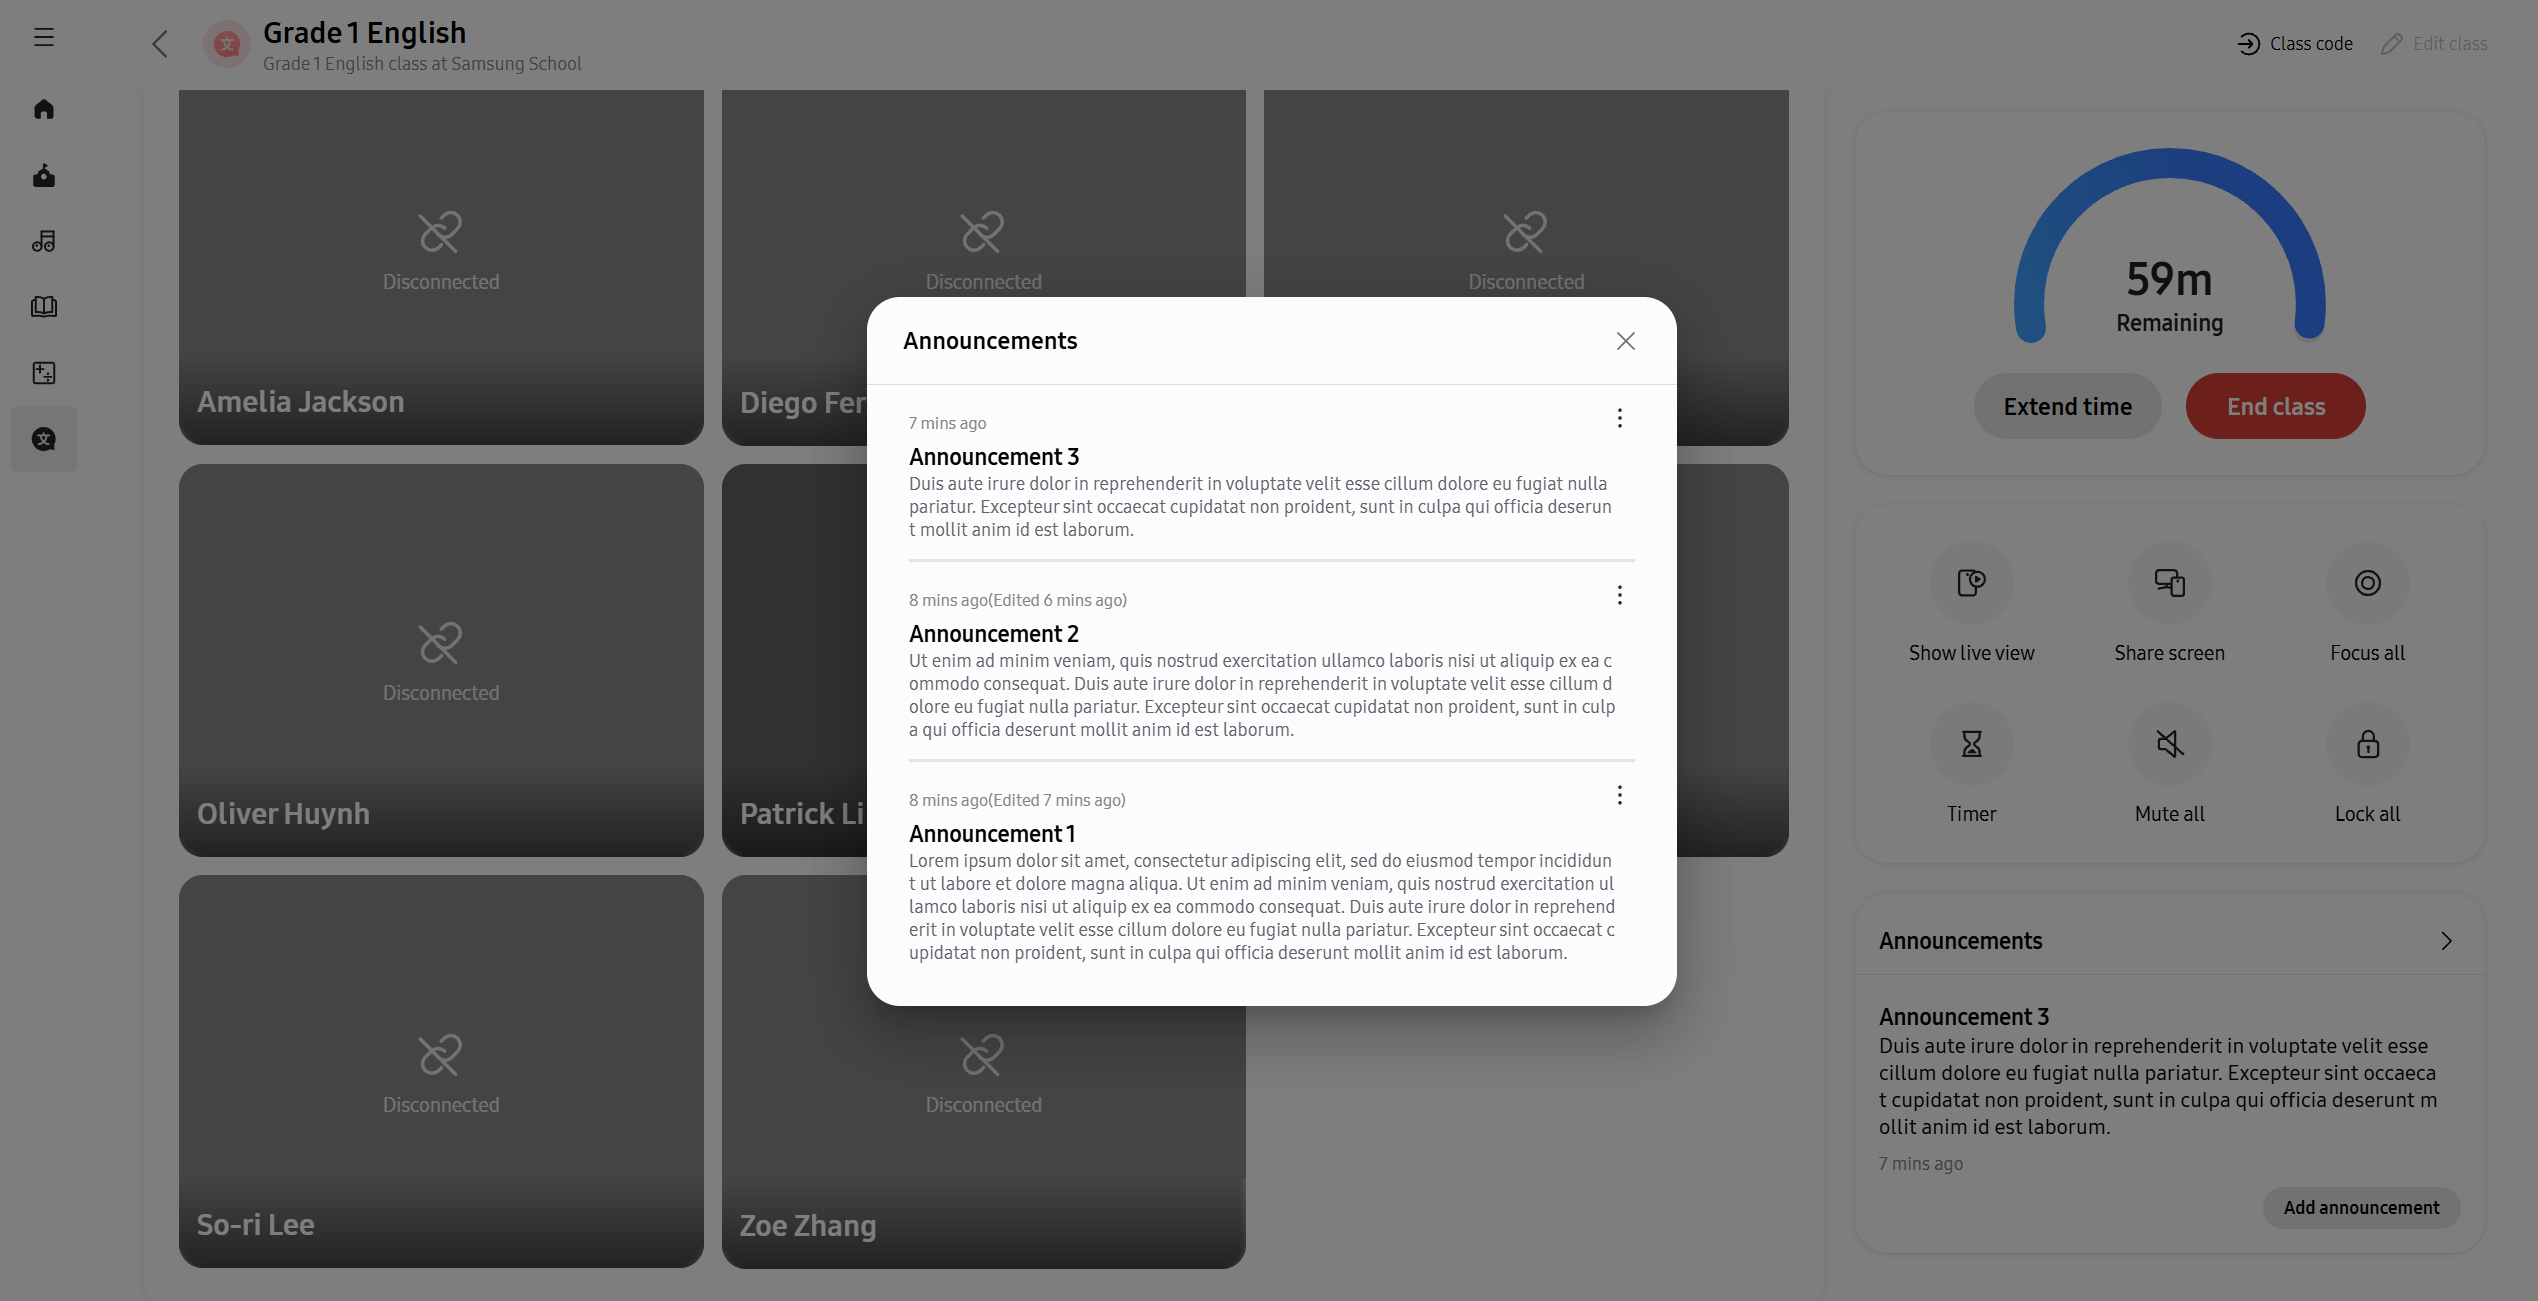
Open the class detail page and go to the Announcements section to review announcements that have already been posted, helping you track what information students have received. If the class has more announcements than are shown, select View all.
Edit an announcement
You can update an existing announcement from the announcements list to correct mistakes or keep information current.
- In the Announcements section, select (More actions icon) for the announcement.
- Select Edit.
- Update the title, message, formatting, or link preview as needed.
- Select Post.
If editing fails, check your network connection and try again.
Delete an announcement
Delete an announcement when students no longer need it to keep the announcements list organized and relevant.
- In the Announcements section, select (More actions icon) for the announcement.
- Select Delete.
- Review the notice that the announcement will be permanently deleted for you and everyone in the class.
- Select Delete to confirm, or Cancel to keep the announcement.
If deletion fails, try again.
Where to go next
Continue with another class-management task.
- To update class details or share a class code, see Create and manage classes.
- To run a live class, see Start and manage a class session.
On this page
Is this page helpful?