Start and manage a class session
Last updated August 28th, 2026
A live session lets you monitor student activity, guide attention, and respond to students while a class is underway, giving you real-time visibility and control to keep learning on track.
Run a class session
Use this workflow for each class:
- Create a class and add students.
- Start the session and use the session controls that support the activity.
- End the session when the activity is complete.
- Send an announcement if students need follow-up instructions or reminders.
Before you start
Before starting a session, make sure that students are enrolled in the class and their devices are connected. Your IT administrator must create student Classroom user accounts before students can join a class. For account setup, see Invite a Classroom user.
Start a class session
Start the session after your students and devices are ready to begin your lesson with everyone connected and engaged.
- Open the class detail page.
- Set the session duration. The default is 60 minutes.
- Confirm that the expected students are ready.
- Select Start class.
A class can have only one active teacher session. If you open the same class in another tab or window, choose whether to switch the session to that tab. Starting another class in a new tab or window ends the earlier class session there. If you close a tab or browser during an active session, you can rejoin the existing session when you return while the class remains active.
Understand device status
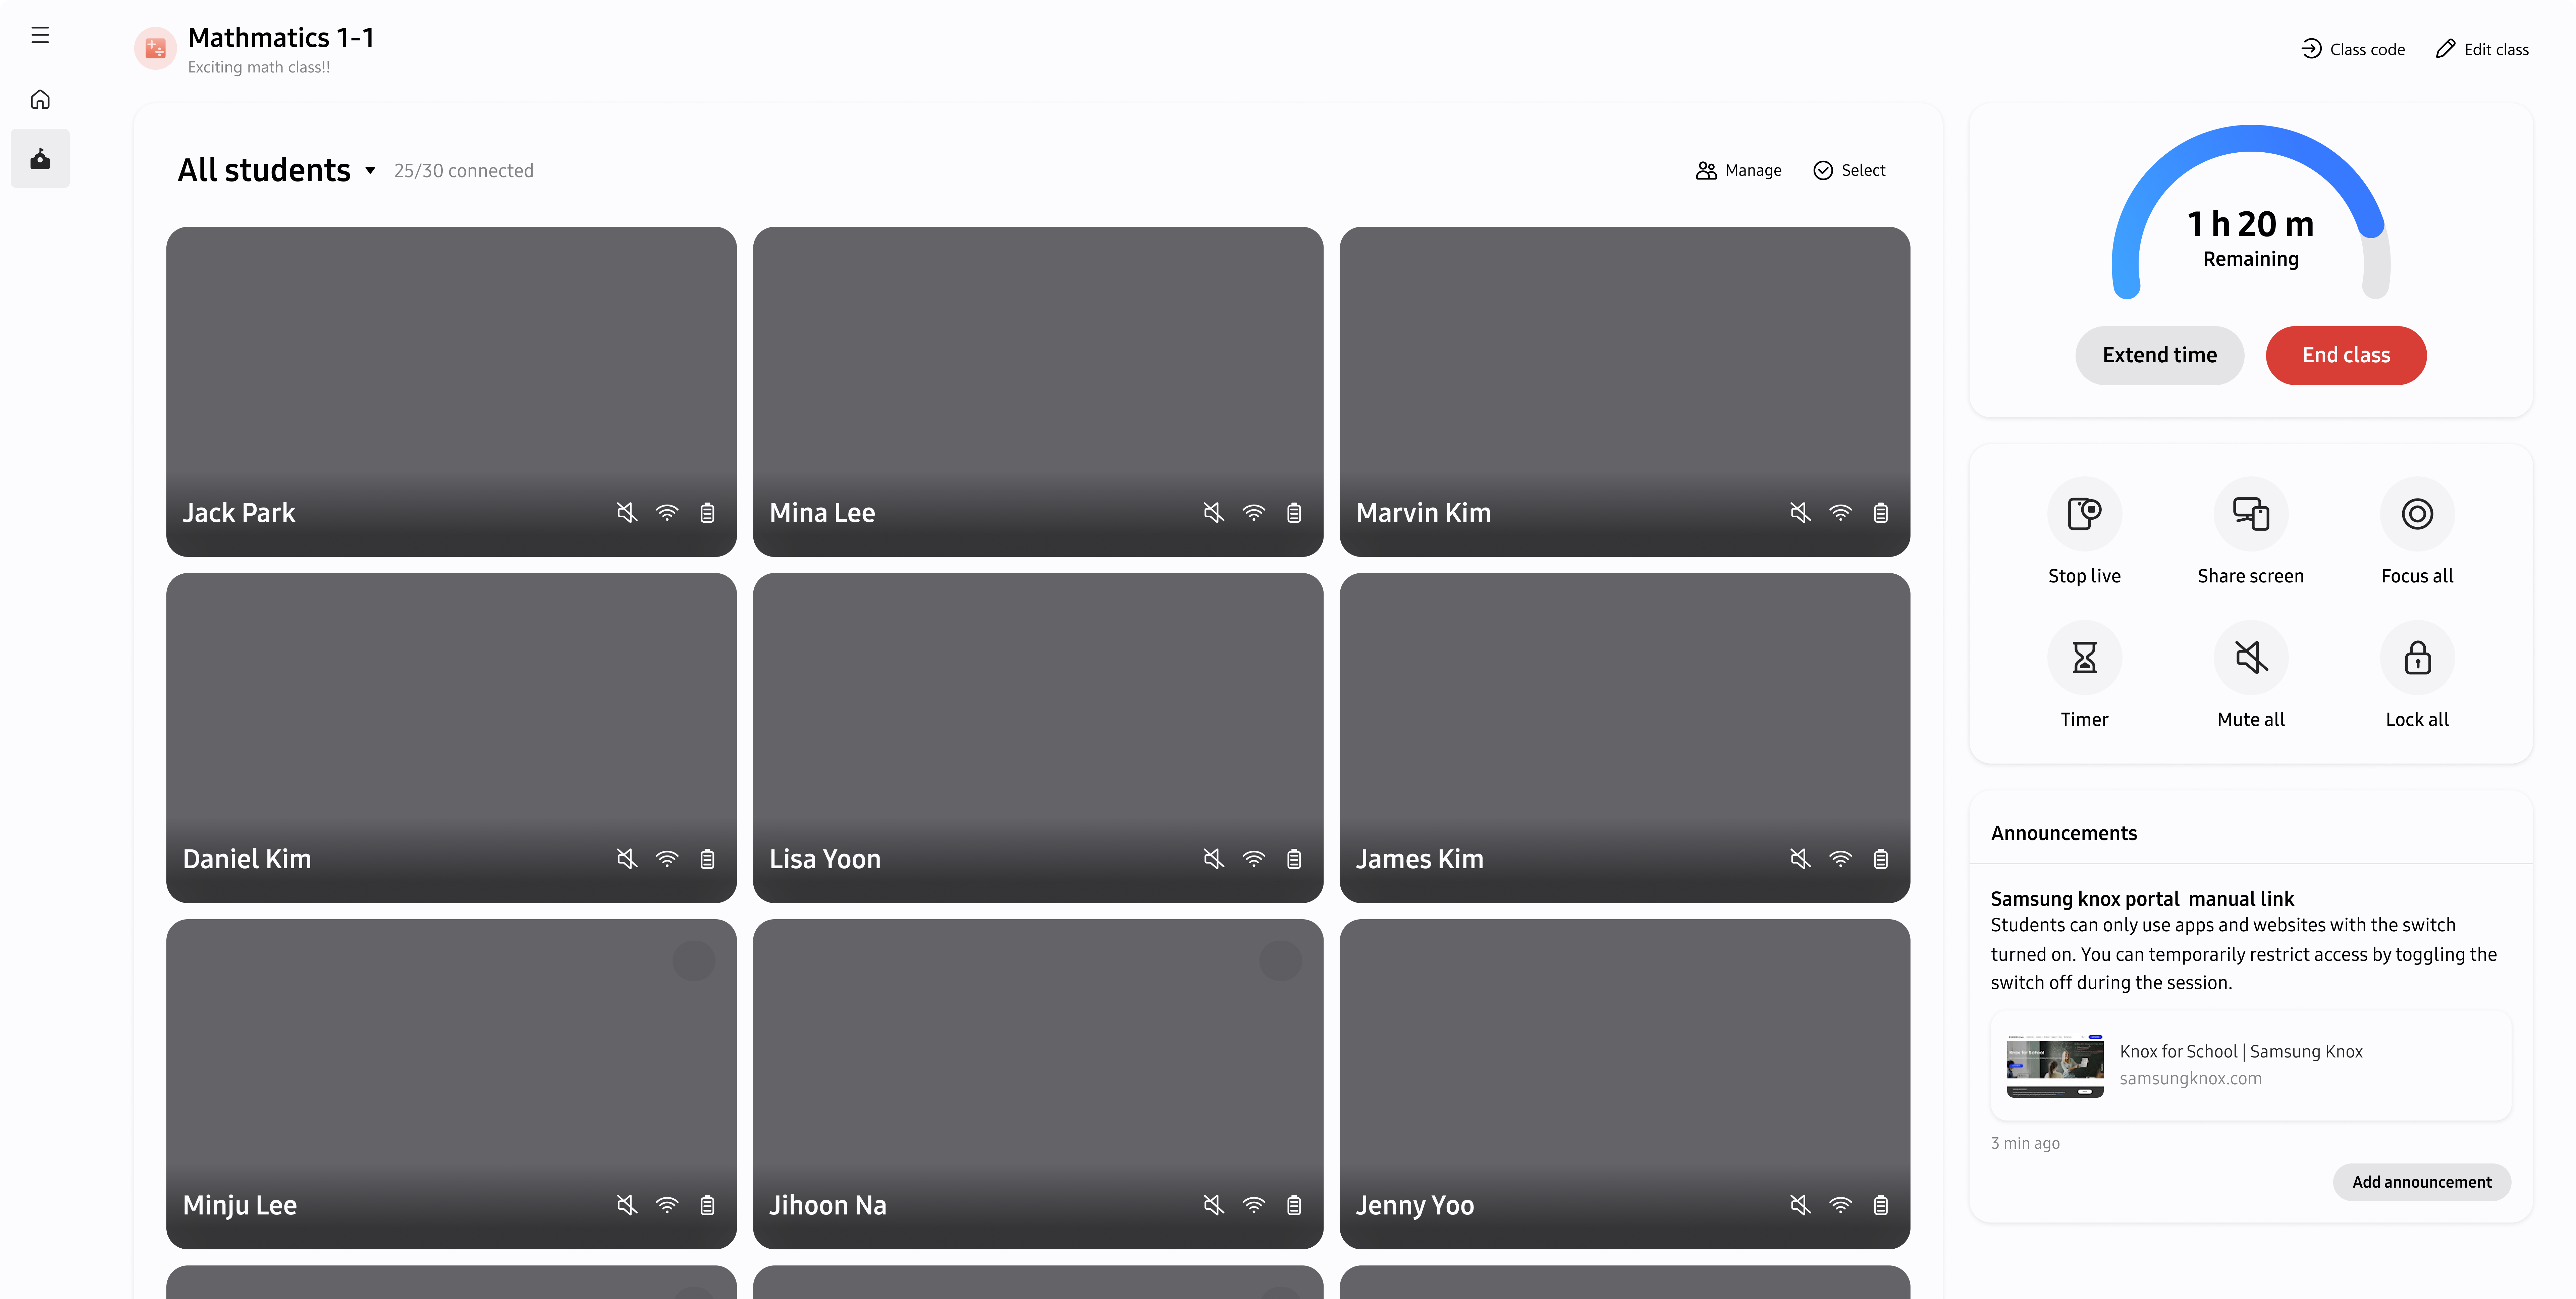
Use the student grid to check each device’s current connection and session state.
| Status | What it means |
|---|---|
| Standby | The device is connected and ready for a session. |
| Normal | The device is connected during an active session. |
| Disconnected | The device has lost its connection to the session. It reconnects automatically when the network connection recovers. |
| Lock | The teacher has locked the device. |
Monitor student activity
During a session, each student appears in the student grid with their name, device status, and a current screen view, helping you stay aware of student progress and identify who needs support. Use the All students menu to show a specific group or student.
Use Live View
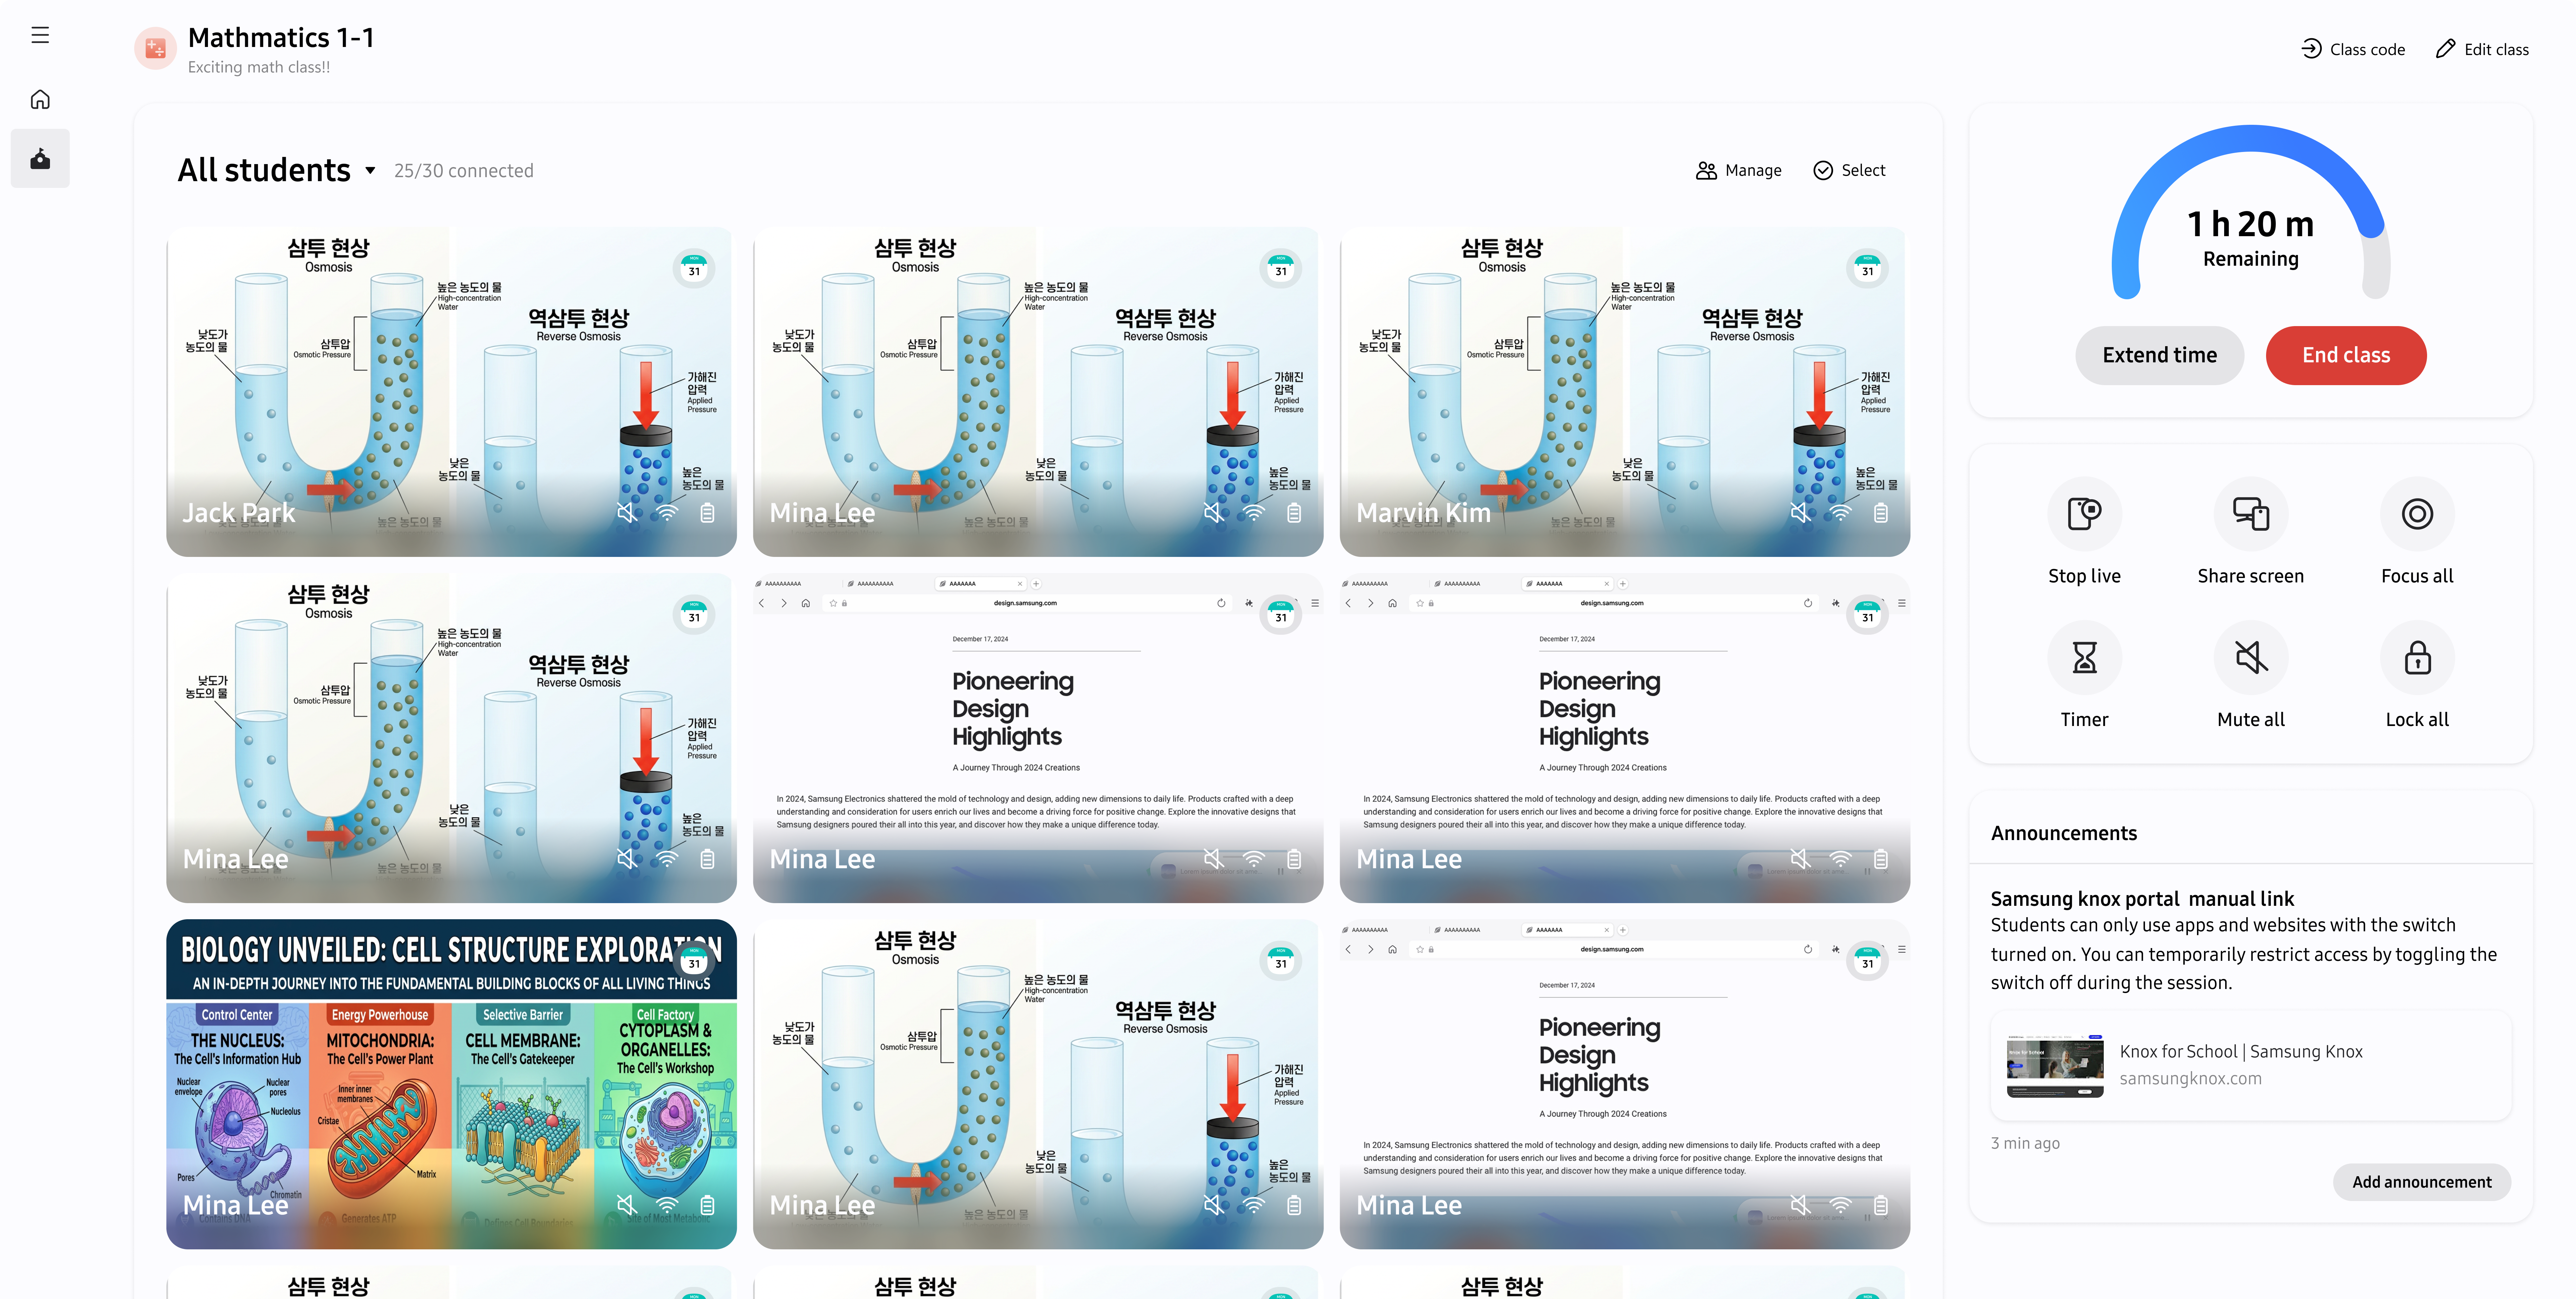
Live view displays real-time screen thumbnails for all students in the active session, letting you visually track progress and ensure everyone is on task.
- During an active session, select Show live view.
- Review the student screen thumbnails to monitor activity.
- Select Stop live view to return to the standard grid.
If starting or stopping Live view fails, try again. If the issue continues, check your network connection.
Track active usage
On the top right of each student card, a list shows the applications the student is using. Use this information to identify whether students are on task or using unrelated apps.
Respond to a raised hand
When a student raises their hand, a notification displays identifying the student, and a hand icon appears on their card. Select the student card, then click Lower hands to lower it. You can lower raised hands for more than one student at a time.
Control a student device
Remote control lets you take temporary control of a student’s device to provide direct assistance, troubleshoot issues, or guide them through challenging tasks. This feature enables hands-on support without needing to physically access the student’s device, helping you resolve problems quickly and keep learning on track.
Remote control, device locking, and focus mode affect student devices immediately. Follow your school’s policies, tell students before applying a control, and restore access when the activity ends.
-
In the student grid, hover over the student’s card.
-
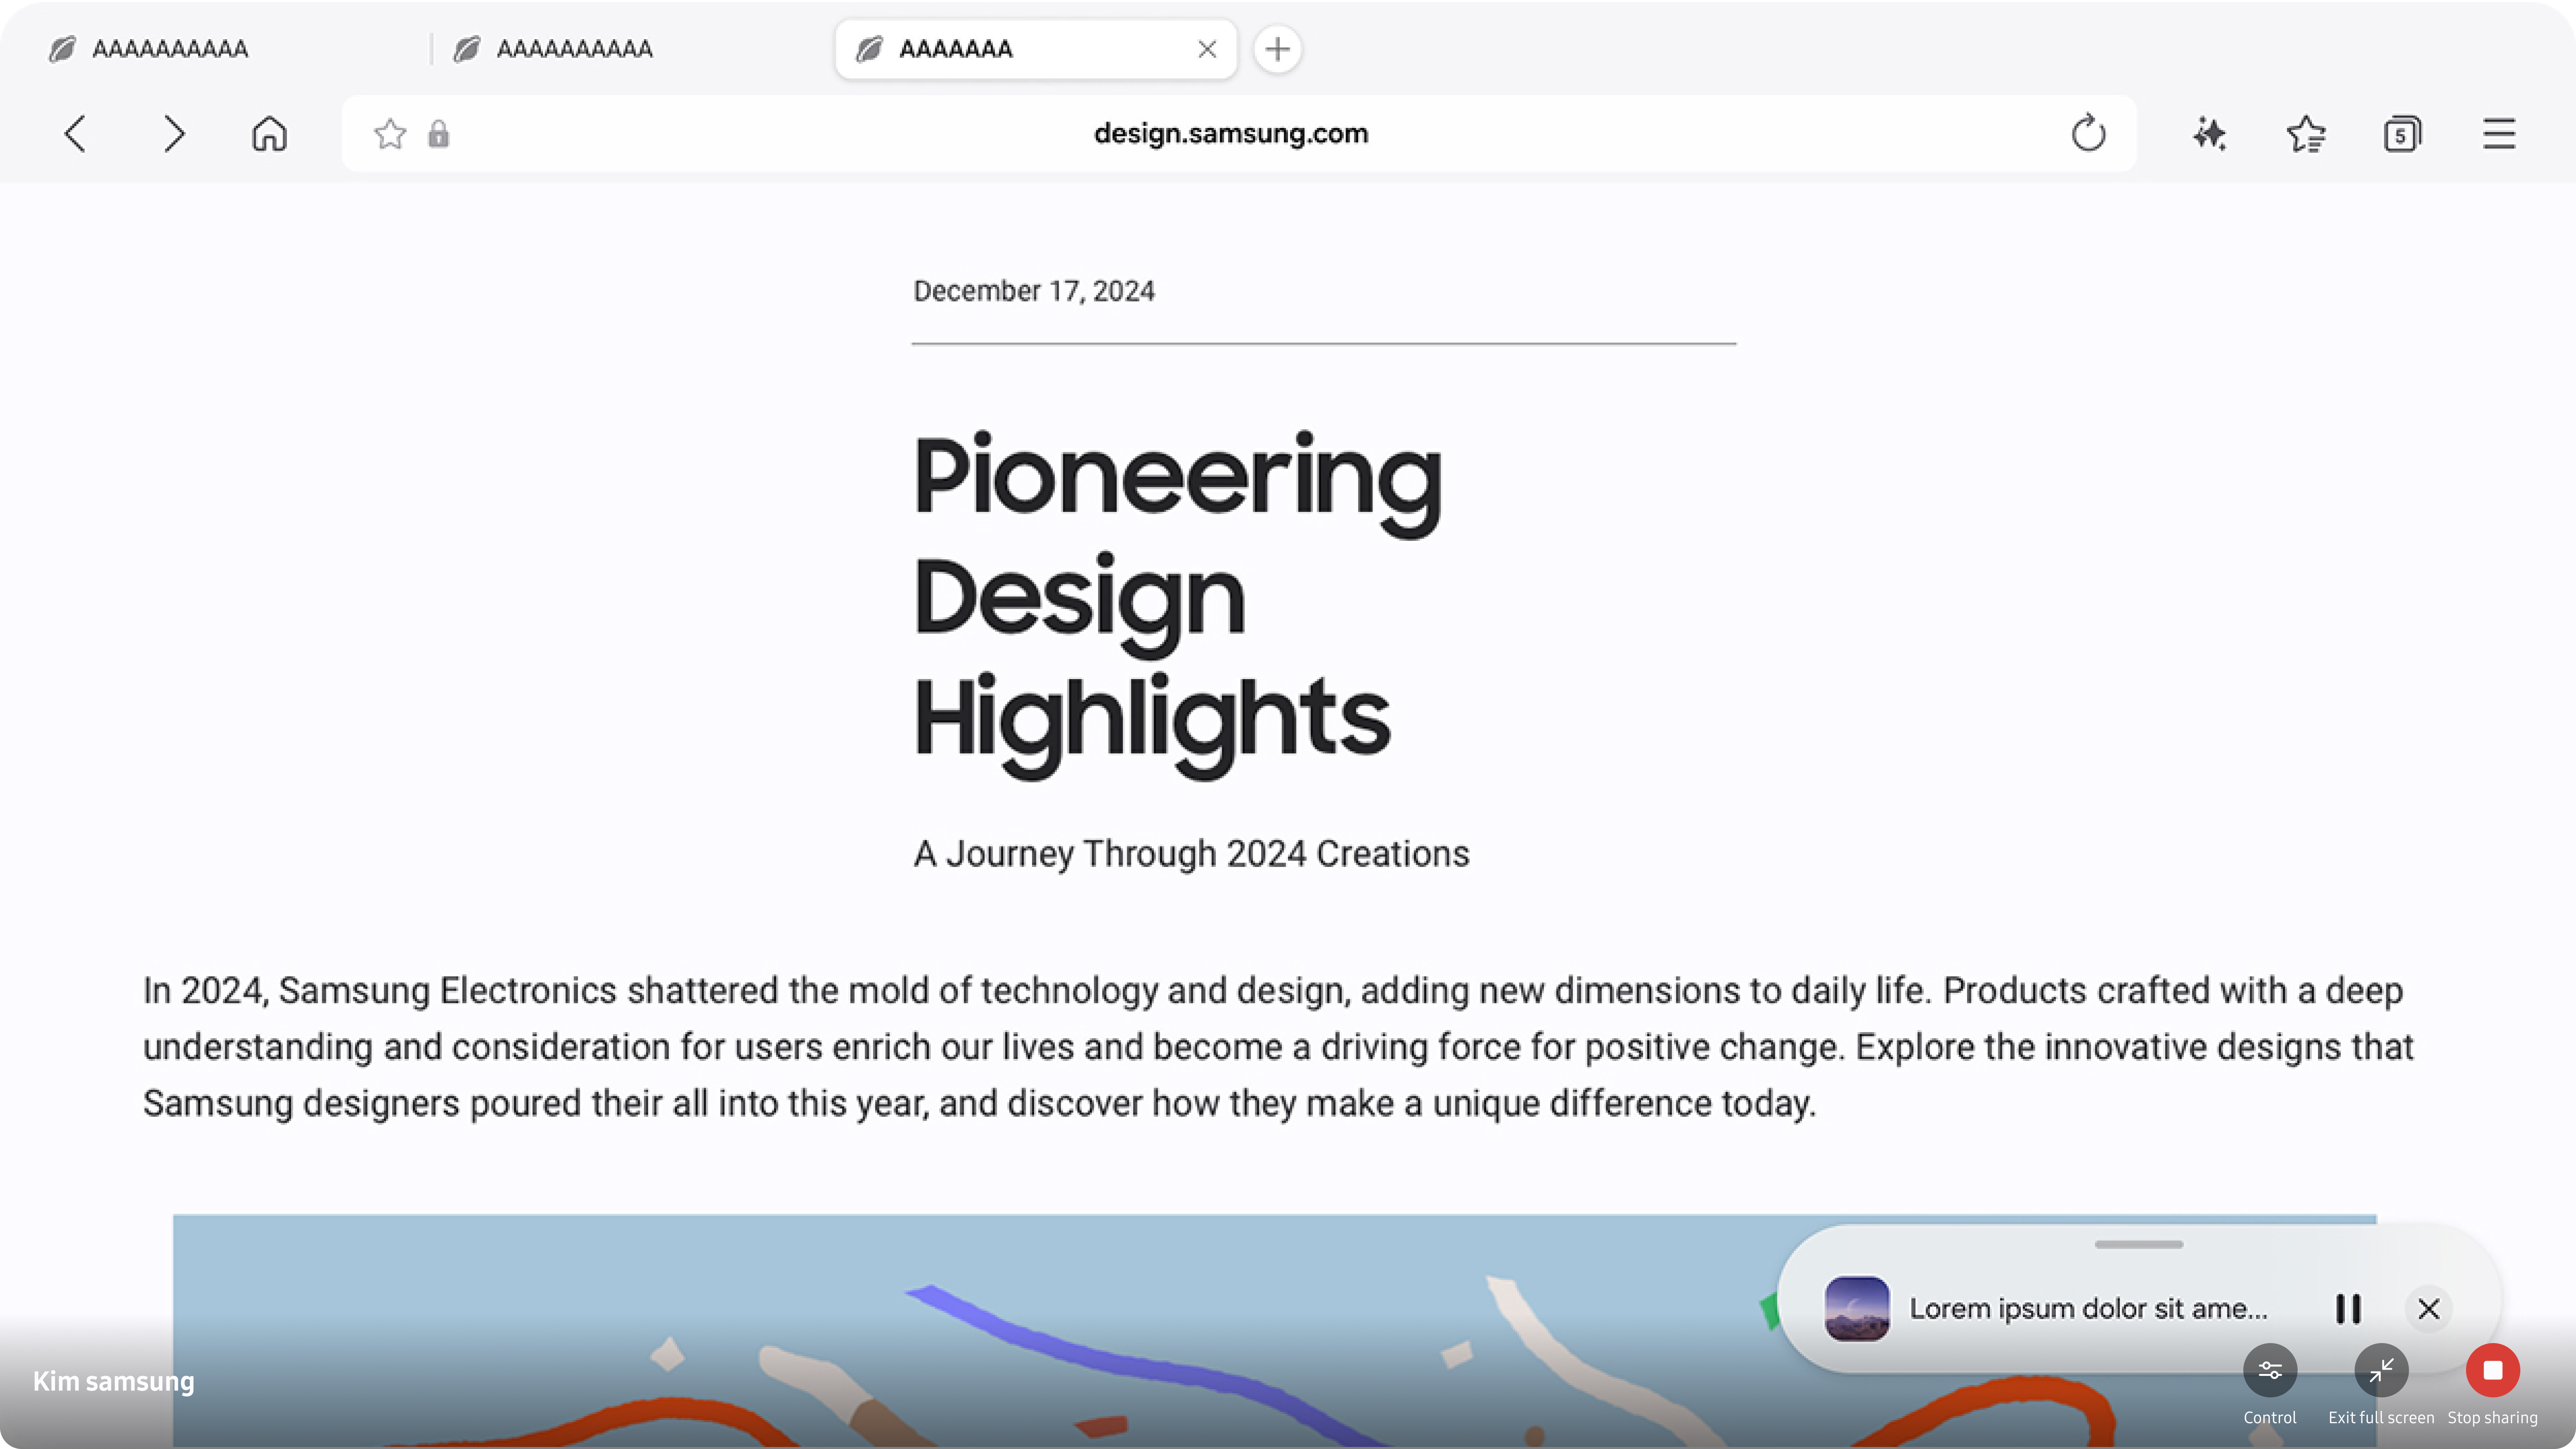
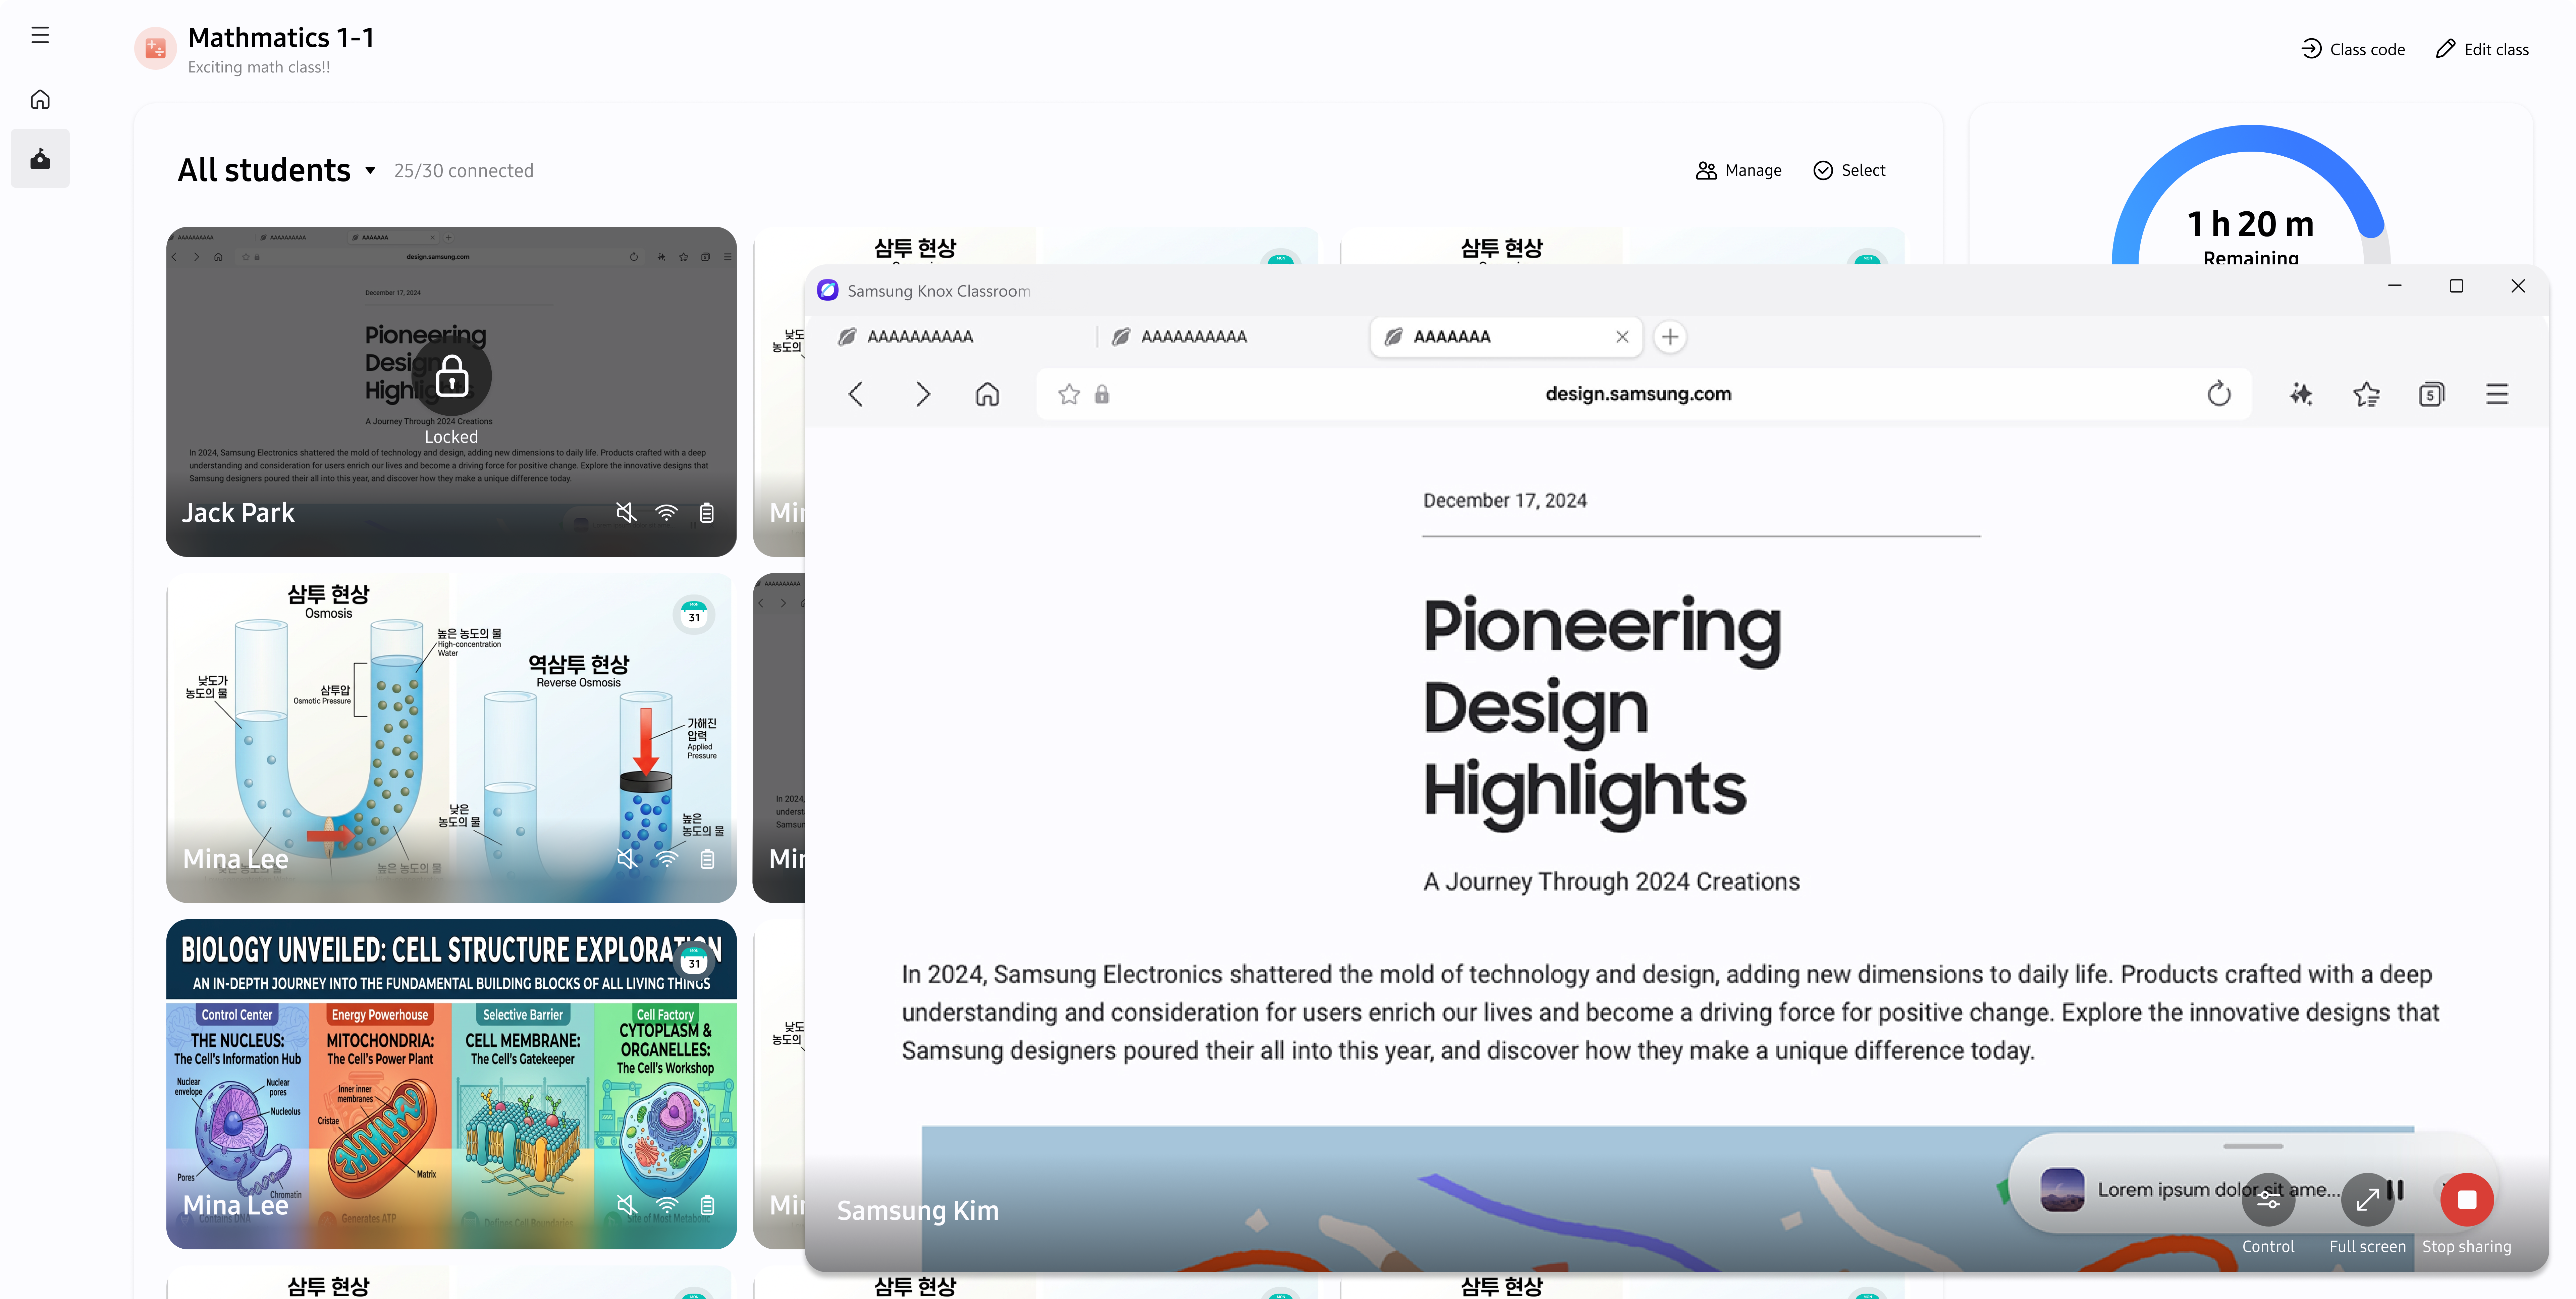
Select Share screen. A window opens showing the student’s screen.
-
Click Control, then click Start. The shared screen window automatically opens in full screen and a status indicator appears.
Remote control is available only in full screen. The control status indicator can be moved during the current remote-control session.
-
Use your mouse and keyboard to guide the student or fix issues on their screen.
-
To stop controlling your student’s screen, click x on the control status indicator, or exit full screen.
Select students for an action
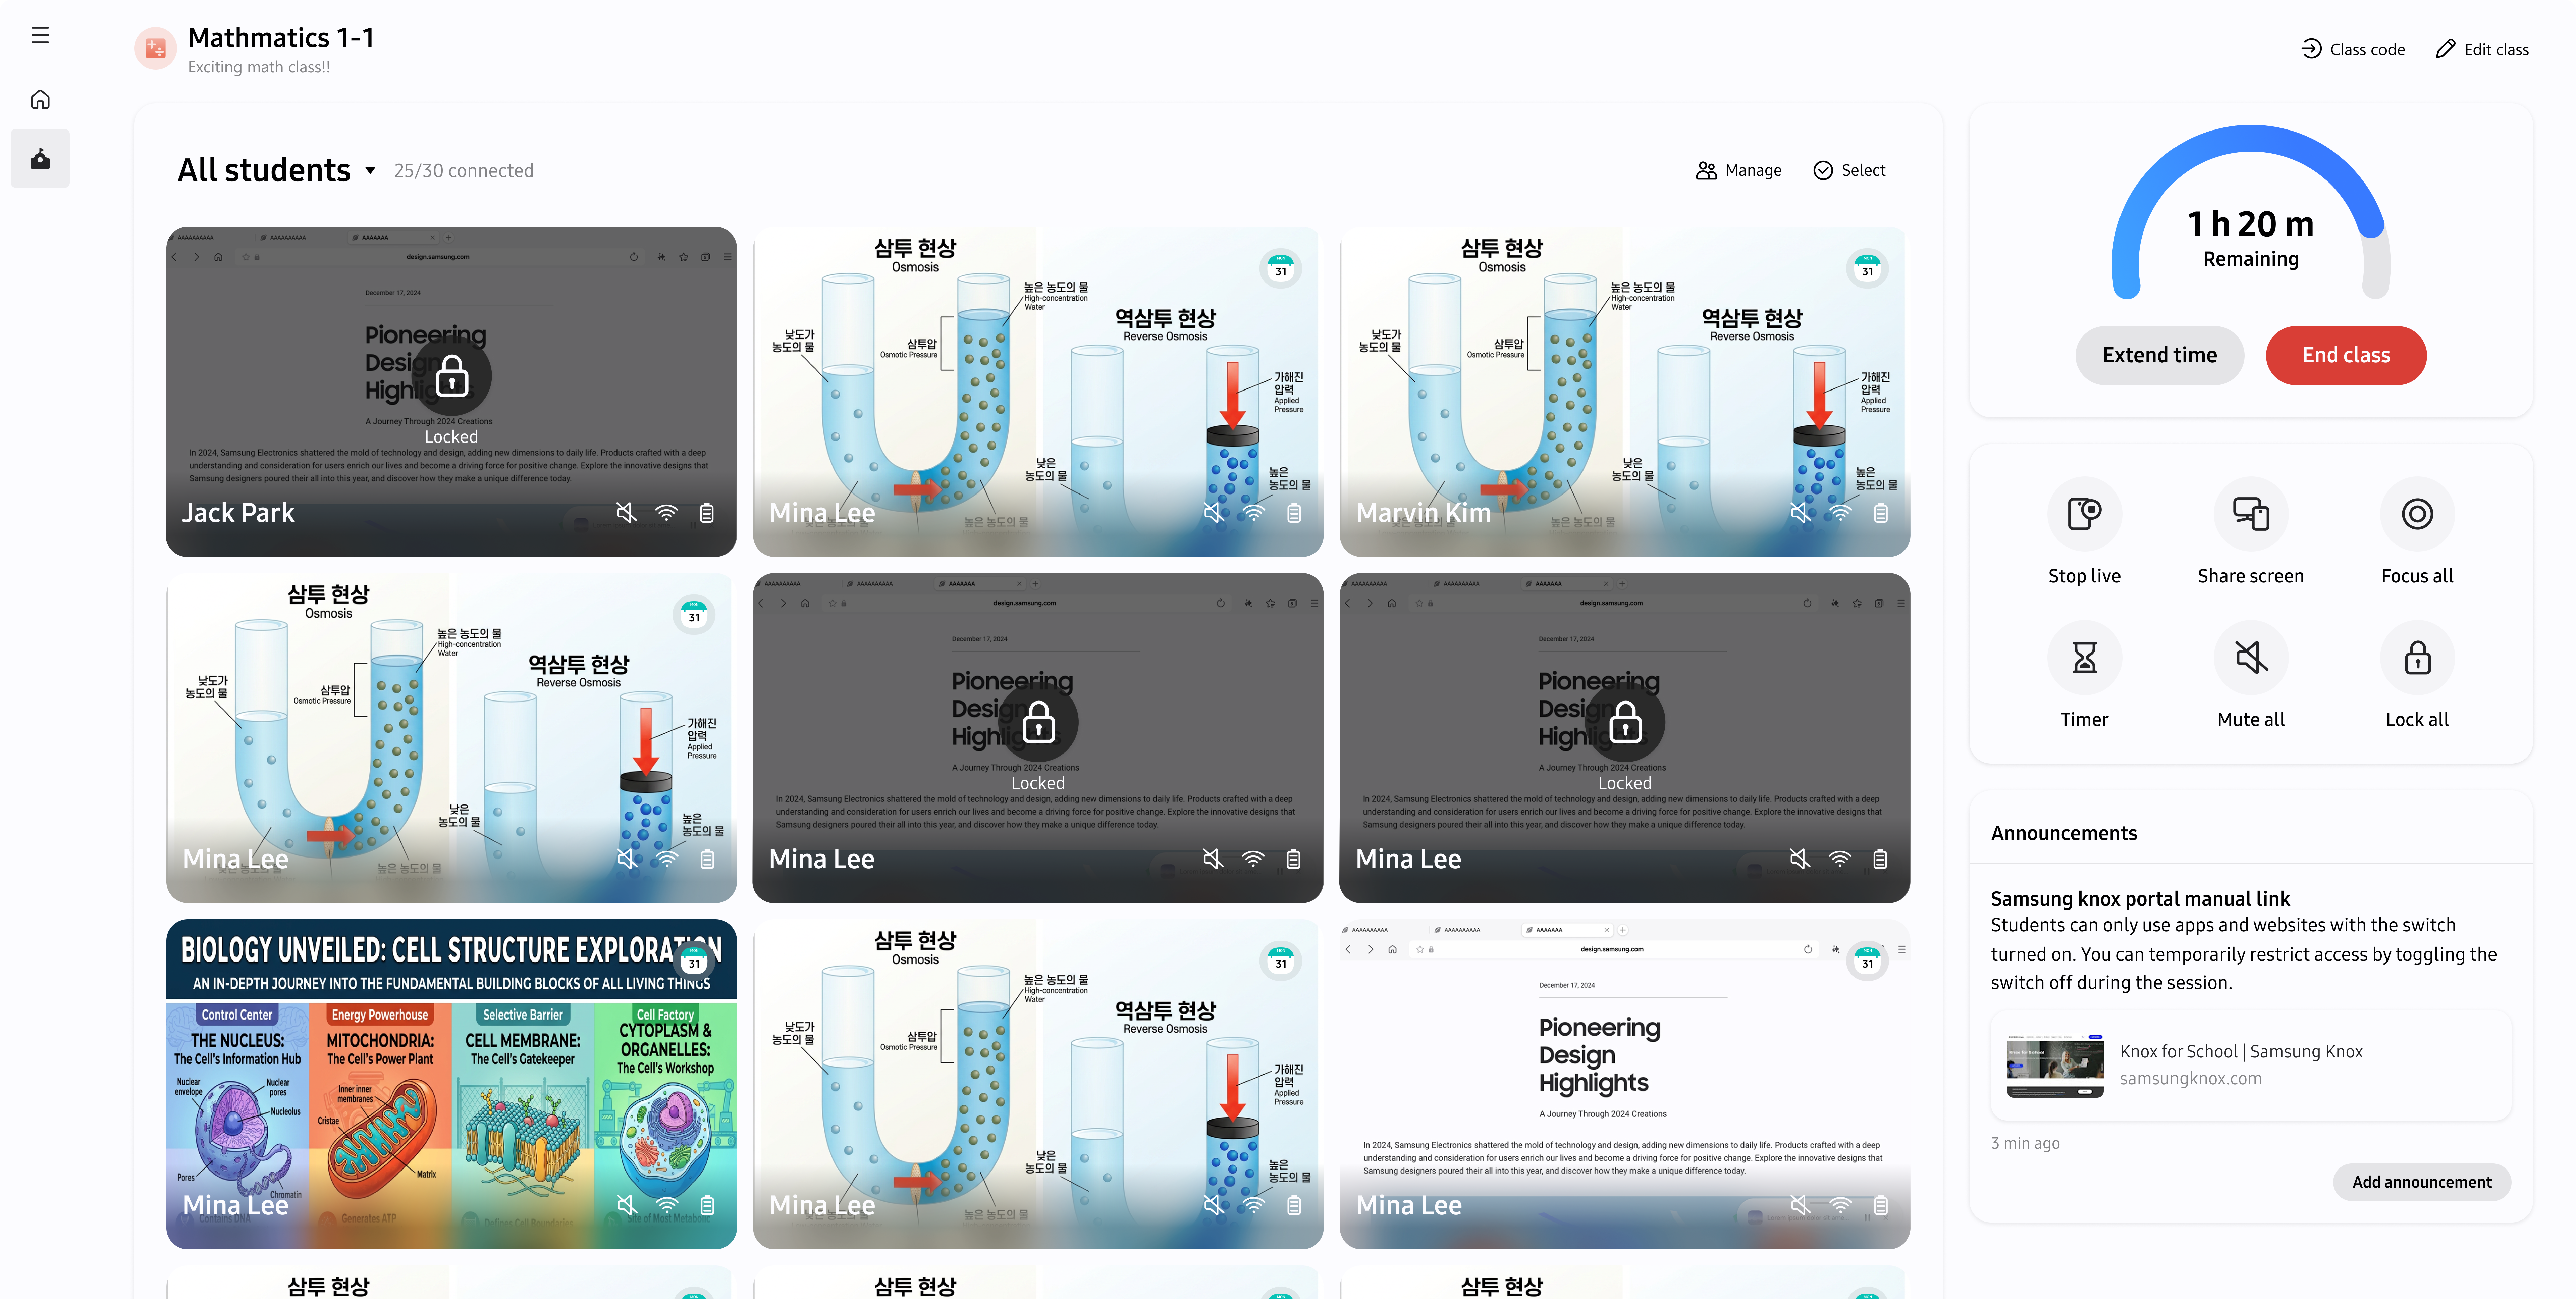
Before applying controls like lock, focus, or disconnect, select the students who should be affected.
- In the student grid, use the selection circles next to each student to choose individuals.
- To select multiple students, repeat the selection for each student.
- Review your selection before applying an action — the selected students are highlighted and confirmed in the action bar.
Mute or unmute student devices
Mute devices to maintain a focused classroom environment.
- To mute or unmute one student, select the student’s device card, then select Mute or Unmute.
- To mute or unmute all connected students, select Mute All or Unmute All.
The student controls show whether devices are muted. If an action applies to only some selected students, review the result and try the action again for the remaining students.
Lock or unlock student devices
Lock a device temporarily to redirect a student during the session.
- To lock or unlock one student, select the student’s device card, then select Lock or Unlock.
- To lock or unlock all selected students, select Lock All or Unlock All.
Verify the result by checking the device indicator. Locked devices display a lock indicator. If an action applies to only some selected students, review the result and try the action again for the remaining students.
Use focus mode
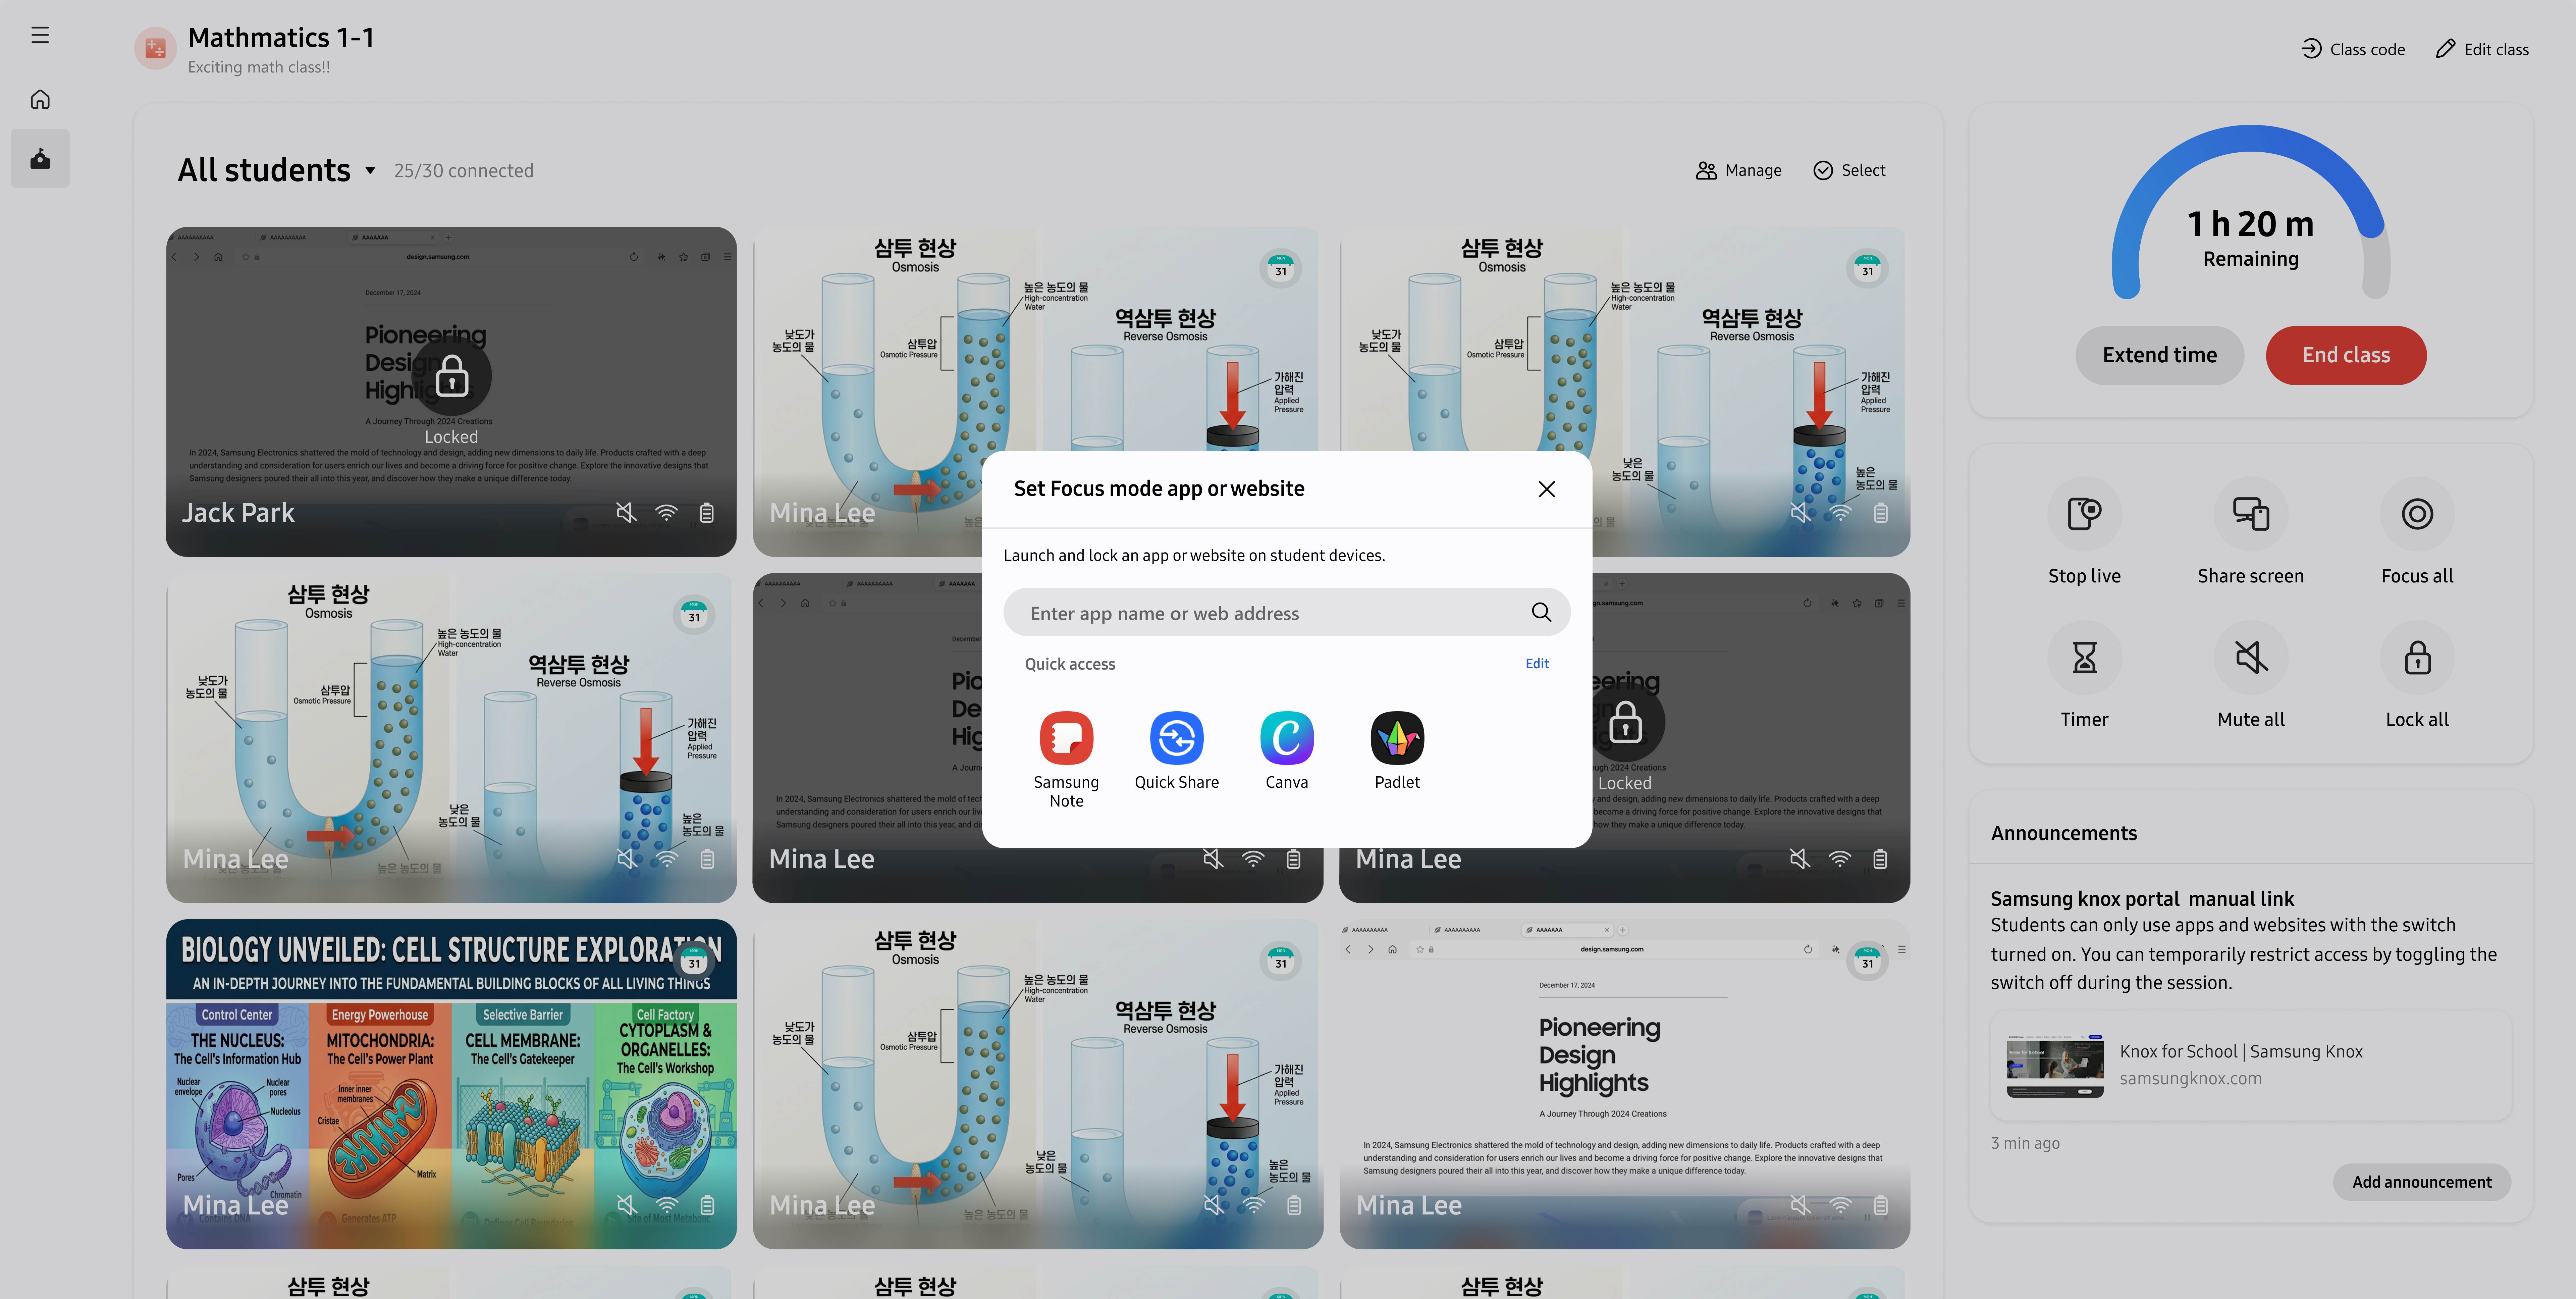
Use focus mode to open and lock a selected app or website on student devices, helping them stay on task during lessons.
Start focus mode
- During an active session, select a student, group, or all students.
- To apply focus to all students at once, select Focus All.
- Select Start focus.
- Search for a predefined app, select an item from Quick access, or enter a website address.
- To add a website, enter its address in Web address (optional). Knox Classroom treats an address without a scheme as an HTTPS address. The address is not validated while you search.
- Select the app or website, then select Start to confirm the command for the selected students.
- Monitor the initialization progress. Once focus mode is active, students are limited to the authorized application or website.
Recently used apps are available in Quick access. You can add apps to it; it stores up to 10 items and removes the oldest item when it reaches the limit. A web address longer than 2,048 characters cannot be used.
If focus mode applies to only some selected students, review the result and try again for the remaining students. If it cannot start, check your network connection and try again.
End focus mode
- Select End focus.
- Confirm that you want to end focus mode.
- Verify that focus mode has terminated — student devices are no longer restricted.
If focus mode ends for only some selected students, review the result and try again for the remaining students. If it cannot end, check your network connection and try again.
Share your screen
You can share your own screen with students during a live session. Select Share screen, then choose the screen or browser content to share in the browser’s sharing dialog. Teacher screen sharing is available on Windows, macOS, and ChromeOS.
To stop sharing, select Stop sharing. If your browser opens sharing in a separate window or pop-out, closing that view also ends the sharing session.
Screen-share behavior may vary by browser. Use a supported browser and test screen sharing before class when it is essential to the activity.
Share a student screen
Display a student’s device screen to the class for demonstration or review. A student can request to share their screen, or you can start sharing from the student’s device card.
Respond to a student screen-share request
A screen-share request appears as a notification with the student’s name.
- Select Accept to start the student’s screen share, or Deny to decline it.
- If the student does not respond to a teacher-initiated sharing request, choose another student or try again.
- Select Stop sharing when you are finished.
Only one student’s screen can be shared at a time. To share another student’s screen, confirm the switch; the current shared screen stops first. When sharing starts, Knox Classroom adjusts conflicting controls as needed, such as unlocking a locked student device.
Start a student screen share
- In the student grid, select the student’s device card.
- Select Share screen.
- A dedicated window opens showing the student’s screen in real time.
- Expand to full screen for detailed monitoring or remote control.
- Select Stop sharing when you are finished.
Screen sharing displays a single student’s screen in a dedicated view. This is different from Live View, which shows thumbnails of all student screens simultaneously.
If screen sharing cannot start, check the student’s connection status and try again.
Disconnect a student
You can disconnect a student from a session either in response to their leave request or proactively. A student who is disconnected because of a network interruption reconnects automatically when their network connection recovers.
Approve a student leave request
Students can request to leave a class. Leave requests are surfaced through an indicator on the student’s device card.
- Check the leave request indicator on the student’s device card.
- Select Disconnect to approve the request.
- Confirm that the student’s status has updated — they are no longer active in the session.
Proactively disconnect a student
- In the student grid, select the student you want to disconnect.
- Select Disconnect.
- Review the disconnection action and confirm.
- Verify that the student has been removed and their device is no longer being monitored.
You cannot disconnect a student while their screen is being shared. Stop screen sharing first.
End a class session
End the session when the class activity is complete.
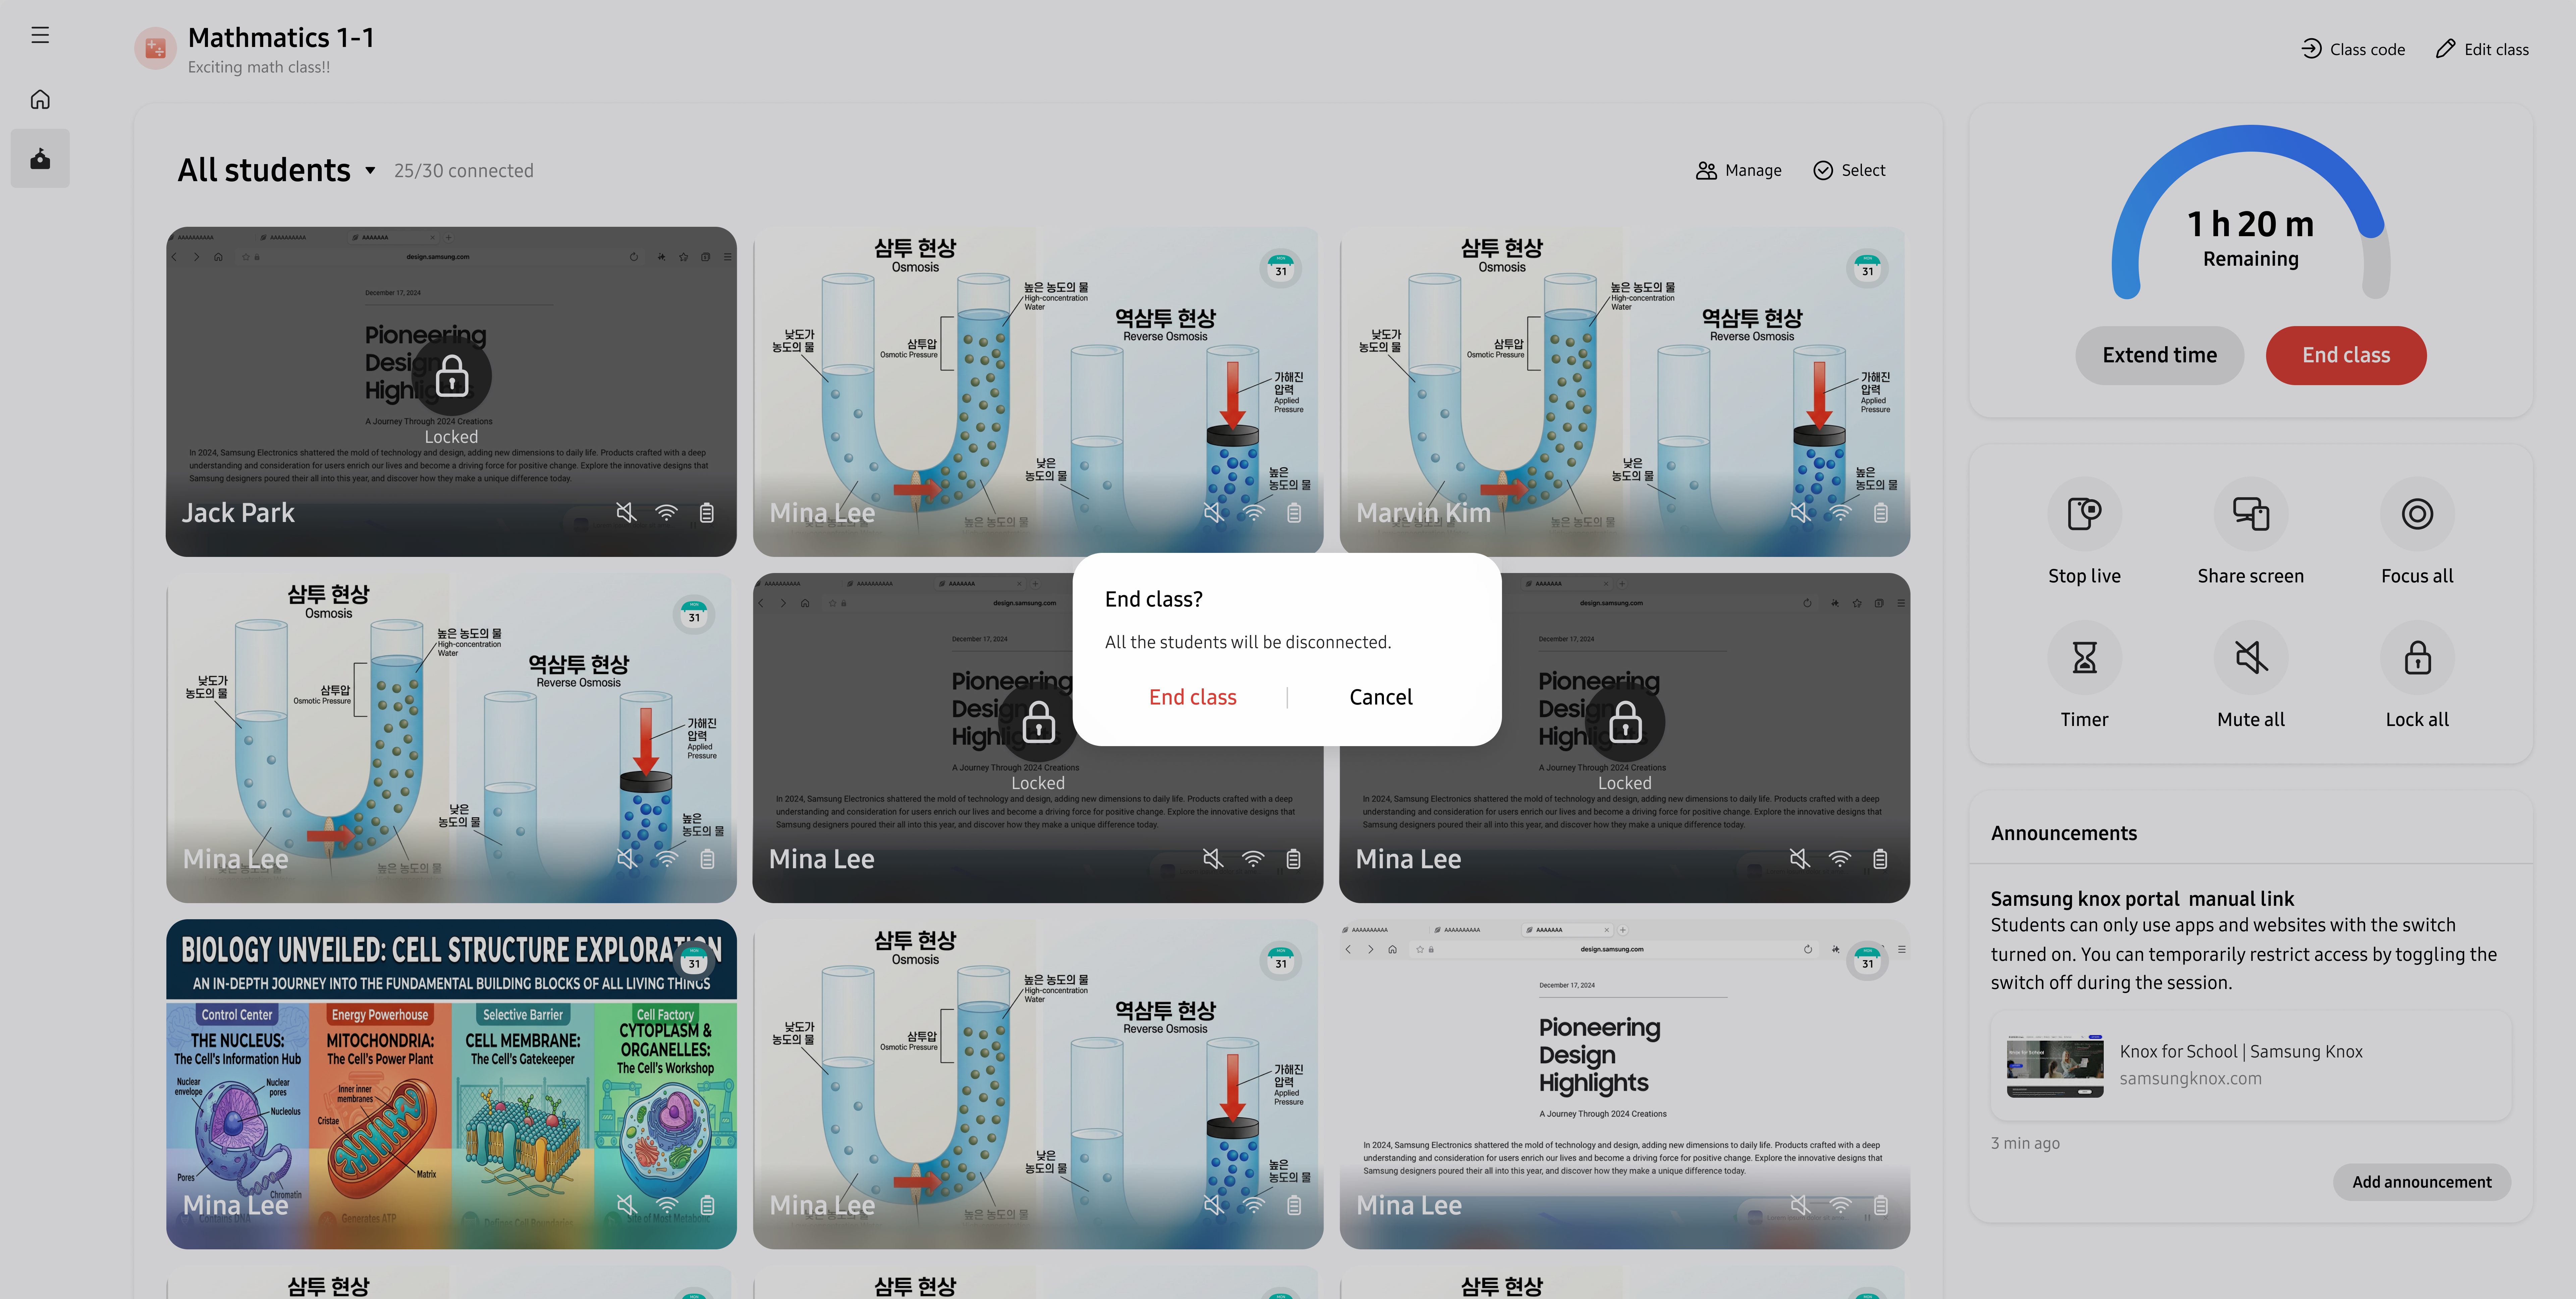
- Select End class.
- Select End class again to confirm and end the session for all connected students.
- Verify that the session has concluded — you are returned to the main class selection screen.
Where to go next
Continue with student management or class communication.
- To update groups and find students, see Manage students and groups.
- To share instructions and reminders with students, see Send announcements to your class.
On this page
Is this page helpful?