Configure apps and activities
Last updated July 26th, 2023
Each Knox Capture profile supports a set of apps to which its scanner and keystroke output settings apply. IT admins can set more refined control over each scanning context within an app by associating individual Android activities with different Knox Capture profiles.
A user interacts with an Android activity within an app’s UI, such as a user data form or search input. Refer to the Android developer documentation for more information about activities.
Depending on deployment requirements, consider configuring one profile for all apps.
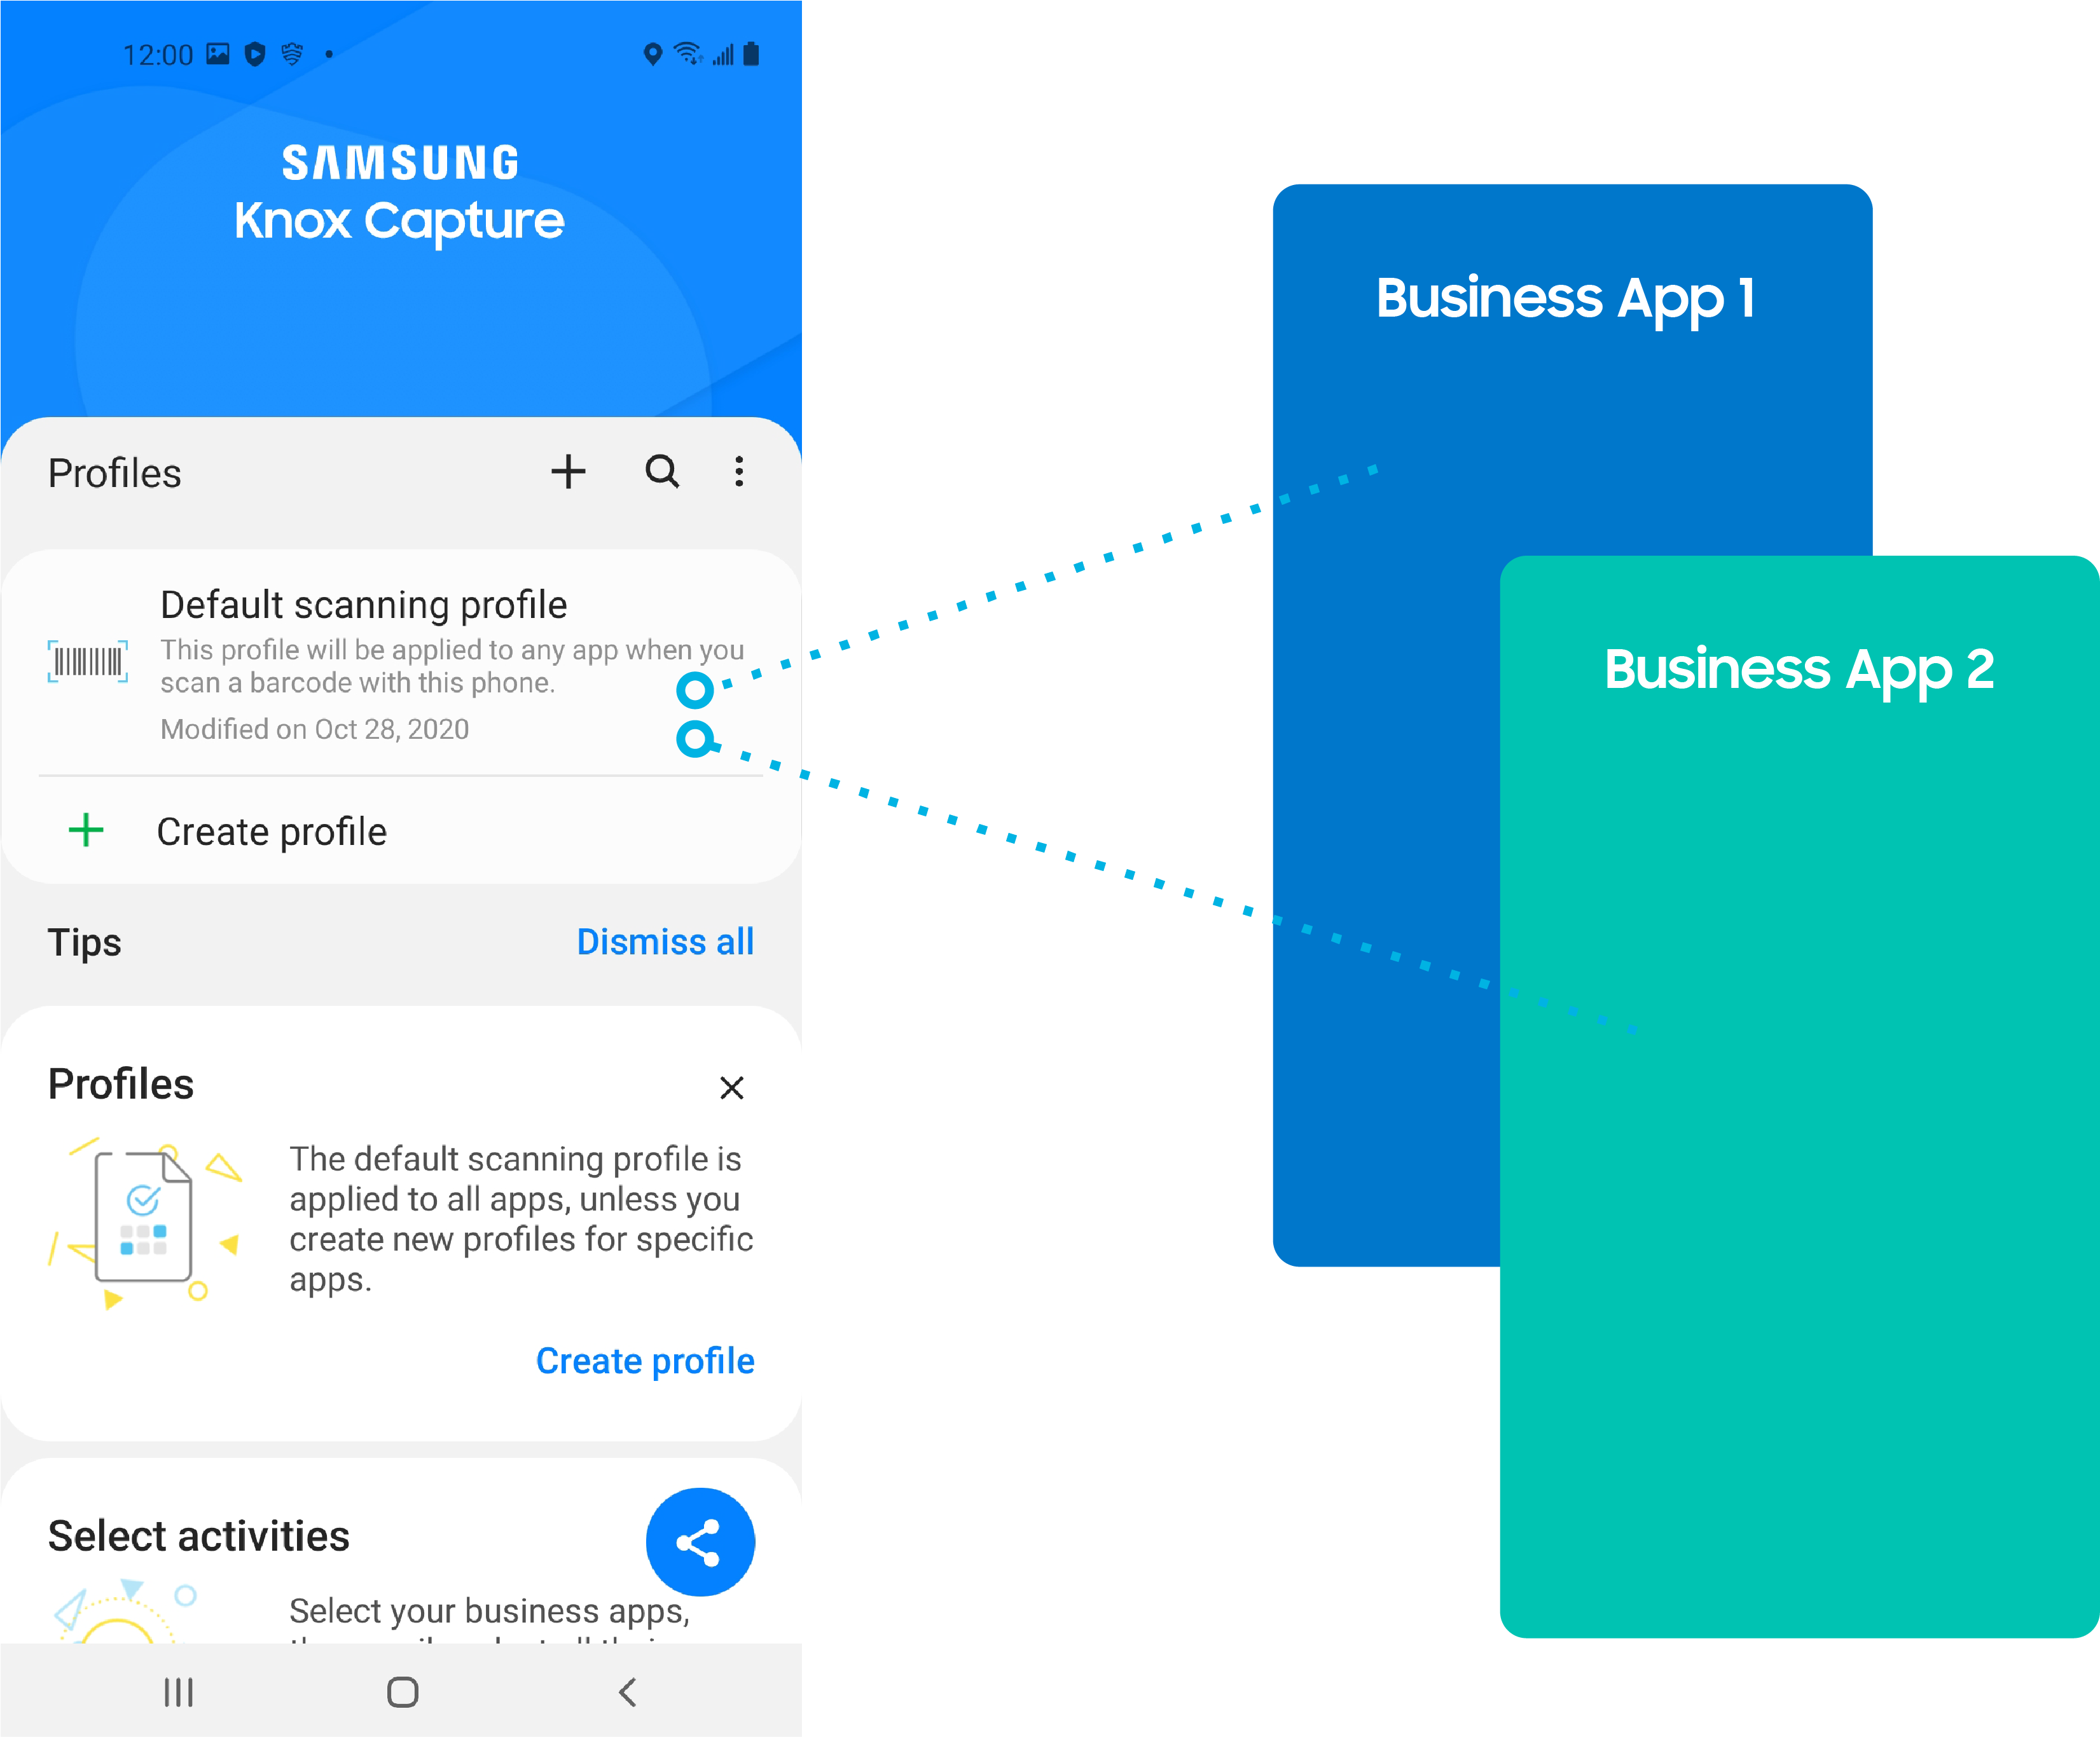
Or, set up a unique profile for each device app.
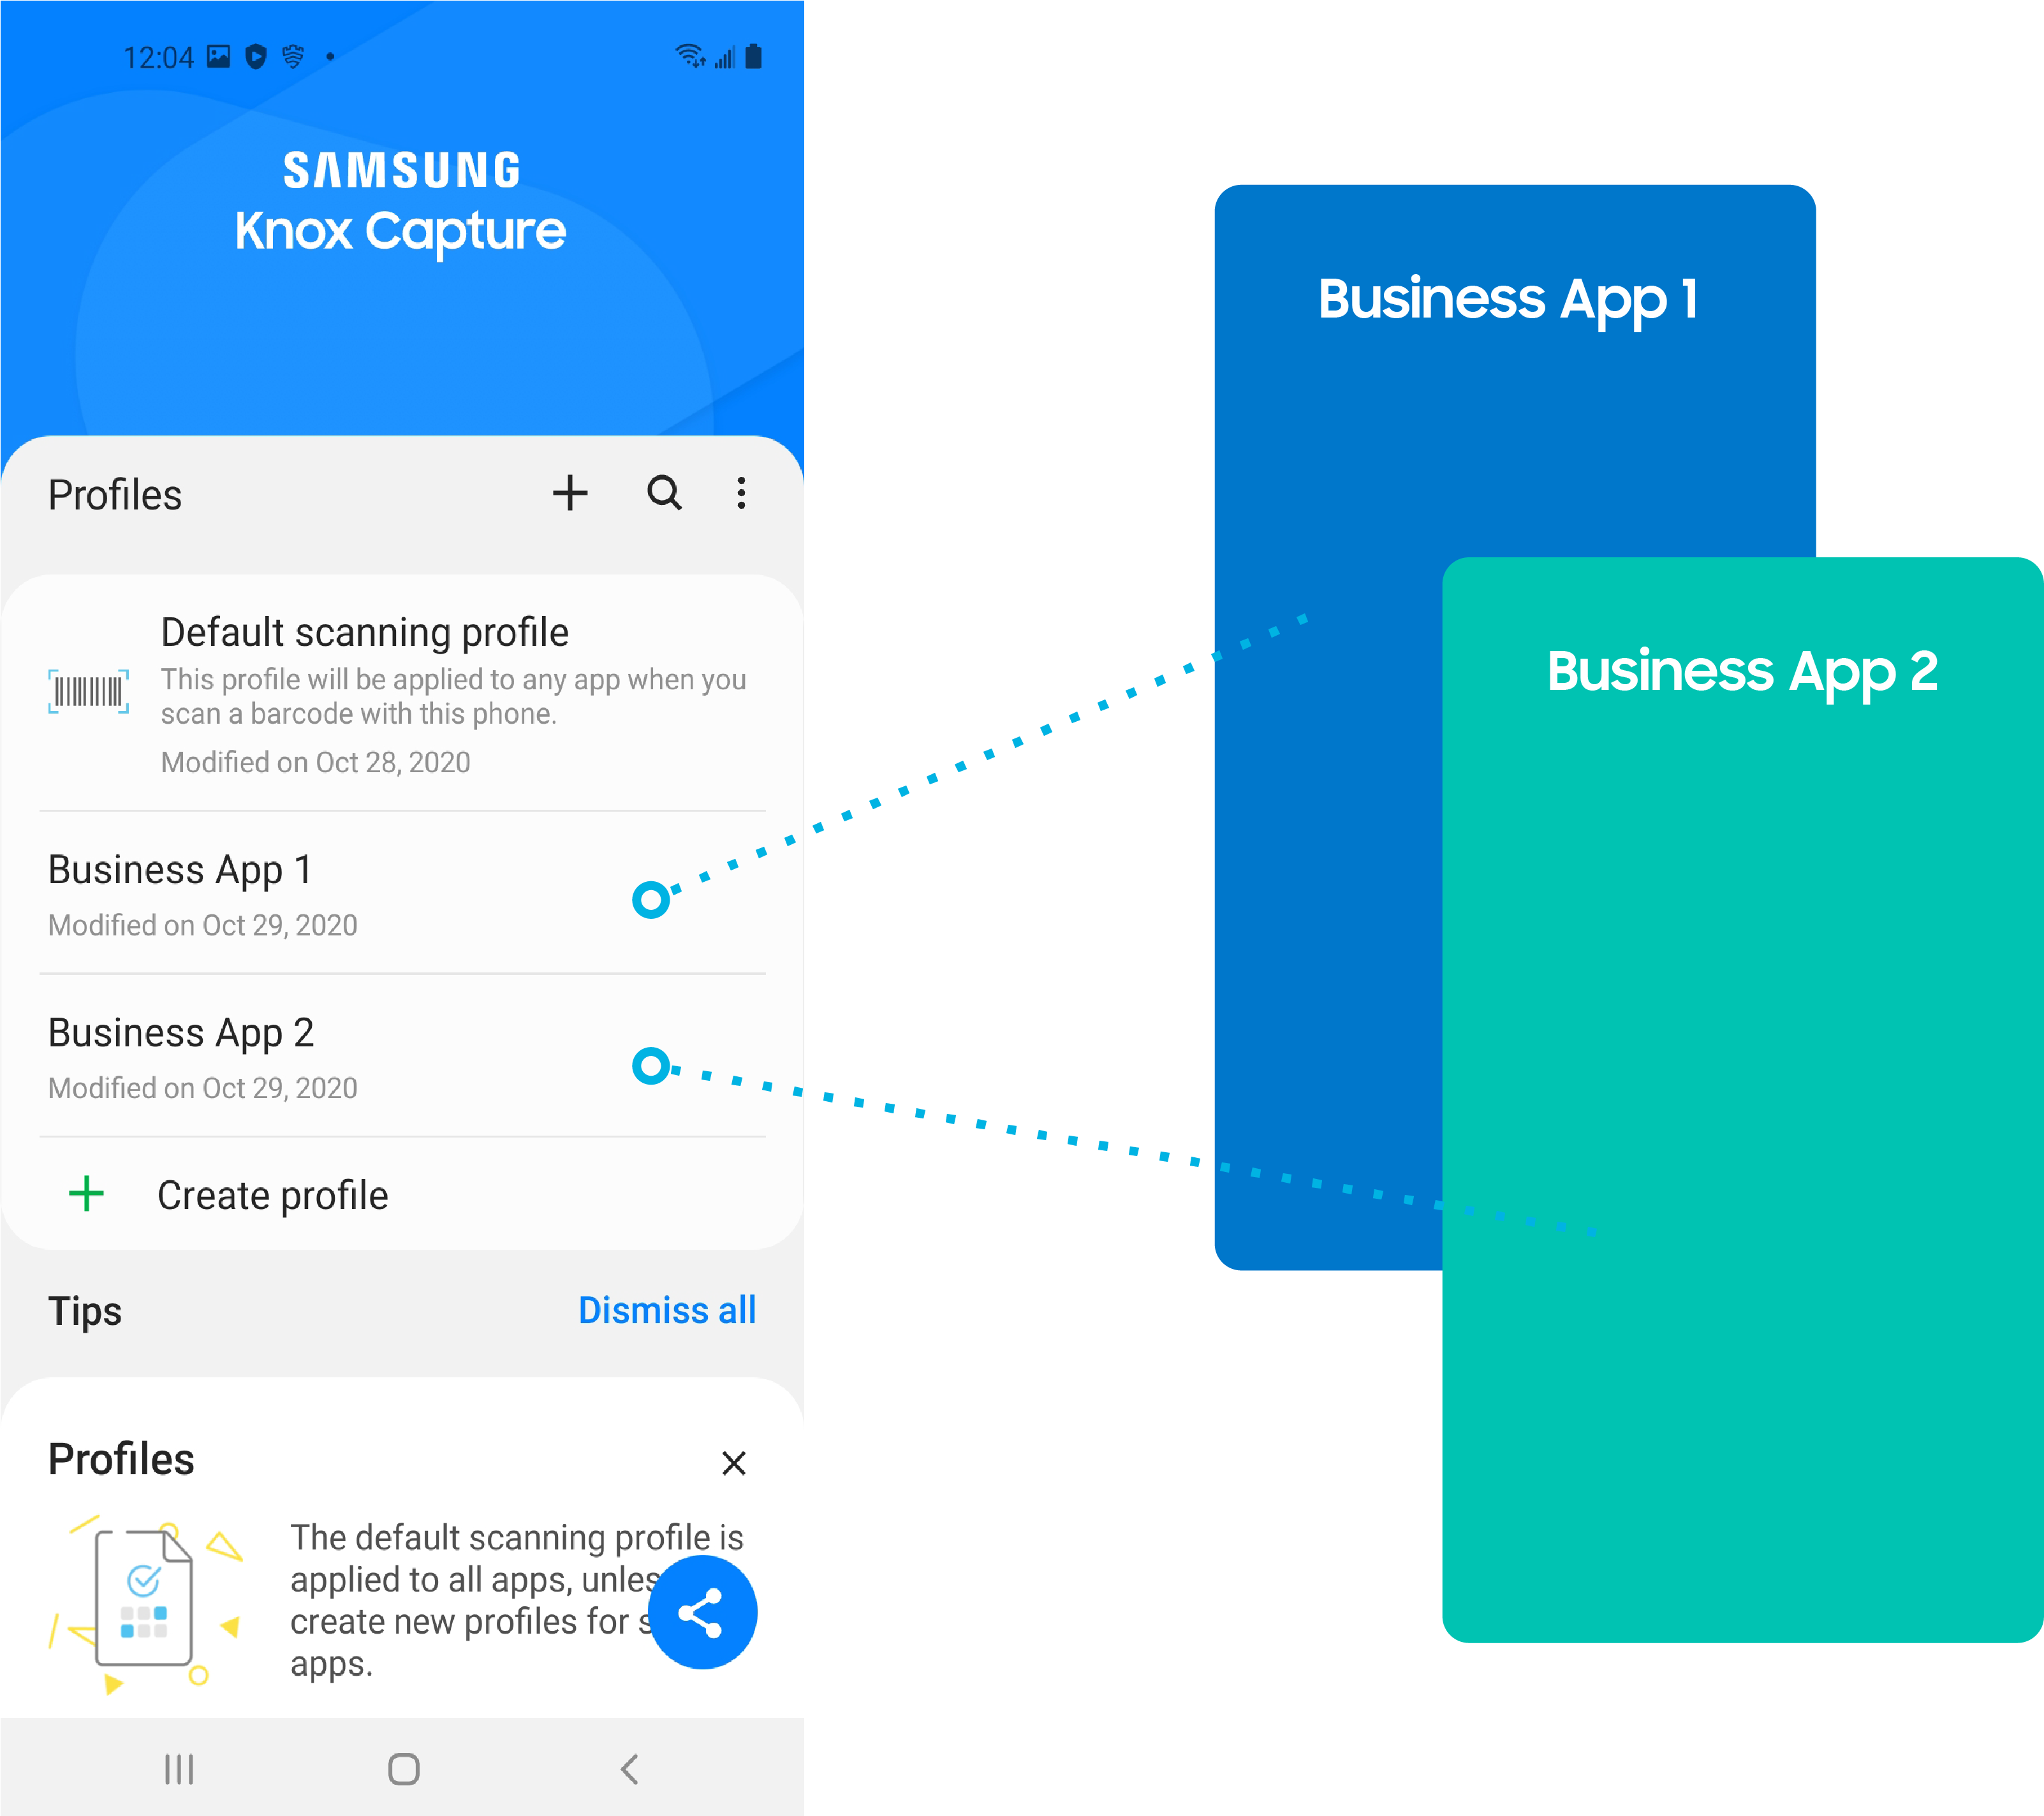
Or, associate a group of apps or activities with one profile. For example, within the same app, consider associating:
- A user data form with one profile that appends a Tab key event to scanned data
- A search input field with a profile that appends an Enter key event
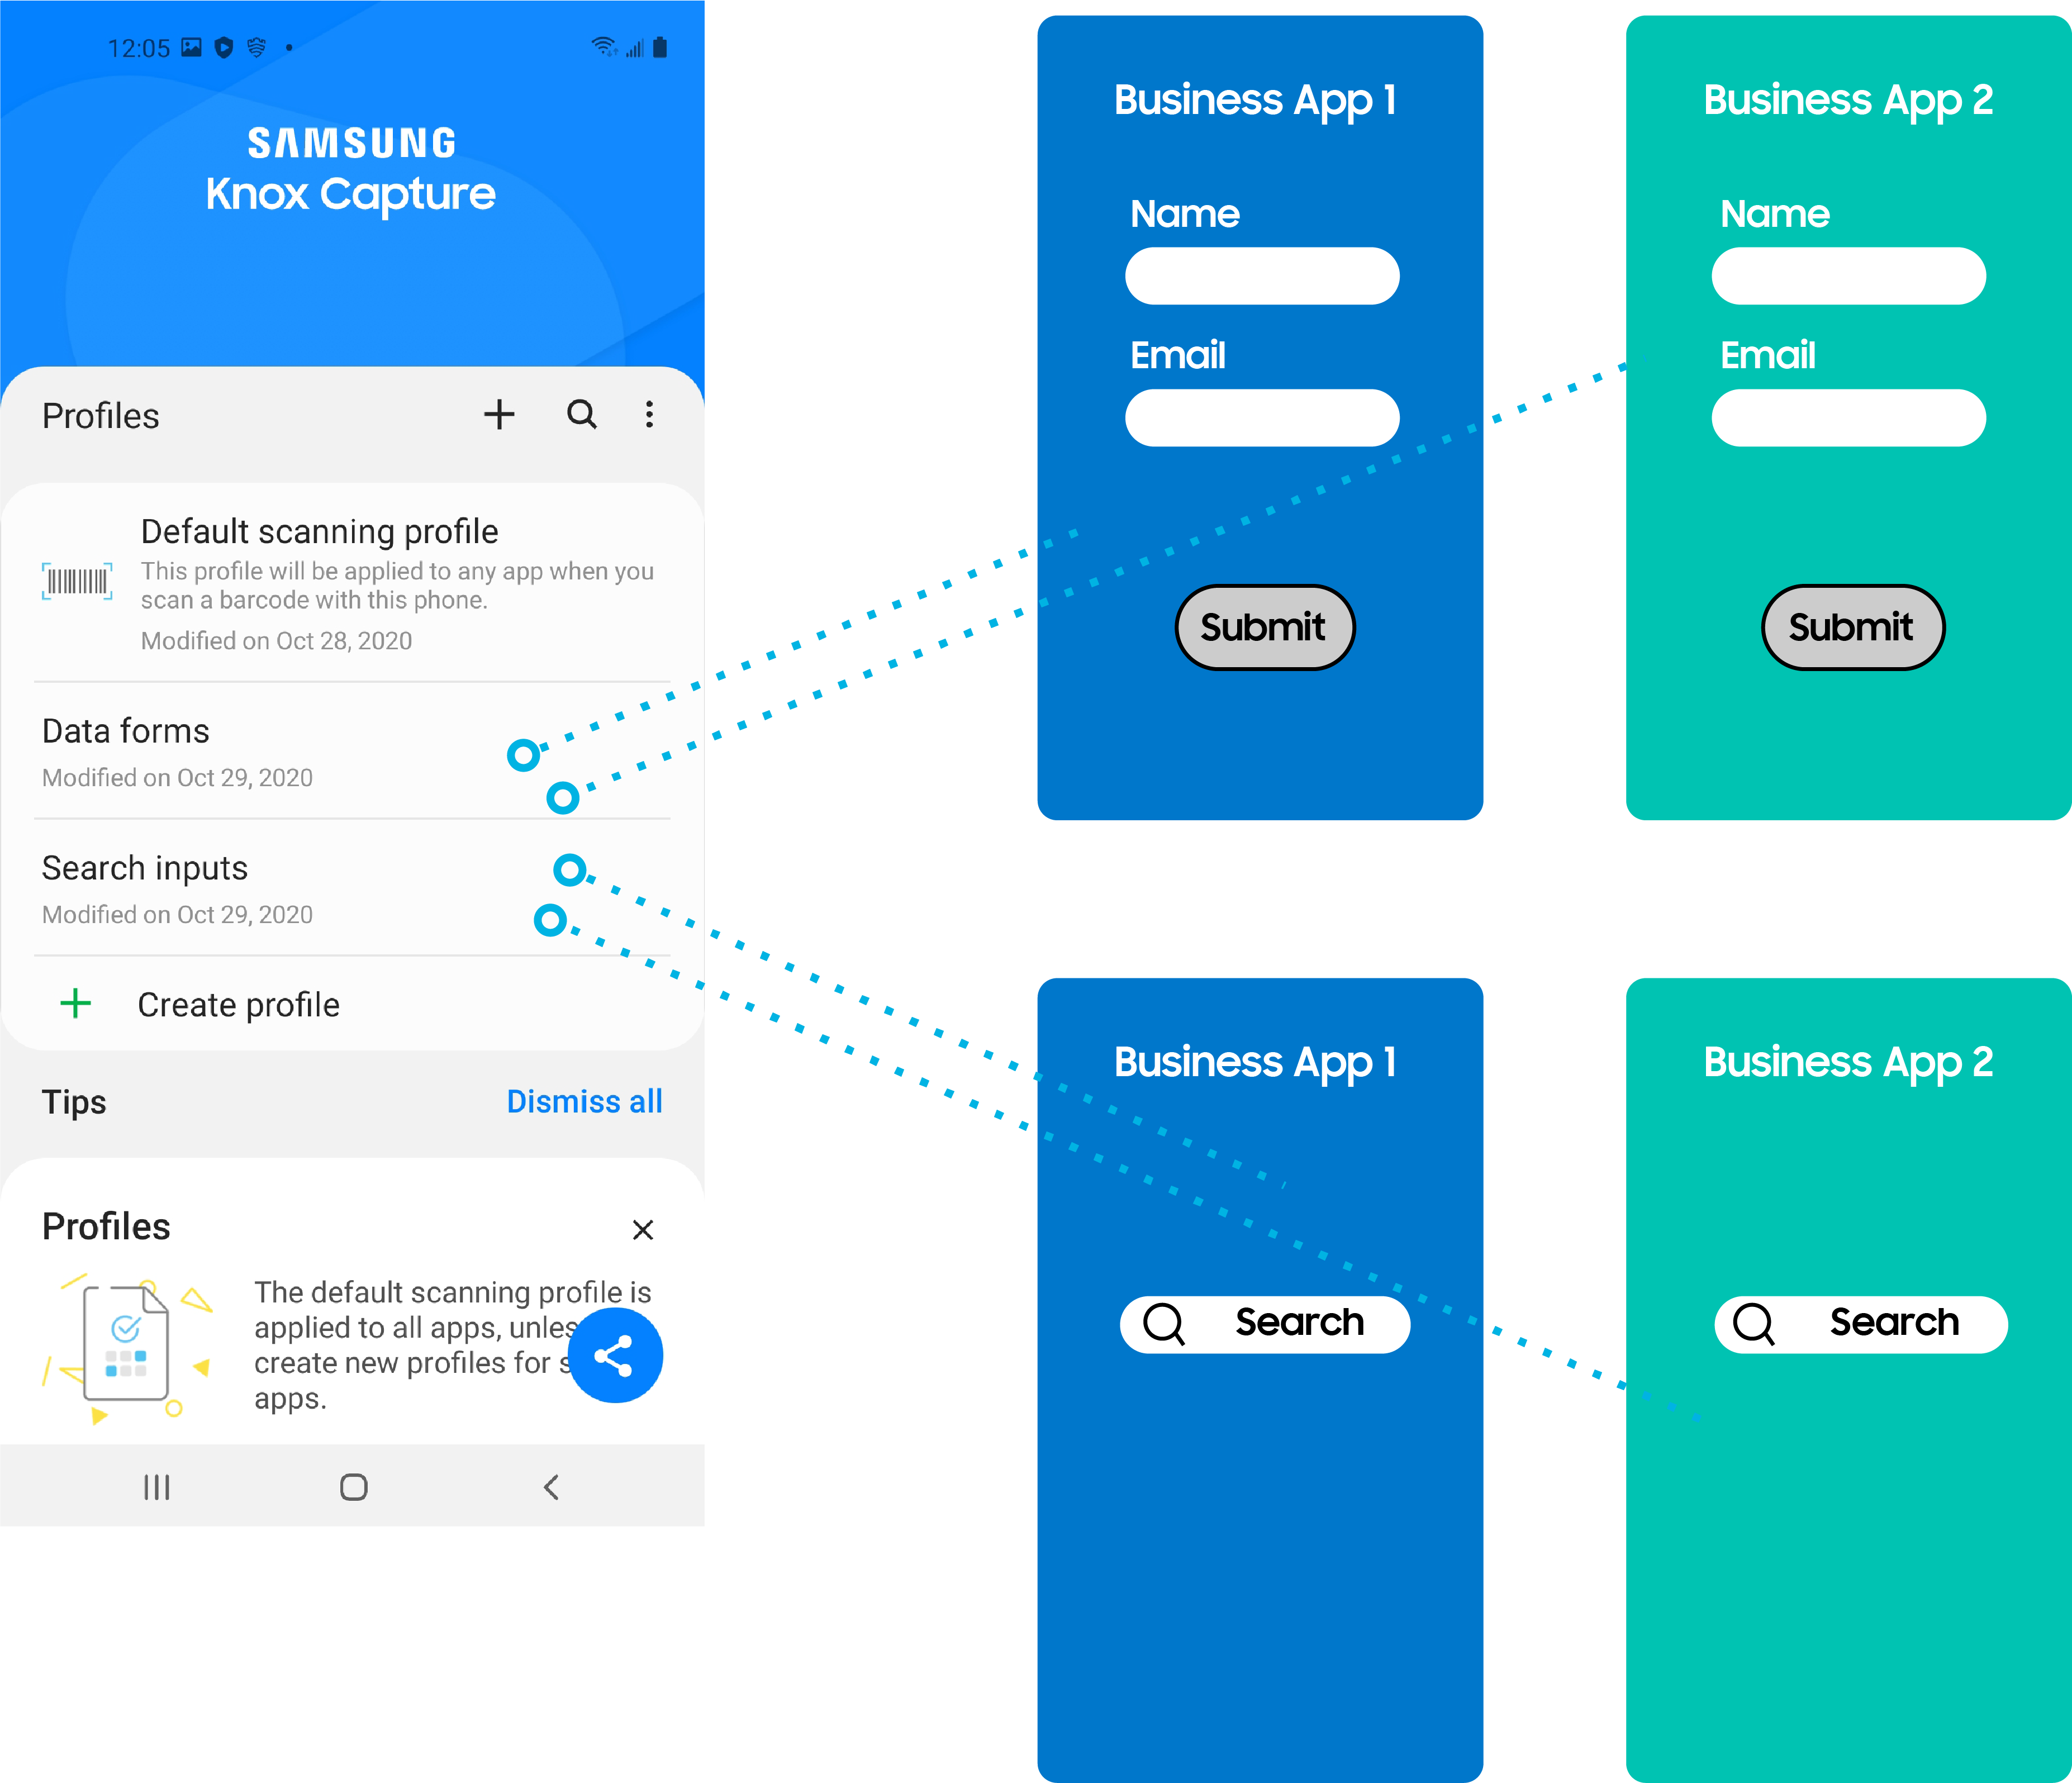
A single profile can have numerous apps or activities, but a single activity can only belong to one profile.
Add activities
Add app activities to control business app scan behavior. There are several ways to add activities:
- Add app activities all at once
- Add individual activities visually
- Add individual activities from the app activity list view
To begin adding activities, either create a new profile or open an existing profile to edit and select a target app.
When working with a custom business app, consider asking your team for a descriptive list of all the Android activities within the app, as this is a good way to find and associate activities quickly within Knox Capture.
Add all activities at once
To add apps as a single activity:
-
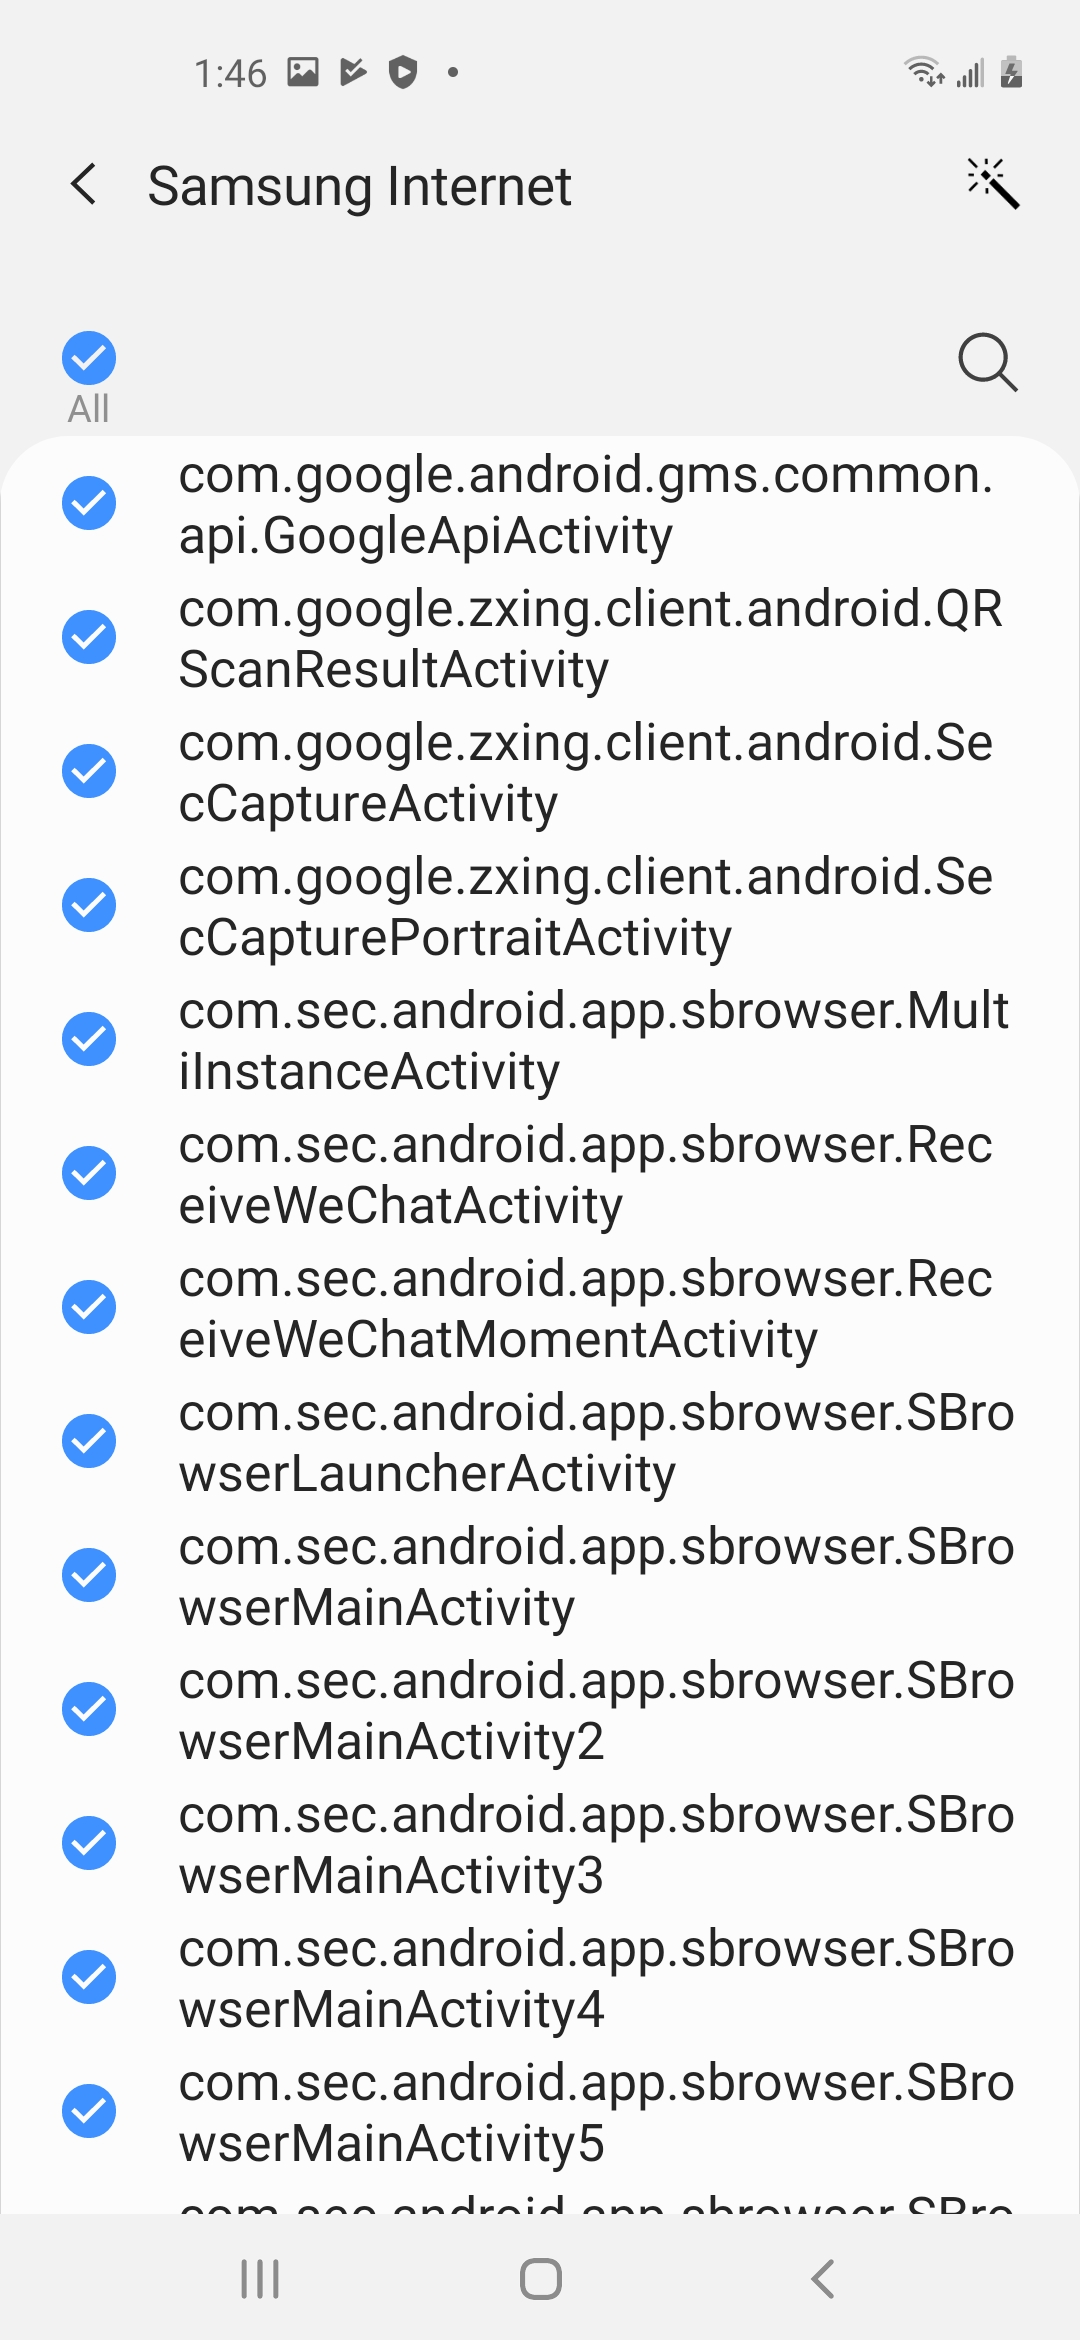
Tap the radio button to the left of the app name within the Select applications list.
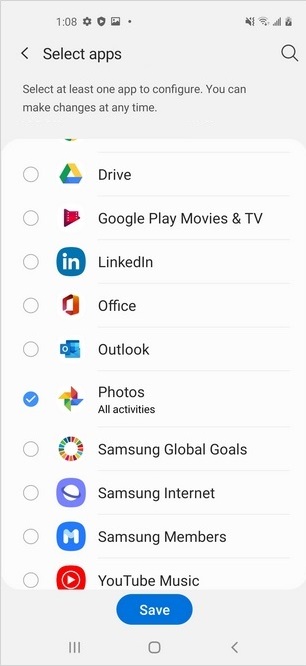
-
An app can also be selected by tapping its name, then tapping the All button at the upper-left of the app activities list.
Add individual activities visually
To add individual apps visually:
-
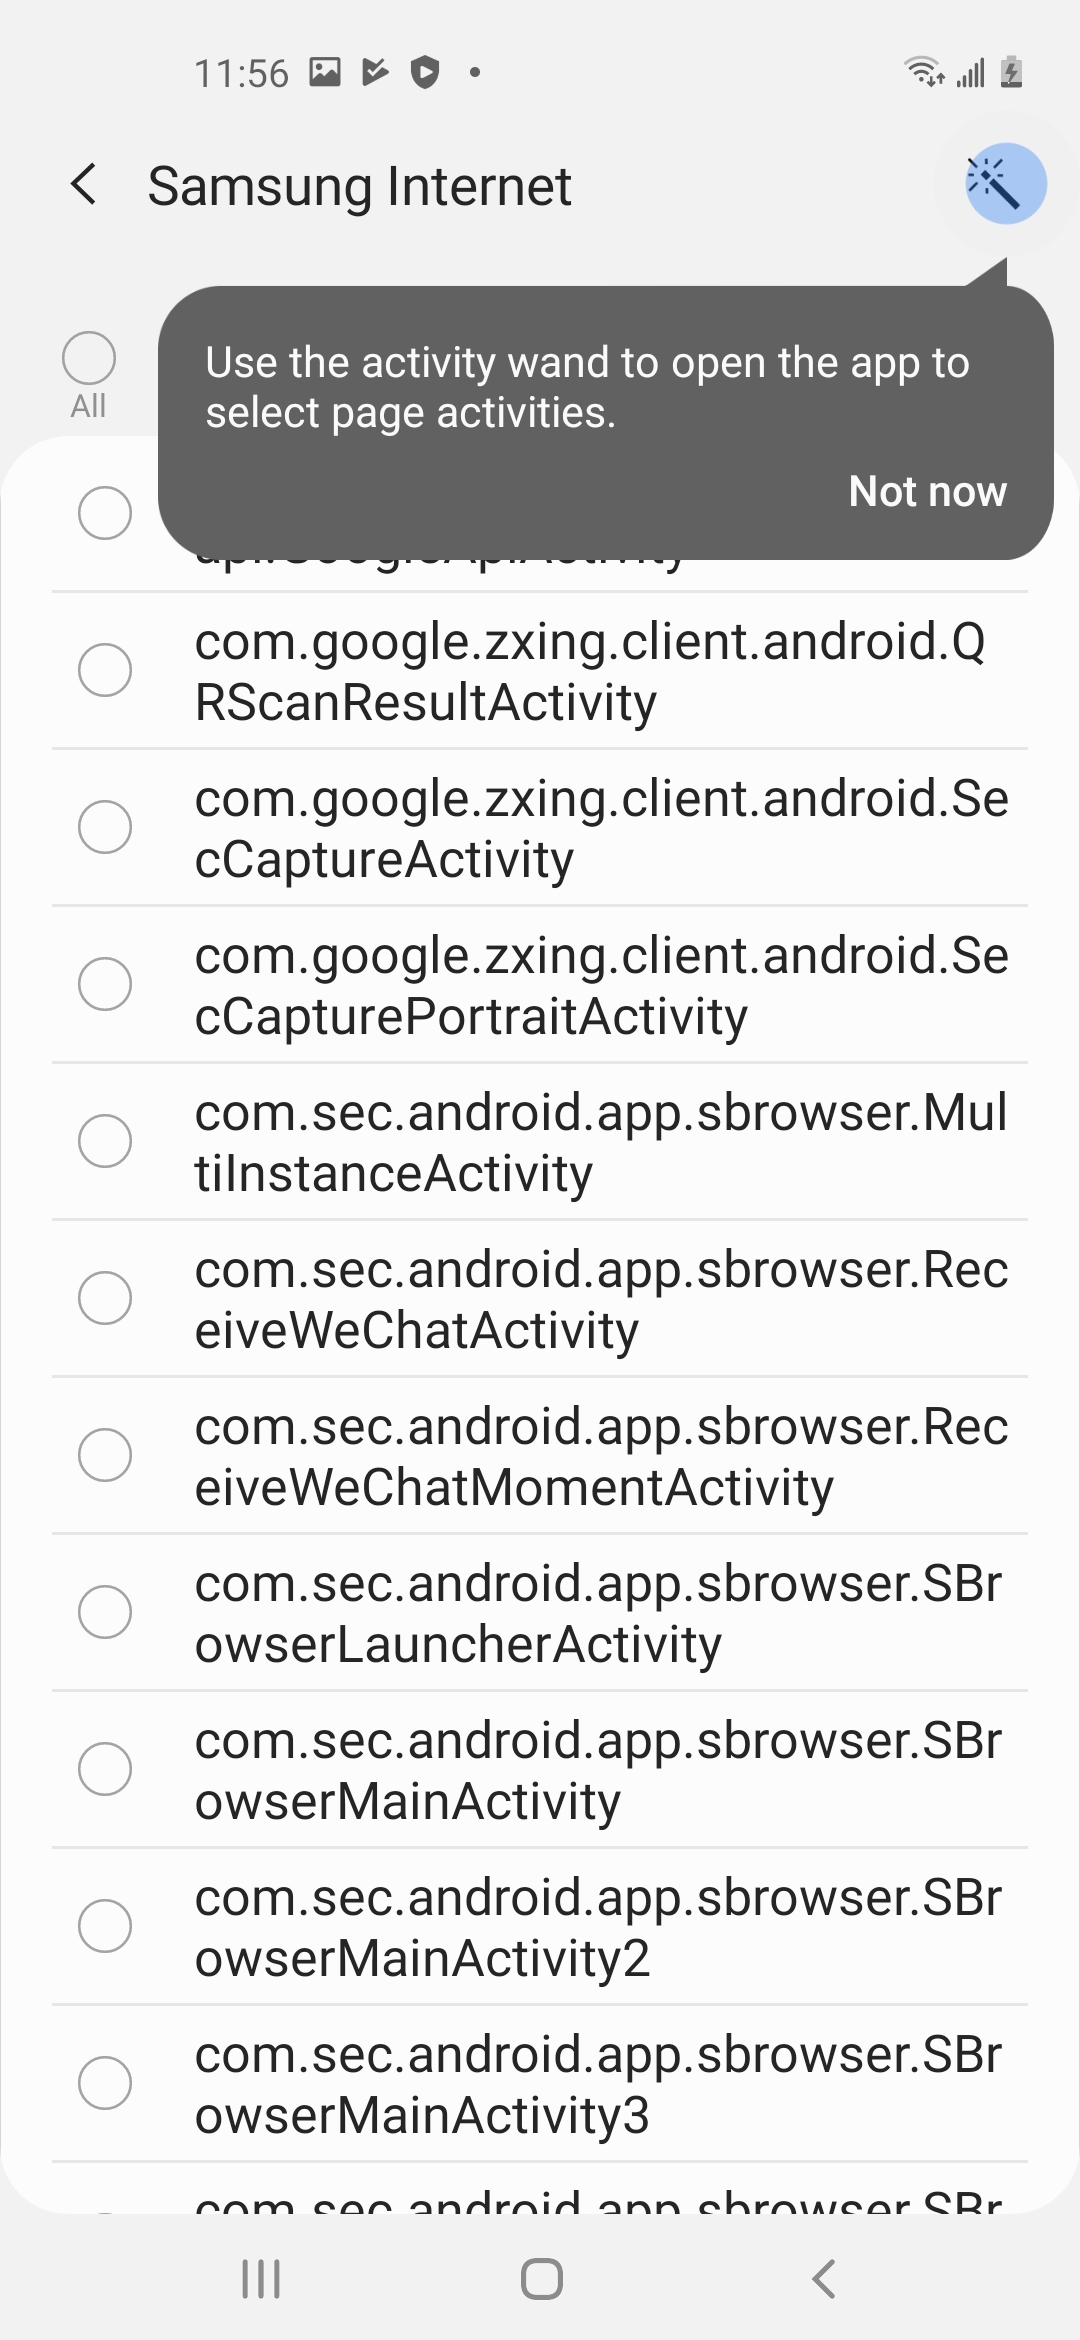
Within the app activities list page, tap the wand icon in the upper-right corner to launch the visual selection tool.
-
If this is the first time using the visual selection tool, a series of pop-up messages display with information on selecting activities. Tap anywhere on the screen to advance the pop-ups. If the visual selection tool has been previously invoked, the pop-up messages do not display.
-
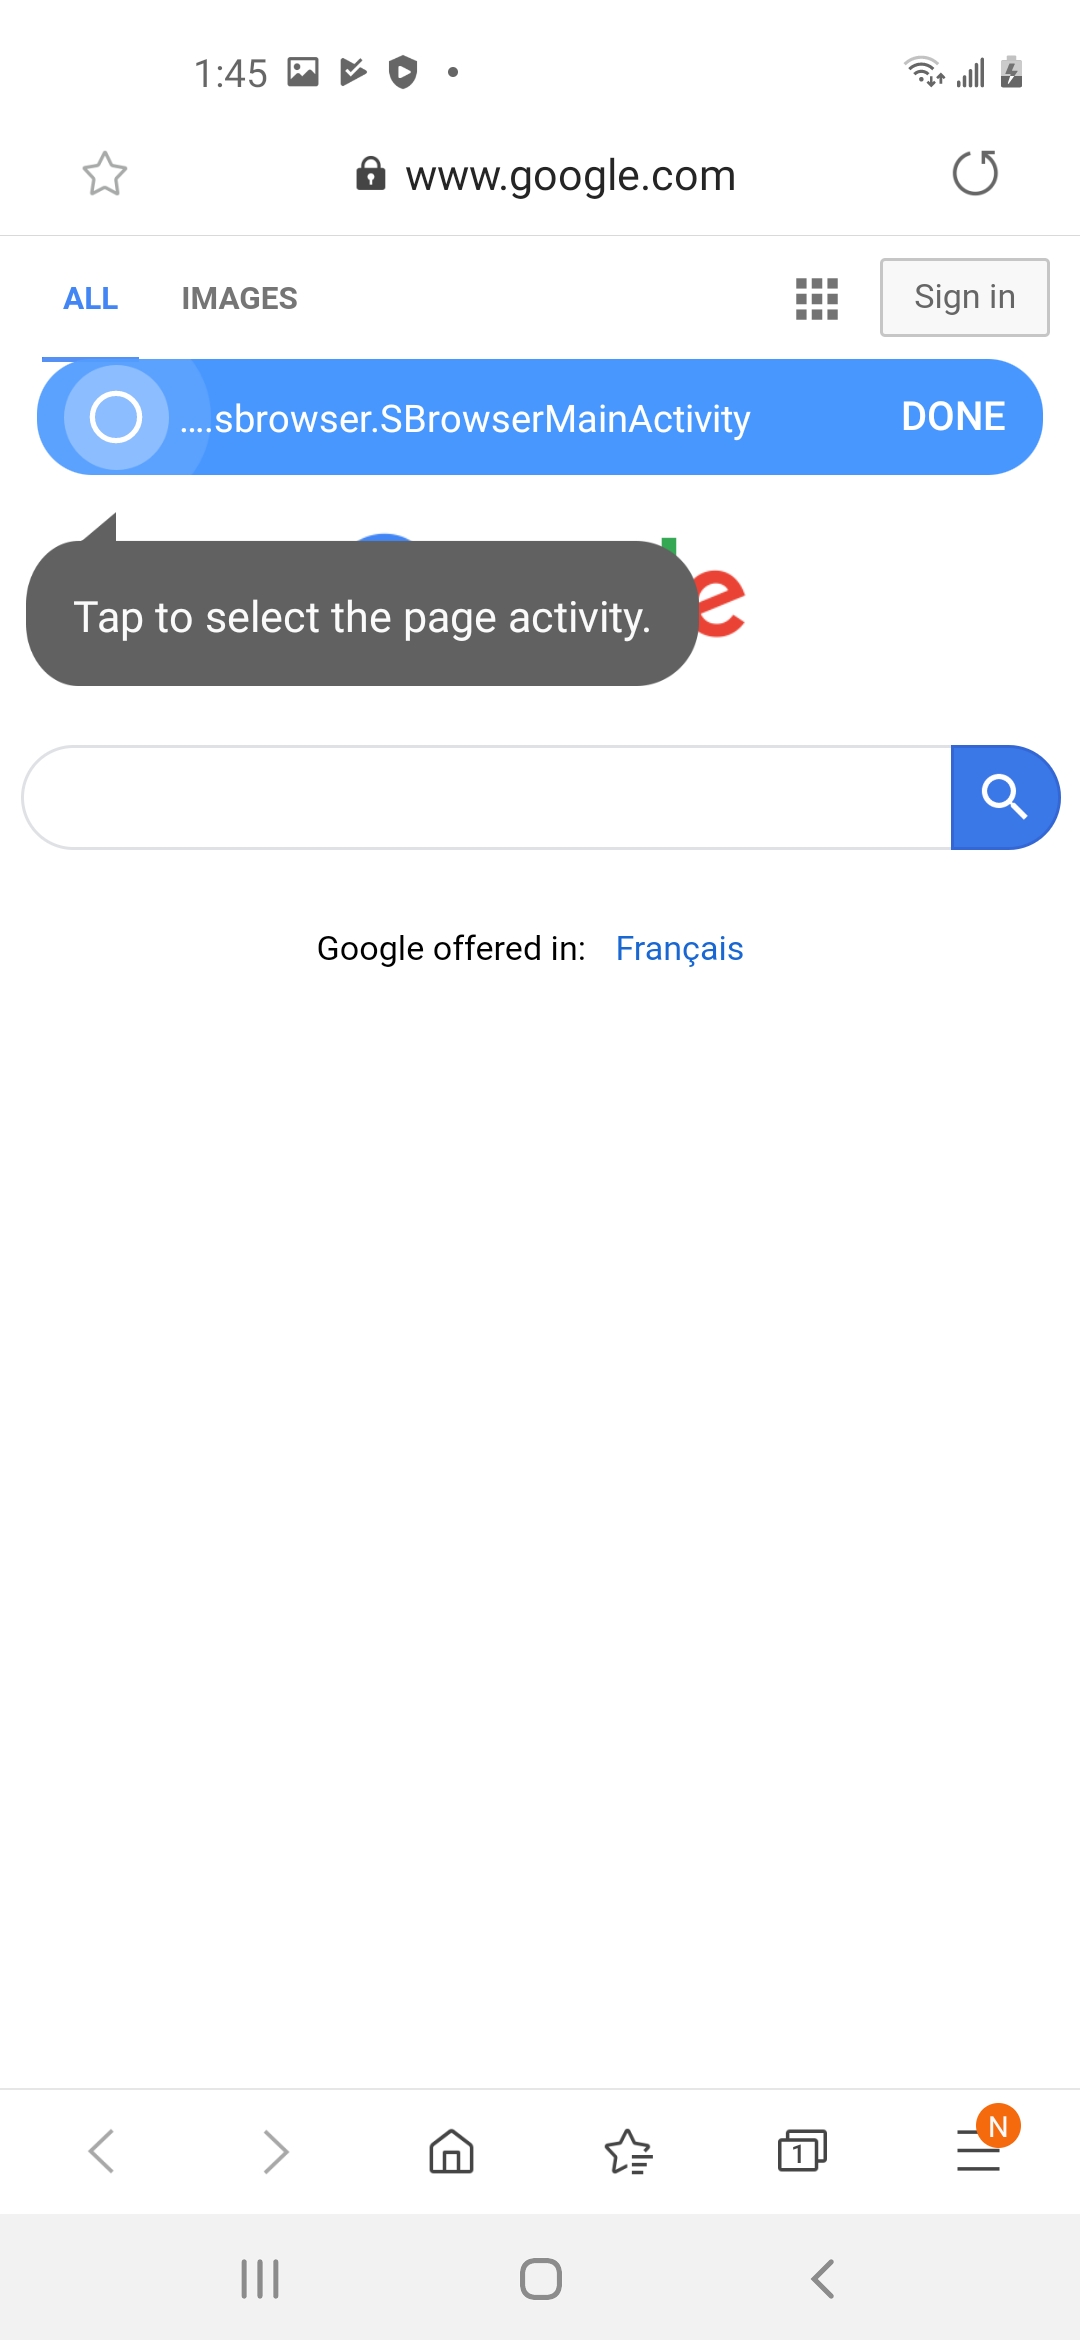
Navigate within the app to locate an activity. A blue selector overlay (pictured above) displays on each screen to name the activity associated with that screen. Drag this selector around the screen as needed to view the app user interface.
-
To select an activity, tap the radio button next to the activity name within the blue overlay. As activities are added, the counter in the overlay, next to the DONE button, increments with each selection.

-
When completed adding activities, tap DONE to navigate back to the app activities list page.
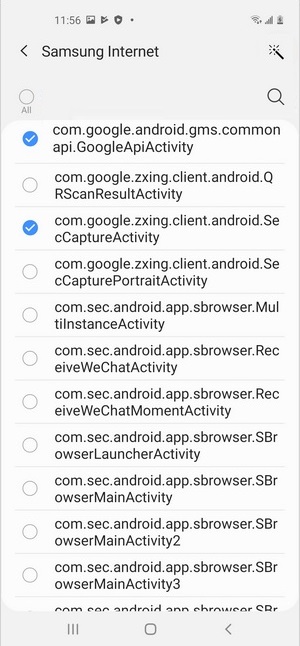
Add individual activities from the activities list
-
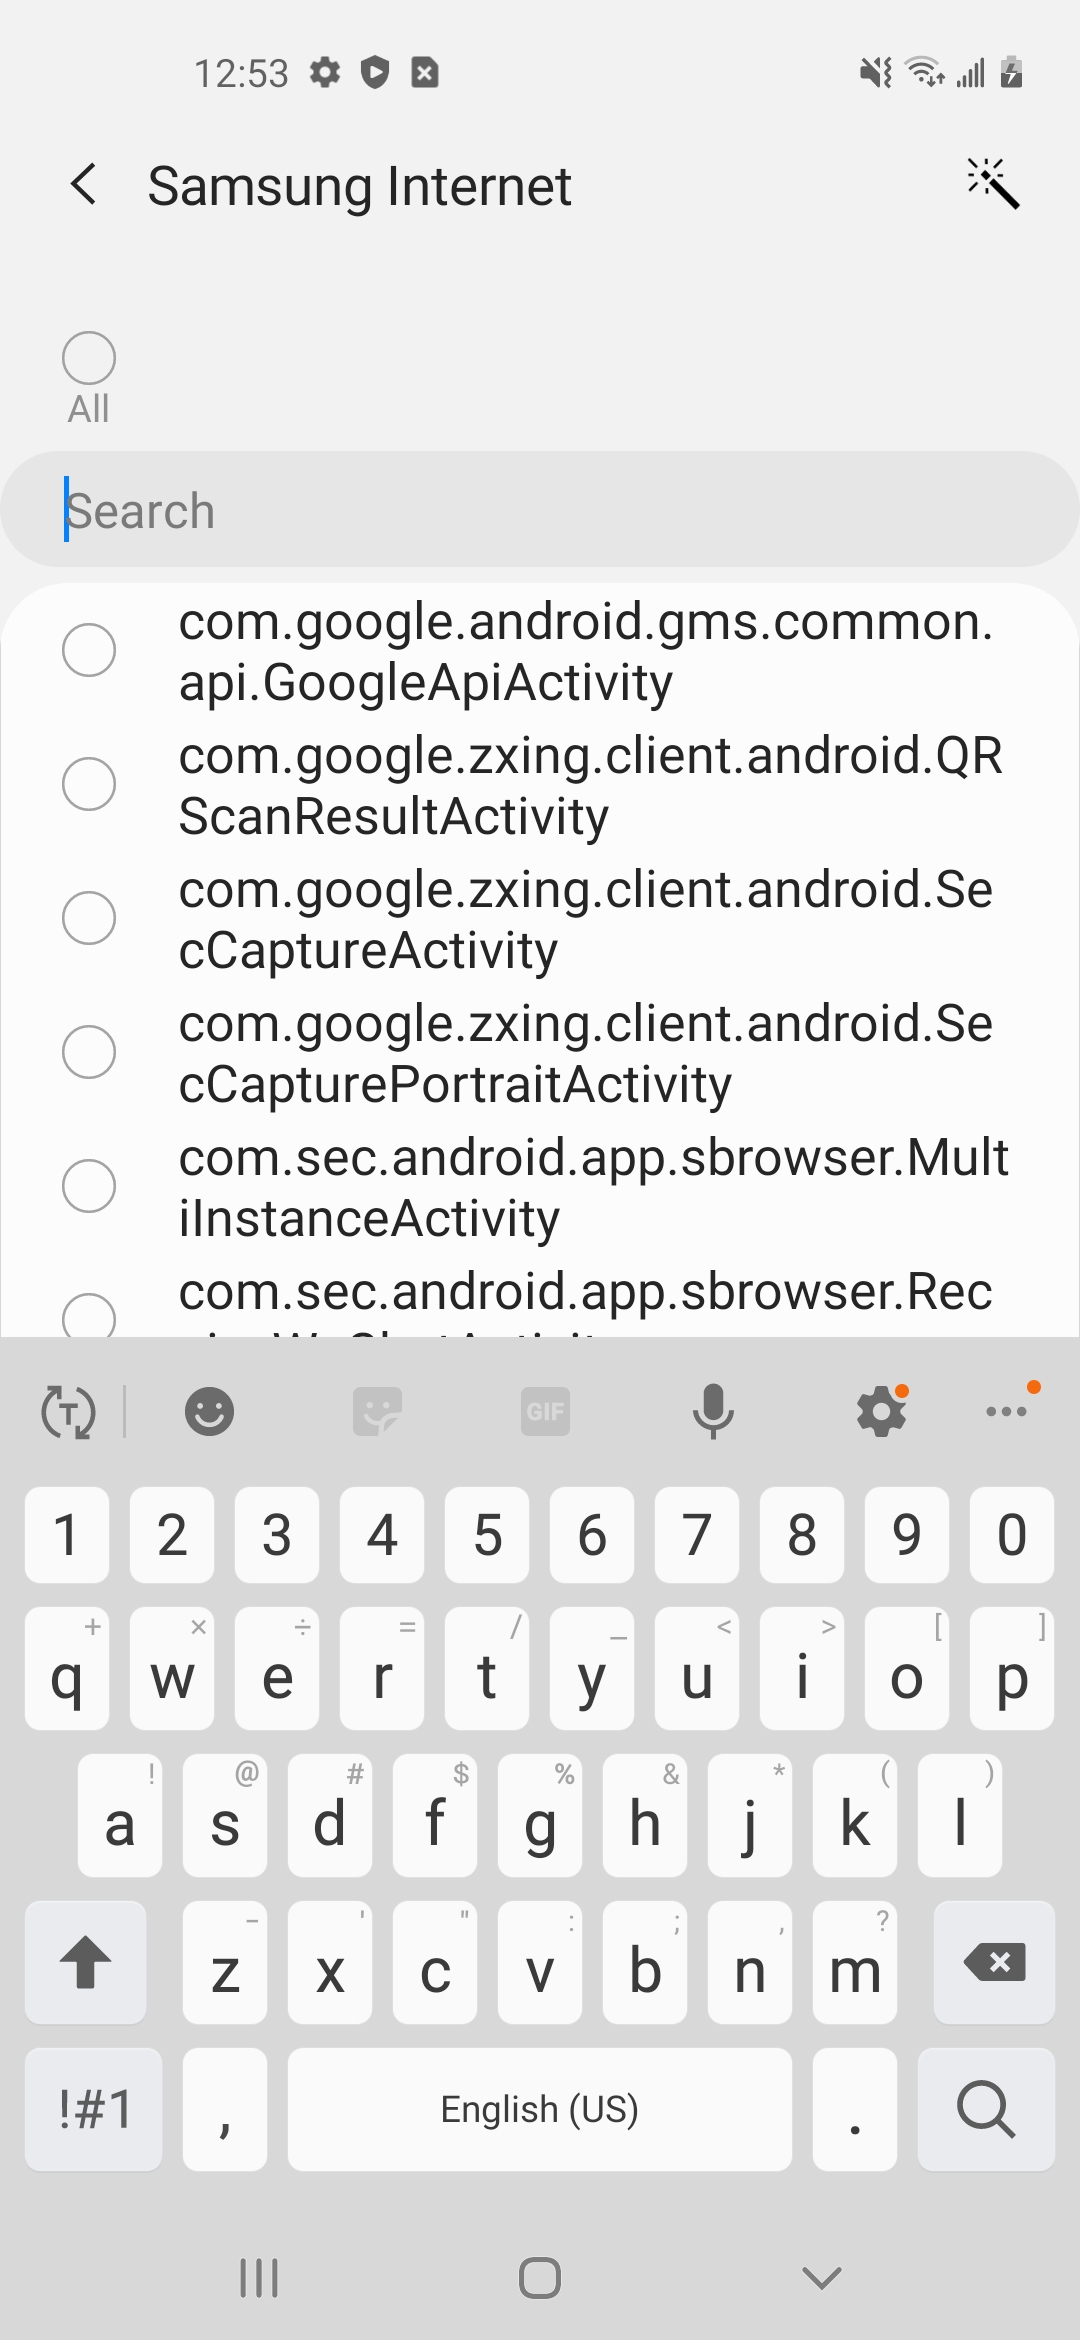
Locate an activity to add within the app activities list page. If you know the name of the activity, tap the magnifying glass located on the upper-right of the screen to enter a search term.
-
Tap the radio button to the left of each activity you would like to add.
On this page
Is this page helpful?