Create a service request
Last updated October 21st, 2026
If one of the devices you’ve registered for Samsung Care Pro is damaged, you can submit a service request.
Service requests cover manufacturing defects, water damage, screen damage, and other types of physical damage. When creating your service request, you’ll need to identify the type of issue the device is experiencing, as well as whether you’d like the device to be repaired or exchanged (Advanced exchange).
You can create a new request on the Service requests page of the Samsung Care Pro console.
Prerequisites
Before you create a new service request, ensure you have the following:
-
Active Samsung Care Pro licenses with sufficient coverage credits. Each service request consumes one credit per device.
You must have at least one credit on a license to submit a service request, even if you’re submitting a request for a manufacturing defect. Credits are deducted when the request is submitted — if the issue is determined to be covered by Samsung Care Pro’s extended warranty, the credits are refunded to your account.
-
For sub-admins, the appropriate role permissions:
- Samsung Care Pro > Service requests > Manage service requests
Step 1: Request details
On the top-right side of the Service requests page, click Create request. The Create batch request page opens.
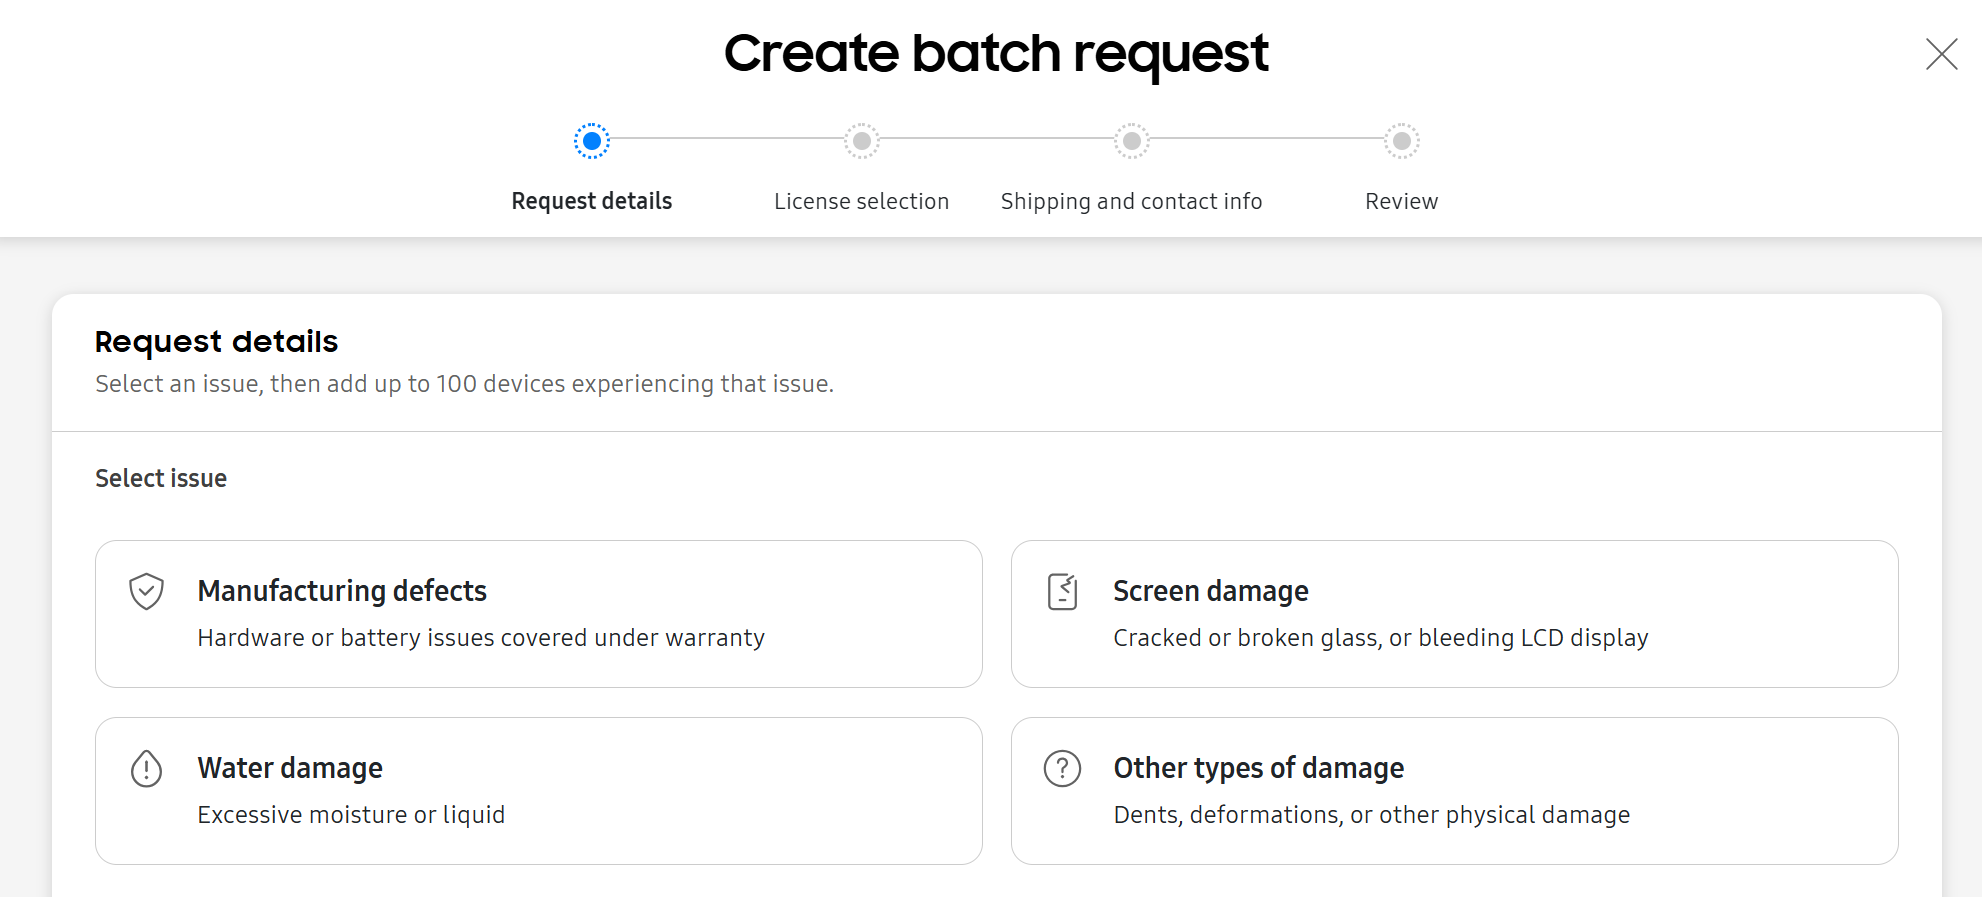
First, you’ll need to fill out some basic request details. You can submit a service request for up to 100 devices at a time.
- Under Request details, select the type of issue your devices are experiencing.
- Manufacturing defects: Hardware or battery issues covered under the device’s warranty.
- Water damage: Damage due to excessive moisture or liquid.
- Screen damage: Cracked or broken glass, or bleeding LCD display.
- Other types of damage: Dents, deformations, or other types of physical damage.
- Under Devices, select the devices experiencing this issue. You can either:
- Click Upload a CSV file with devices and select a file containing your device IMEIs. If needed, you can also download a CSV file template.
- Click Add devices to manually select from a list of devices currently covered by Samsung Care Pro.
- When you’re ready to proceed, click Next: License selection.
Step 2: License selection
Once you’ve provided the request details, you’ll need to select a license for each device in your request.
Ensure your license has enough credits to fulfill your request. You can check the number of remaining credits by expanding the License list, or on the common Licenses page.
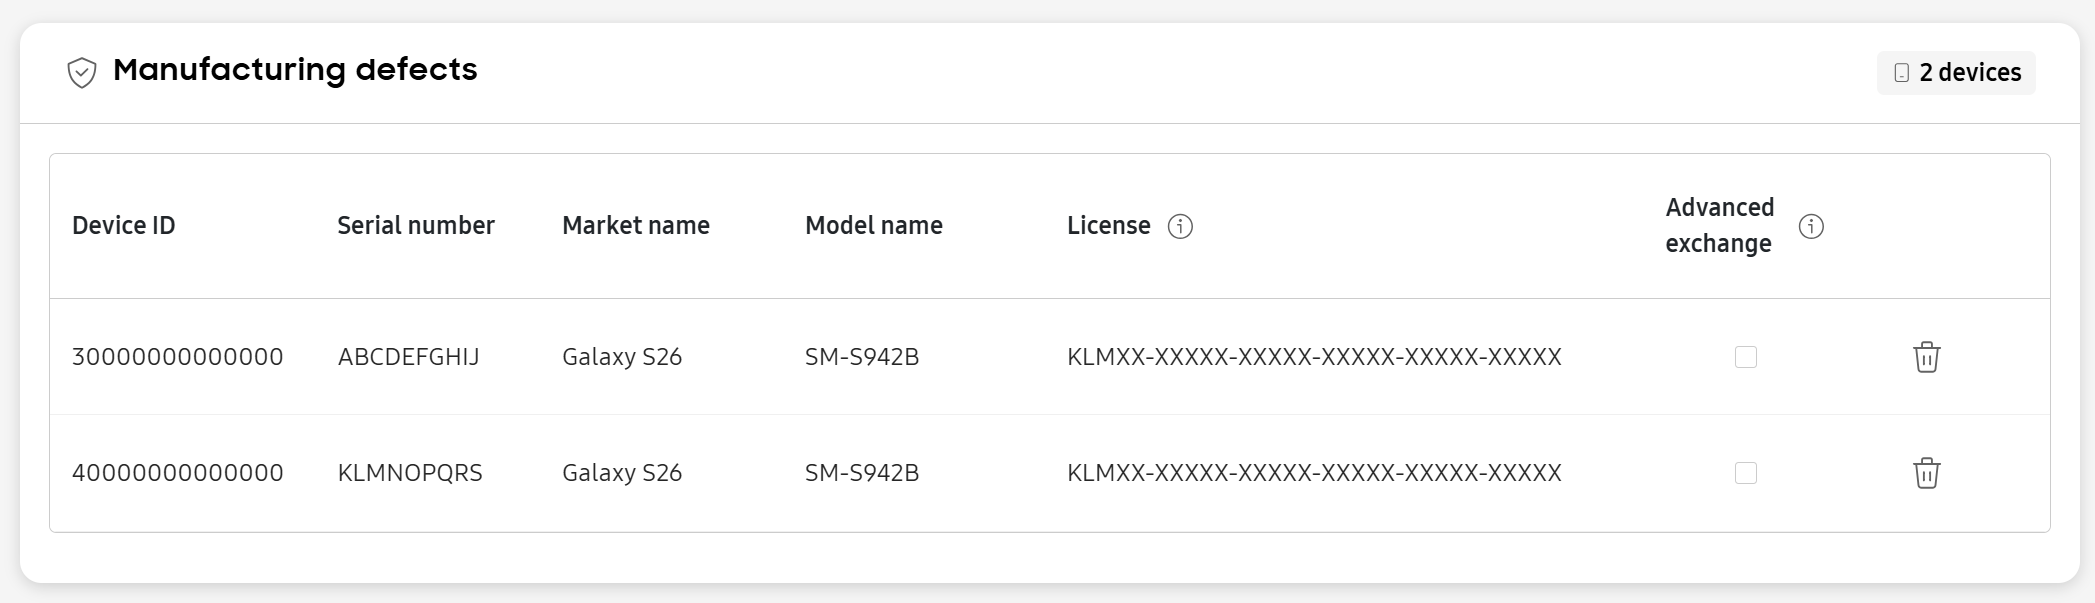
By default, devices you submit for service are repaired. In addition, some devices may be eligible for exchange — if you wish to replace a device instead of repairing it, check Advanced exchange.
Once you’ve selected a valid license for all your devices, click Next: Shipping and contact info to proceed.
About advanced exchange
By default, any device you submit for service is repaired when possible. Advanced exchange enables you to replace damaged or defective devices instead. If the device is eligible for advanced exchange, you’ll be sent a replacement device in the mail.
Once your replacement device arrives, you must unenroll the original device from any third-party systems and ship the original device to the posted return address within 14 days. Otherwise, you may be charged an additional fee.
In addition, once your replacement device is mailed to you, your original device is automatically unenrolled from all Knox cloud services.
Step 3: Shipping and contact info
Once you’ve provided the request details and selected a license, you’ll need to provide your shipping and contact information.
- In the Sender Address section, click Add new address. Enter the address you’ll ship your devices from, then click Add.
- (Optional) When entering your shipping details on the Add new address dialog, you can check Set as default sender address to set this address as your default.
- In the Return address section, enter the address where you want to receive shipments — we’ll ship your devices back to this address. You can either:
- Select Use sender address as return address.
- Click Add new address and enter your shipping details.
- Provide your Contact information. We’ll refer to this information if we ever need to reach out about your service requests.
- (Optional) Check Set as default contact information to auto-populate this section every time you create a new service request.
- Click Next: Review.
Step 4: Review
Finally, review all the information you’ve provided in your service request. If you need to adjust any details, click Edit at the top right of the section to return to that step.
If you’re ready to submit your request, click Create batch request.
Your service request is assigned a Service request ID and displays on the service request list. To learn more about the information displayed on this page, see View and manage service requests.
On this page
Is this page helpful?