Install the SDK
Download the SDK
-
Sign in to the Knox Developer Portal. If you’re not already a member of the Knox Partner Program, Become a Partner and provide your details.
-
Click SDK Tools > SDK Downloads.
-
On the SDK Downloads page, click Download for the SDK you want.
-
Review the SDK Agreement. If you agree to the terms, select the checkbox and click Accept. The browser saves the SDK package into your Downloads folder.
-
Extract the SDK.zip contents.
Create your Android Project
-
Open Android Studio.
-
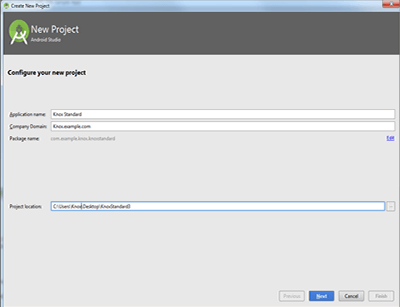
Create a new project: click File > New Project.
-
Fill the fields:
-
Application name: your app name.
-
Company Domain: the qualifier for your app package name.
-
Package name: this is the combination of the company domain and application name, which must be unique across all packages in the Android environment. Android generates this from the application name and company domain values.
-
Project location: the directory where your app is stored. You can use the default or specify another location.
-
-
Click Next.
-
Select Phone and Tablet as your platform.
-
Select the API level you want to target.
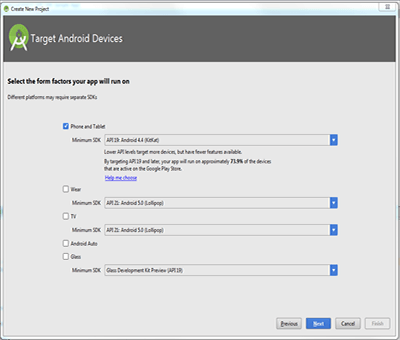
- For details about which Android version maps to which Knox SDK versions, see Knox version mapping.
-
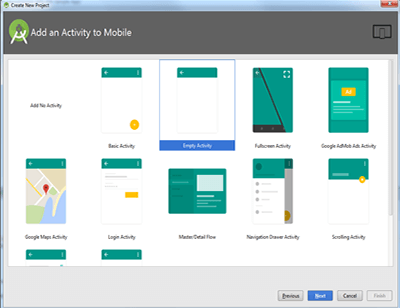
Select your activity type and click Next. For the purpose of this tutorial, select Empty Activity. For more information on Activities, see Android Activities.
-
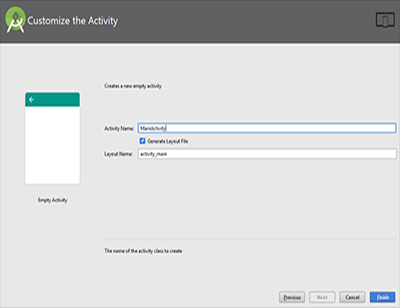
Choose an Activity Name and Layout Name. For the purpose of this tutorial, accept the default Activity Name and Layout Name. Click Finish.
For more information on how to create an Android project, see Google’s Create your first Android app.
Add Knox libraries to a project
-
Open the project in Android Studio.
-
Use the file browser to navigate to the location where the library files are stored.
-
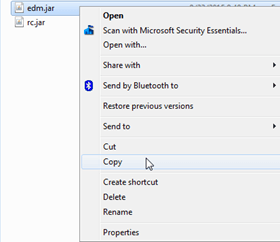
For the Knox POS SDK, select the knoxpossdk.jar and then click Copy.
-
Switch to your Android Studio project, select the libs directory, and paste the libraries into your project. This displays the libraries in your project under the libs directory. If you do not see the libs directory, ensure your file browser is using ‘Project’ view rather than ‘Android’ view. You may have to create this folder yourself.

-
Click OK to complete copying the libraries into the project. The libraries in your project are displayed in the libs directory.
-
Select and right-click the library you just copied. Click Add As Library….
-
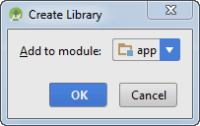
Select the module to add the library to, and click OK. If your app contains several modules, ensure that you add the library to the appropriate module. For the purpose of this tutorial, select the app module.
Your project now includes the Knox POS SDK.
On this page
Is this page helpful?