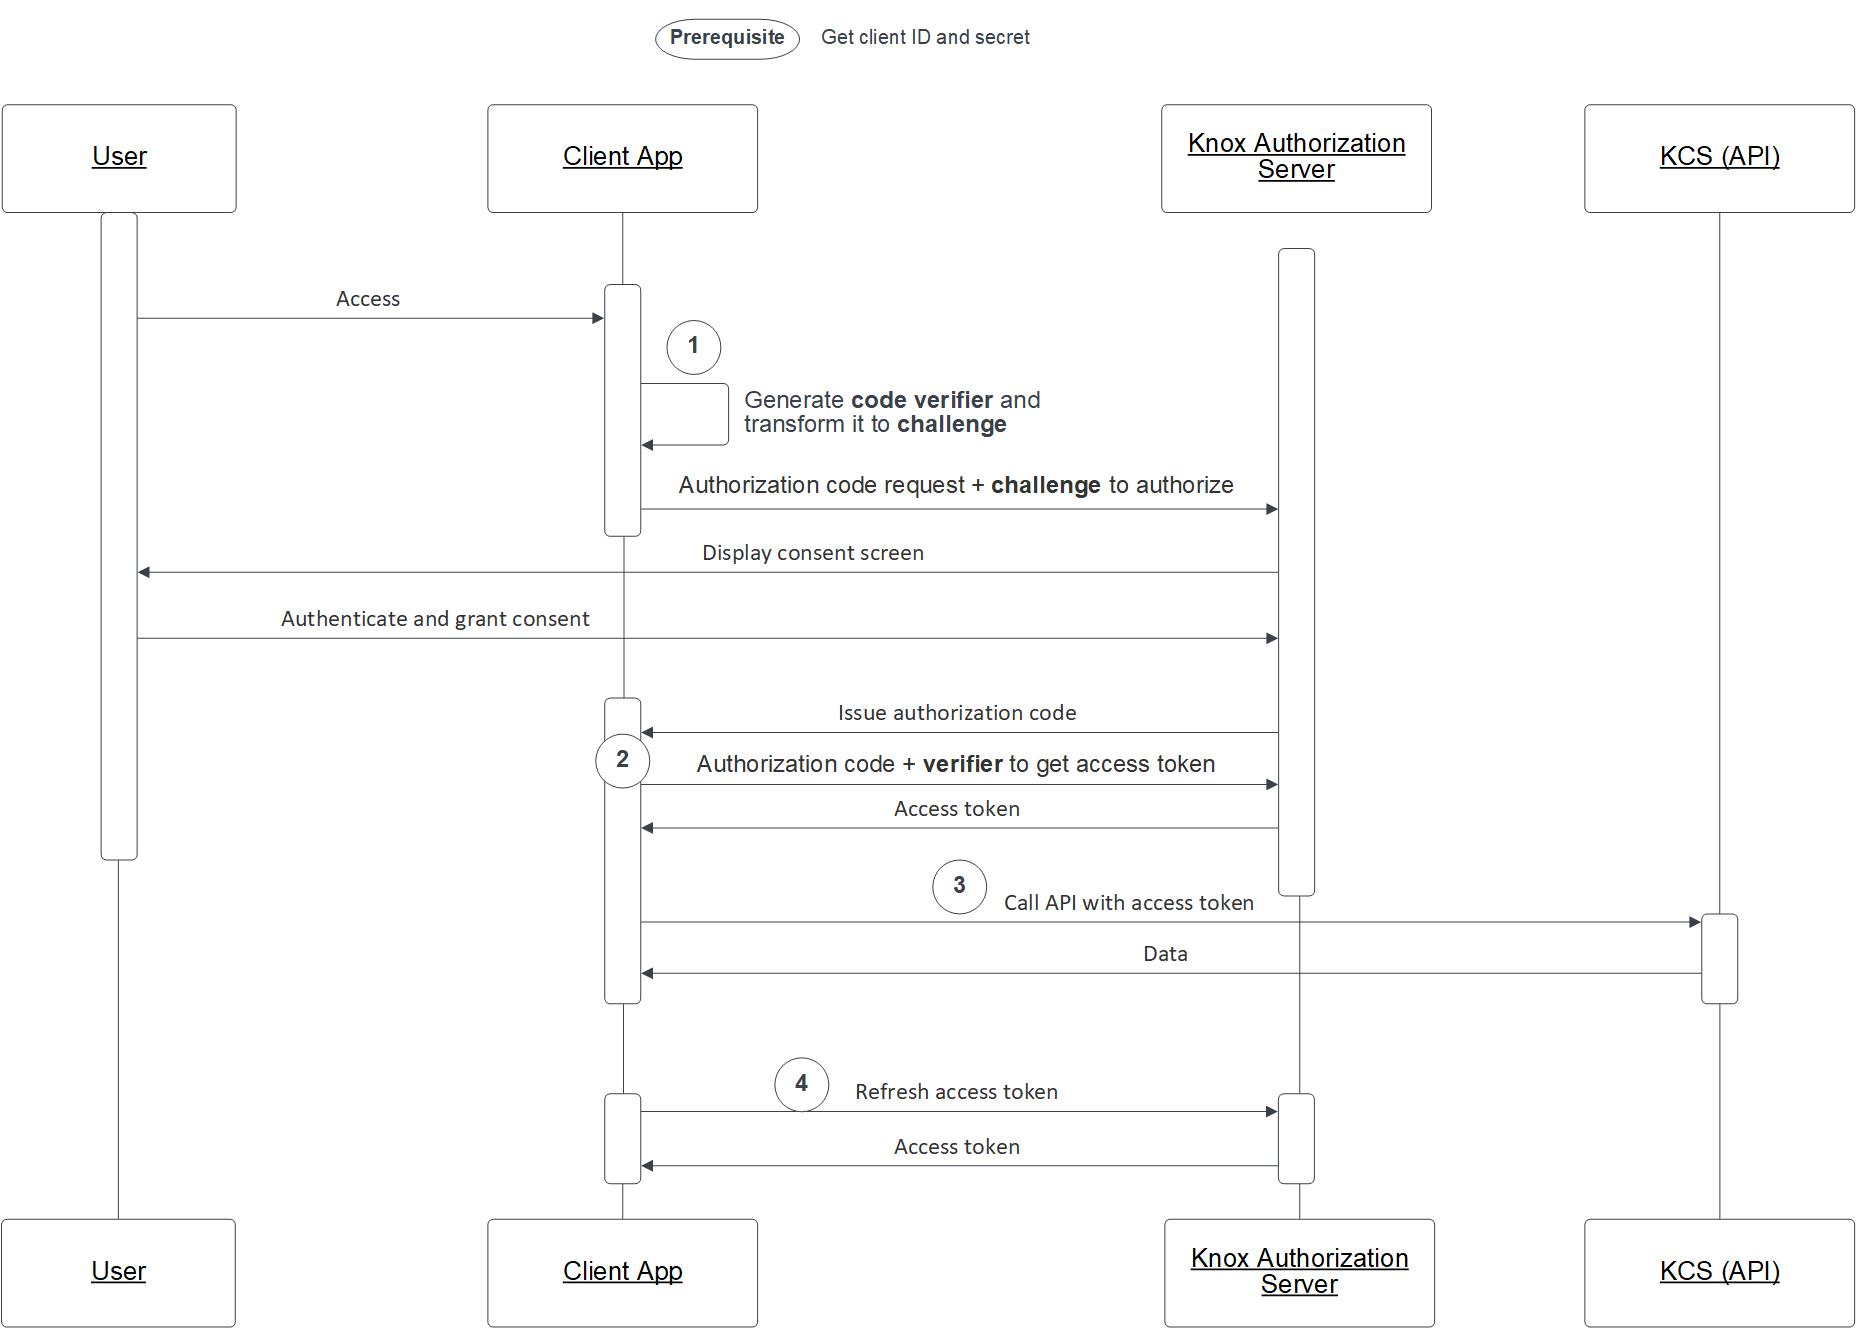
Understand authorization code flow
Last updated December 21st, 2023
This section of the documentation summarizes how to integrate your customers’ Knox cloud services into your own Unified Endpoint Management (UEM) front end.
| Prerequisite | Get client ID and client secret | Contact the Samsung Knox team to obtain client ID and client secret. |
| Step 1 | Get authorization code |
Get an authorization code.
When you request an authorization code, Knox authenticates your customer (using a Samsung account or other identity provider) and obtain their consent for you to manage their Knox cloud services. |
| Step 2 | Get access token and refresh token |
Get an access token using your authorization code. This token identifies a customer’s Knox account and proves that your app is authorized to make calls on behalf of that customer. |
| Step 3 | Call API with access token | Pass the active access token each time that you call an API. |
| Step 4 | Refresh the access token | When the access token expires, use the refresh token to get a new access token. |
The following diagram represents a high-level view of the OAuth 2.0 flow, including the optional but recommended Proof Key for Code Exchange (PKCE) for enhanced security.

Knox optionally supports the use of Proof Key for Code Exchange (PKCE) to protect against authorization code interception attacks. PKCE ensures that even if a malicious app mimics your app and intercepts the authorization code, that malicious app would still not be able to get an access token to your customers’ Knox cloud services.
The specific steps required by PKCE are included in the instructions below. For more details on PKCE, please refer to RFC 7636 - Proof Key for Code Exchange by OAuth Public Clients (ietf.org).
Is this page helpful?