How Knox Webhook Notification works
Last updated September 25th, 2024
With Knox Webhook Notification, you can set up subscriptions to status events from various Knox cloud services operations. When these events are triggered, Knox Webhook Notification makes a request containing information about the operation that triggered the event, which is sent to the callback URL configured in the subscription.
Multiple subscriptions can be configured with the same callback URL, or each subscription can have a different URL. As long as different subscriptions aren’t made to the same events, all of your subscriptions can asynchronously receive events and trigger notifications.
Knox Webhook Notification API workflow
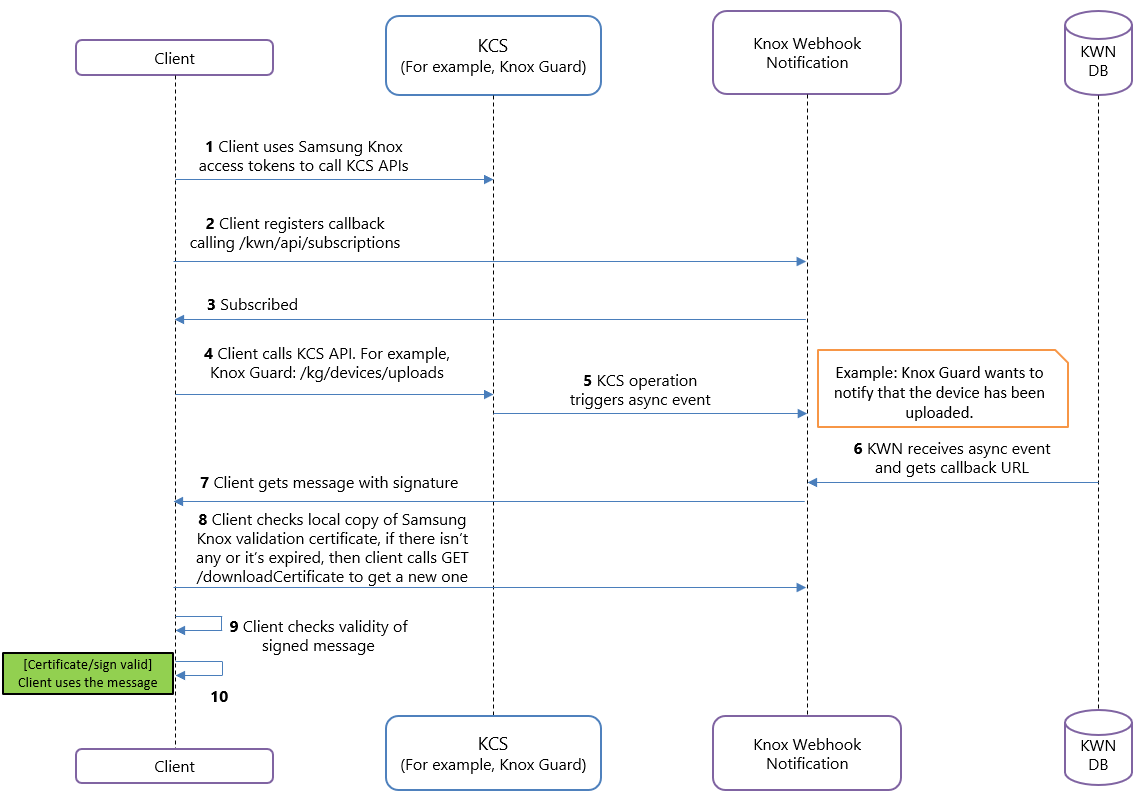
The following procedure summarizes the general Knox Webhook Notification workflow for any Knox cloud service:
-
You set up OAuth 2.0 access tokens for your application client to call Knox Device Management Service.
-
The client registers to an event with the Knox Webhook Notification Subscription API. For example, the
KDMS_DEVICE_UPLOADevent can be registered, which triggers when a Knox Device Management Service upload operation is complete. -
The event is now subscribed. A database stores the event subscription and the associated event.
-
The client calls the Upload devices operation on the Knox Device Management Service API.
-
When the asynchronous upload operation is complete, Knox Device Management Service triggers an asynchronous event.
-
Knox Webhook Notification receives the asynchronous event from Knox Device Management Service, then requests the configured callback URL with the operation result.
-
The client receives the Knox Webhook Notification callback response along with the signature for validation.
-
The client checks for available Samsung Knox validation certificate. If there’s no locally-stored Samsung Knox validation certificate or if it’s expired, then the client calls the GET /downloadCertificate operation to get a new certificate and stores it locally.
-
The client validates the authenticity of the callback response by comparing the signature against the public key contained in the Samsung Knox certificate.
-
Successful validation marks the completion of your request.
Steps 1, 2, and 3 need to be completed only once. However, if your Samsung Knox validation certificate expires, use Step 8 to get a new or updated certificate.
On this page
Is this page helpful?